Configure Azure AD connection via SAML
Author:
Fluent Commerce
Changed on:
27 Mar 2024
Key Points
- It is possible to use the generic SAML configuration to add an external identity provider that follows the SAML standard.
- Steps to configure an external identity provider via SAML configuration
Steps
Registering application with Microsoft
 Access Microsoft Azure Portal
Go to Microsoft Azure portal. If one doesn’t have a Microsoft Azure account, they can create one.
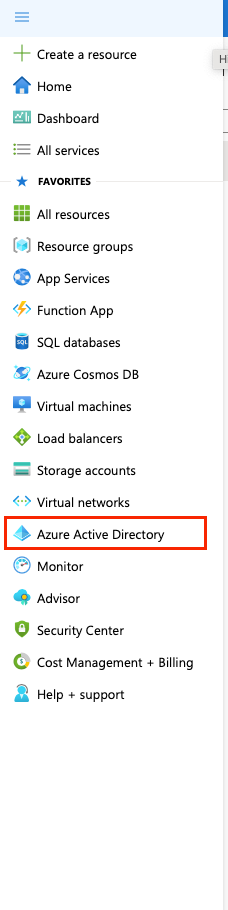
Access Azure Active Directory
Under Azure services, click Azure Active Directory.
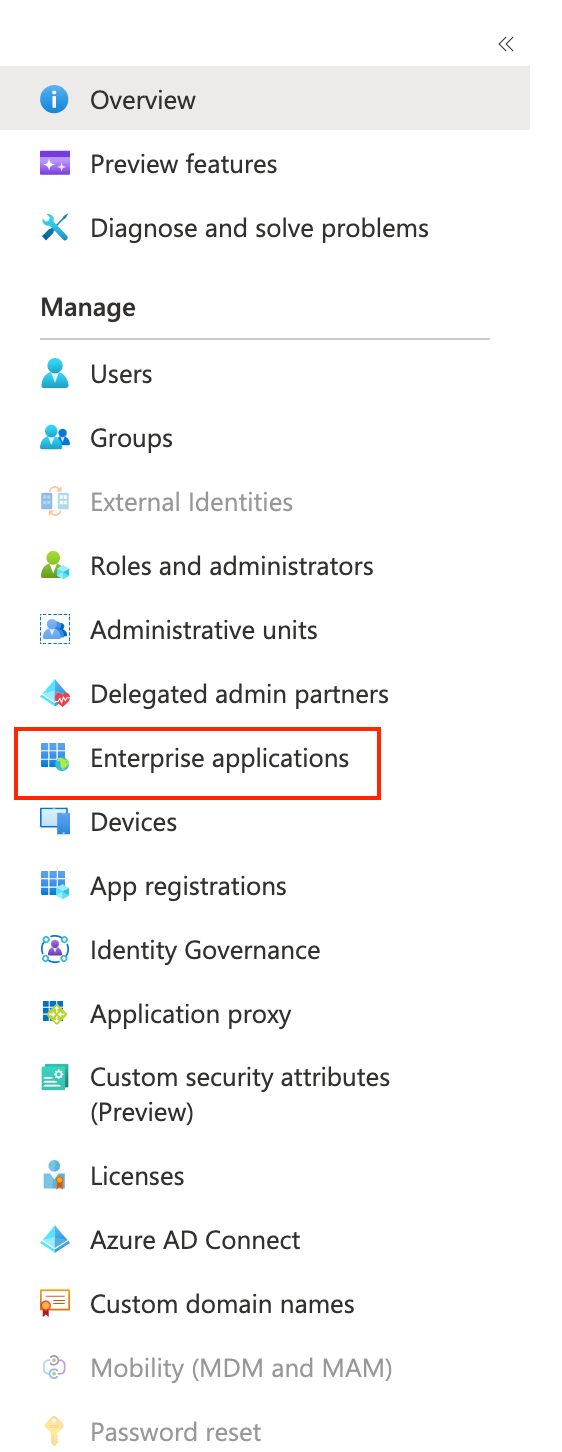
Access Enterprise applications
On the left, click Enterprise applications.
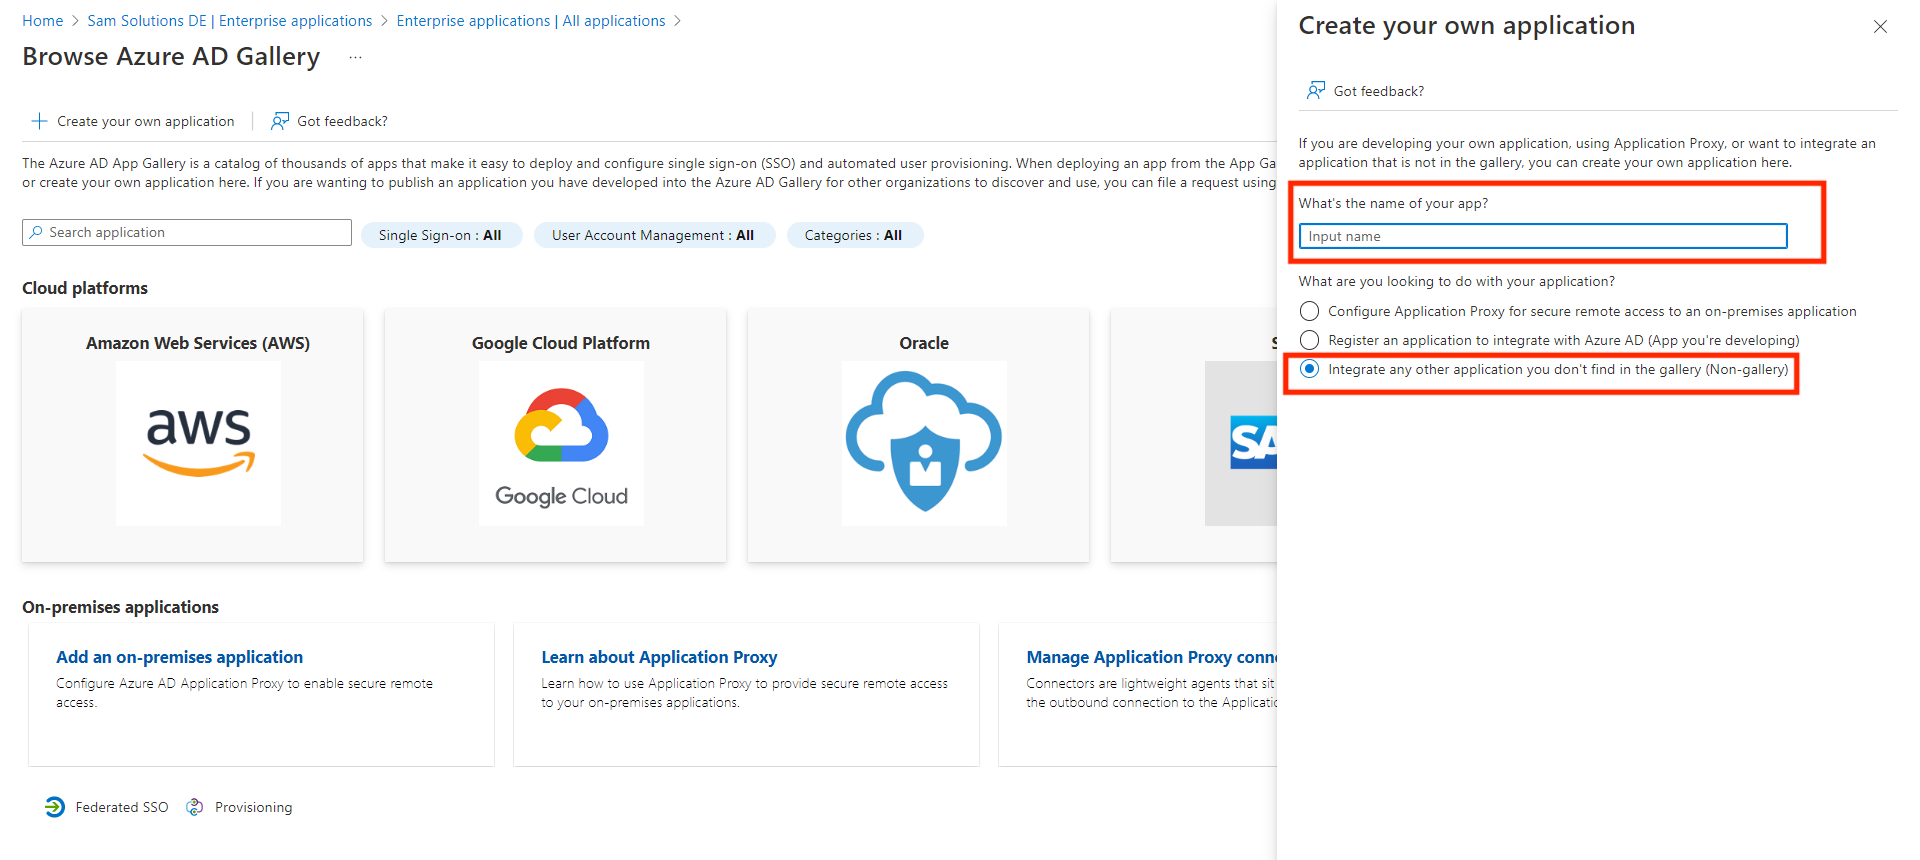
Create New Application
At the top, click New application and then click button Create your own application.
Configure Application
On the appeared drawer input application name, select Integrate any other applications you don’t find in the gallery (Non-gallery) option and then click Create button in the bottom of the drawer.
Configuration
Access Enterprise Application in Azure Portal
Go to Microsoft Azure portal and select your Enterprise application.
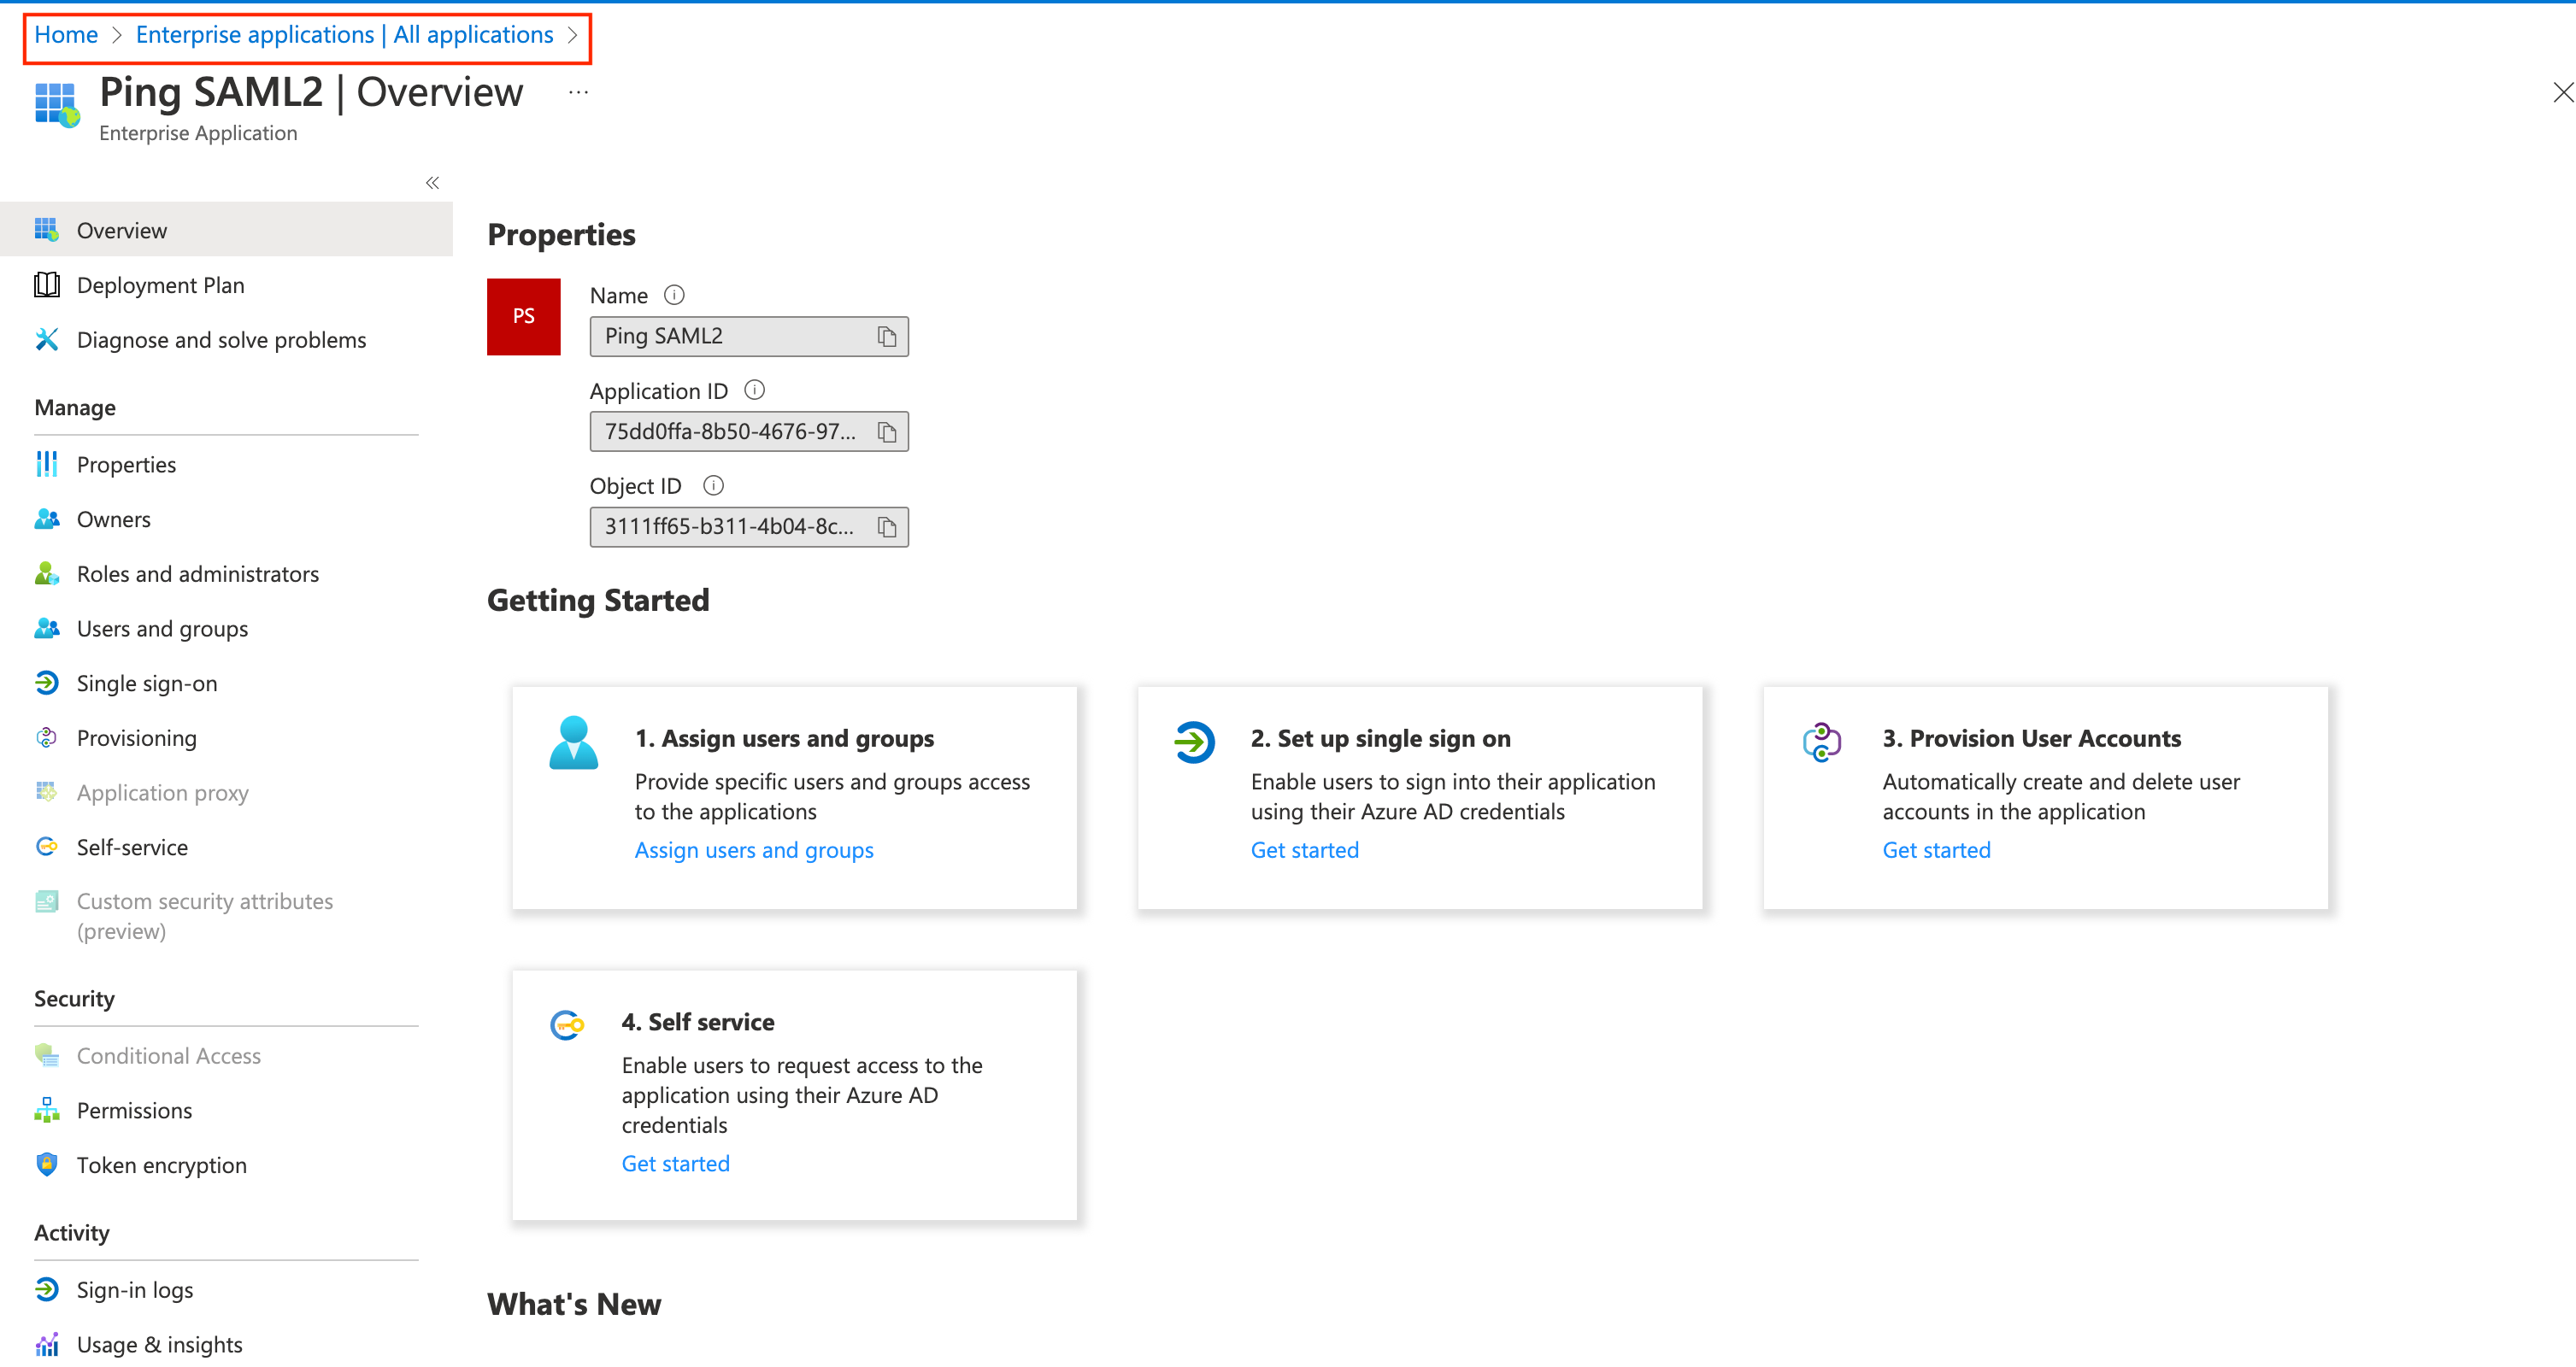
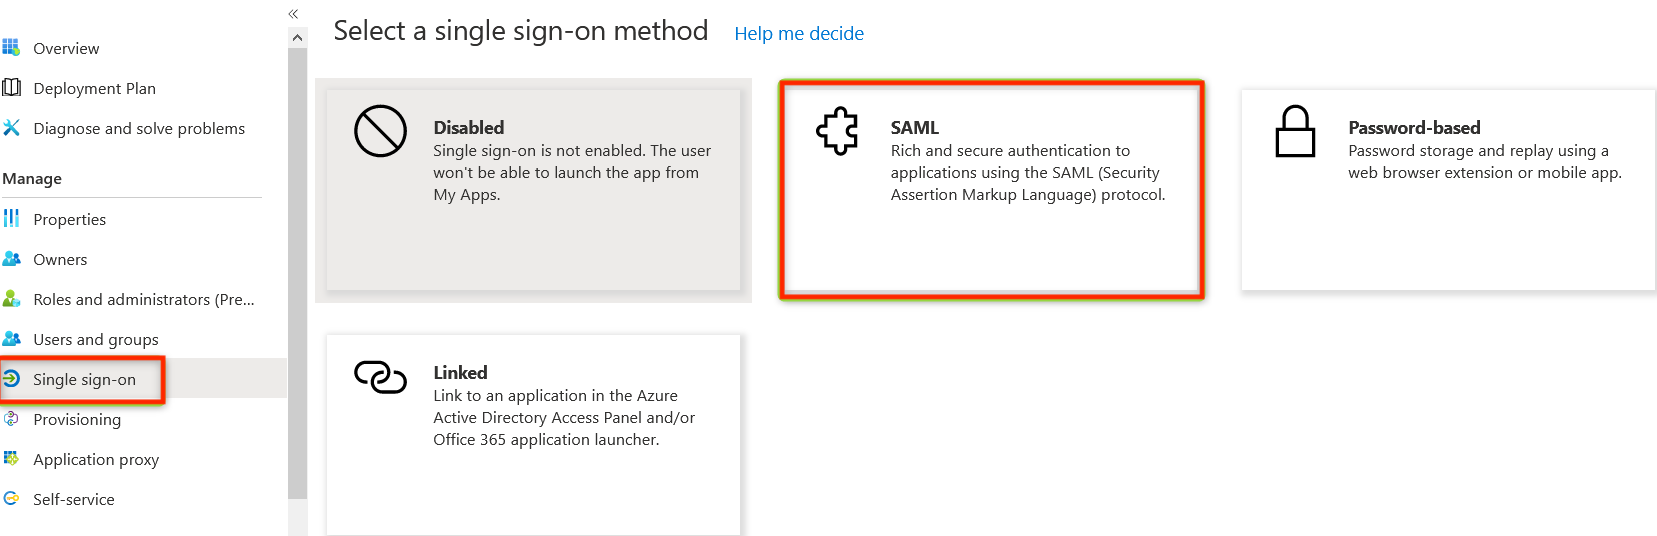
Navigate to Single Sign-On: SAML
On the left menu, click Single sign-on and select SAML.
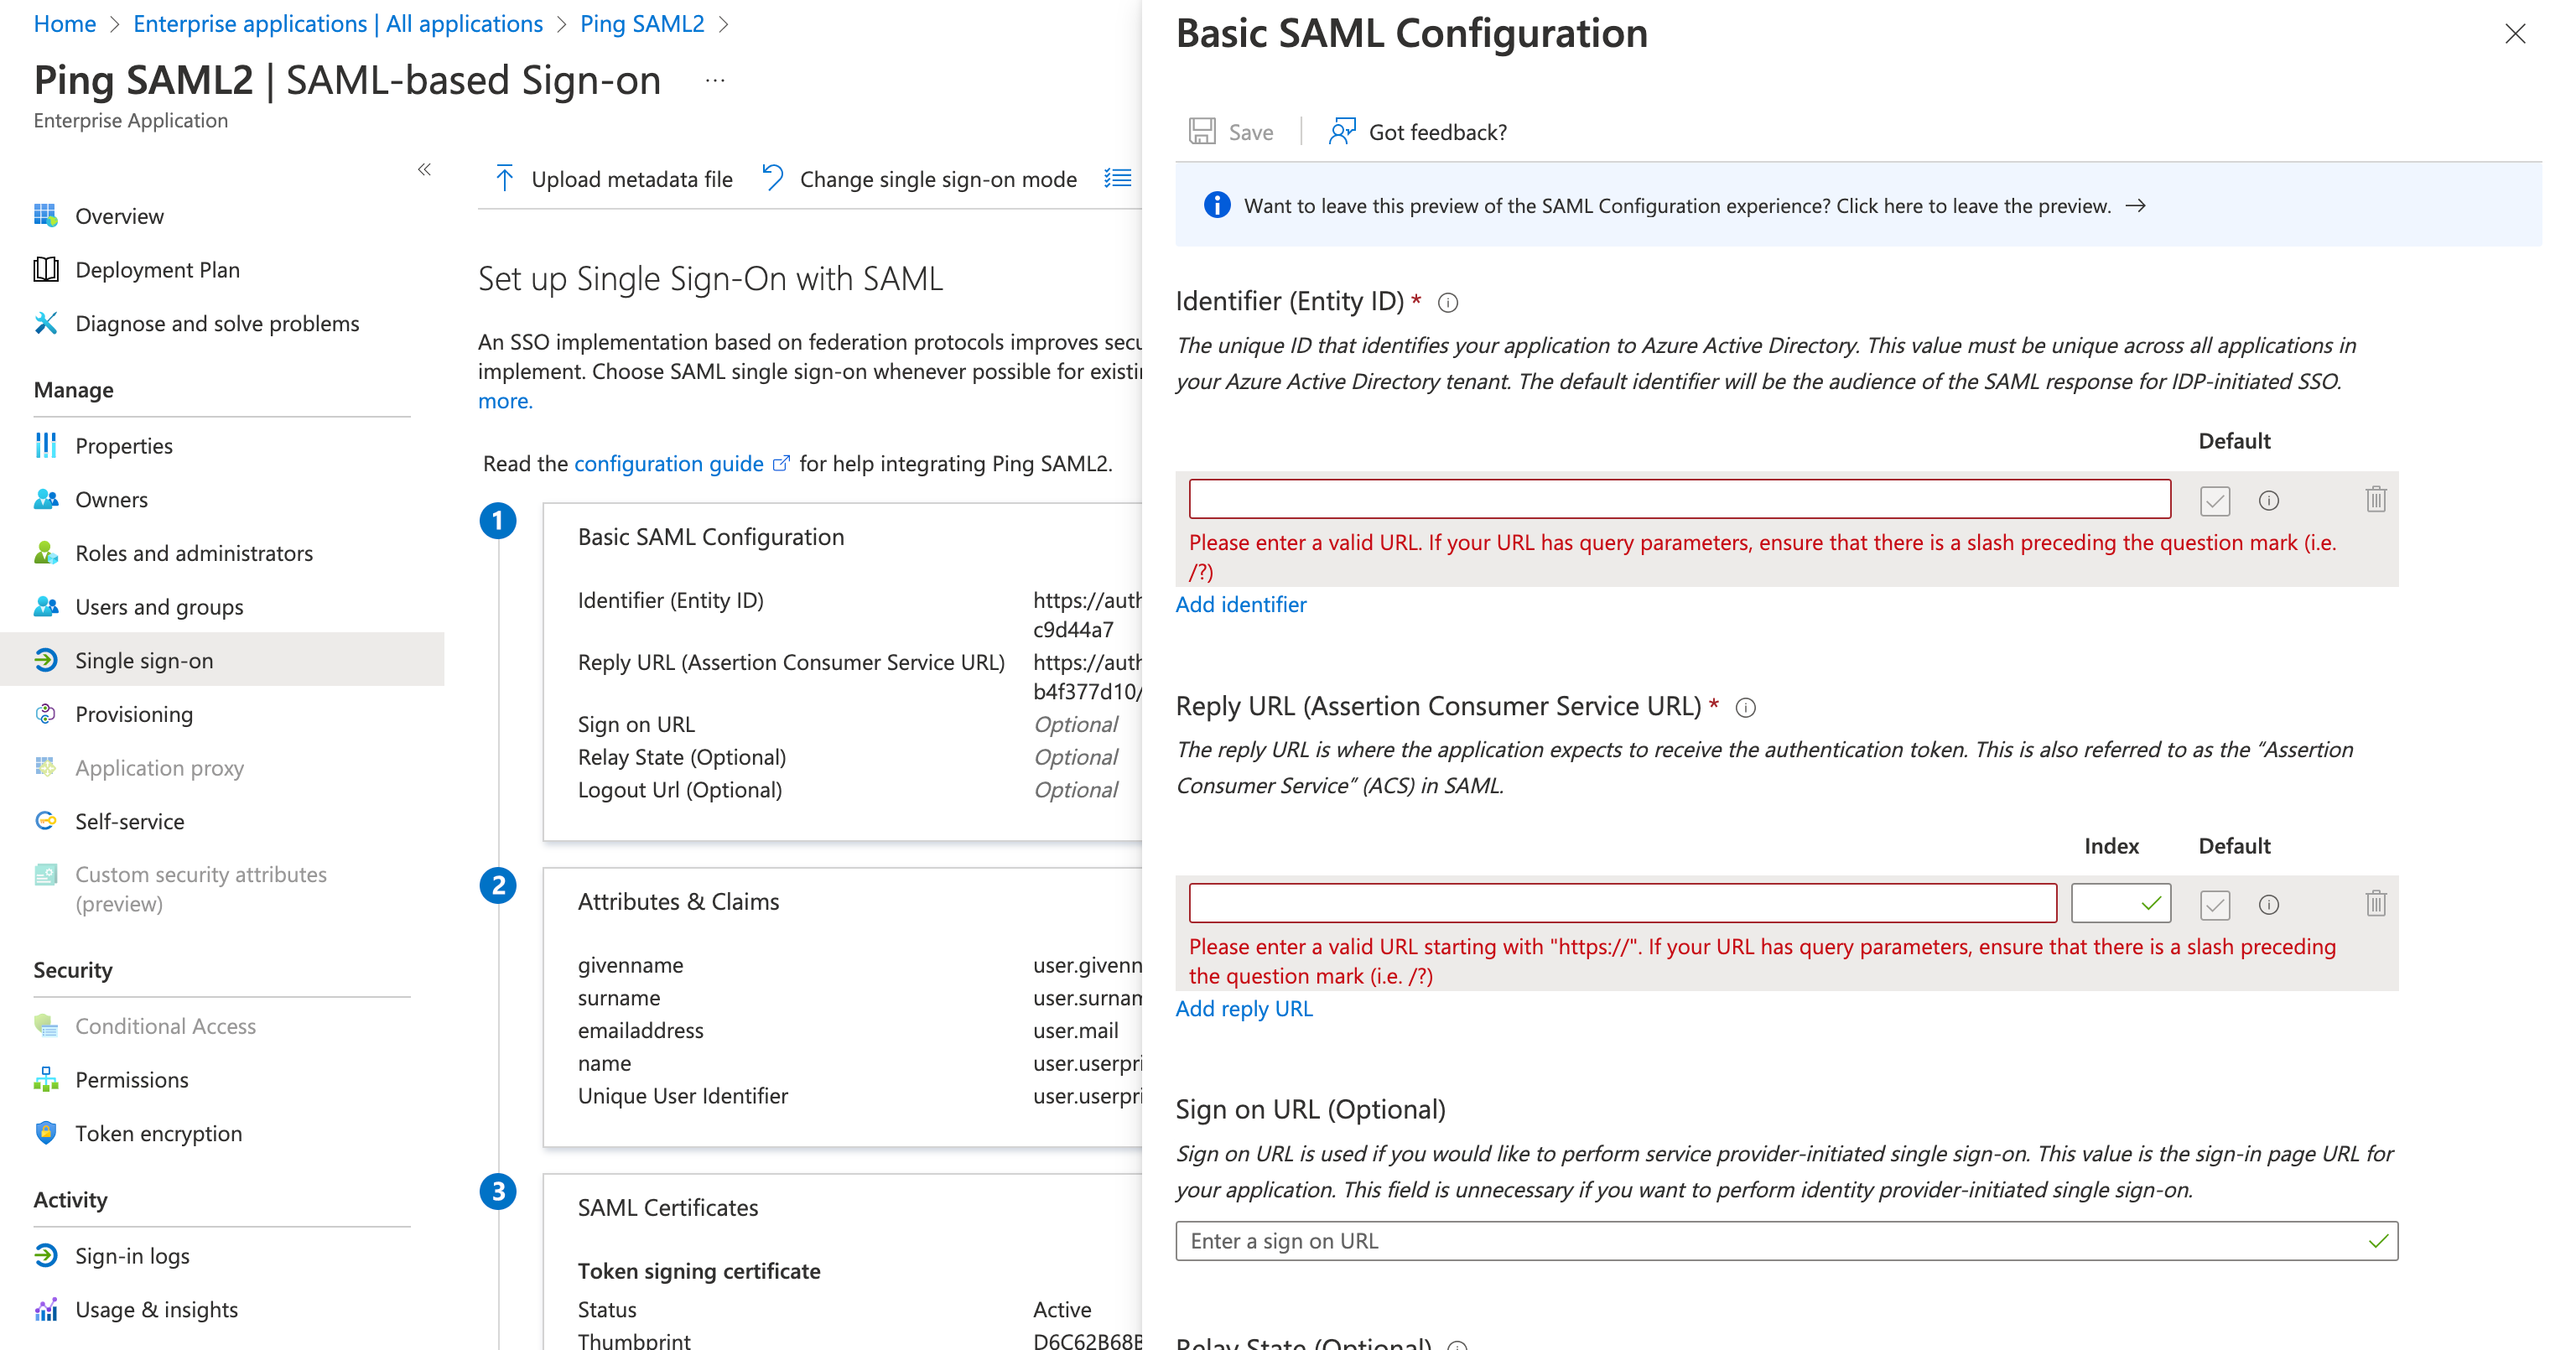
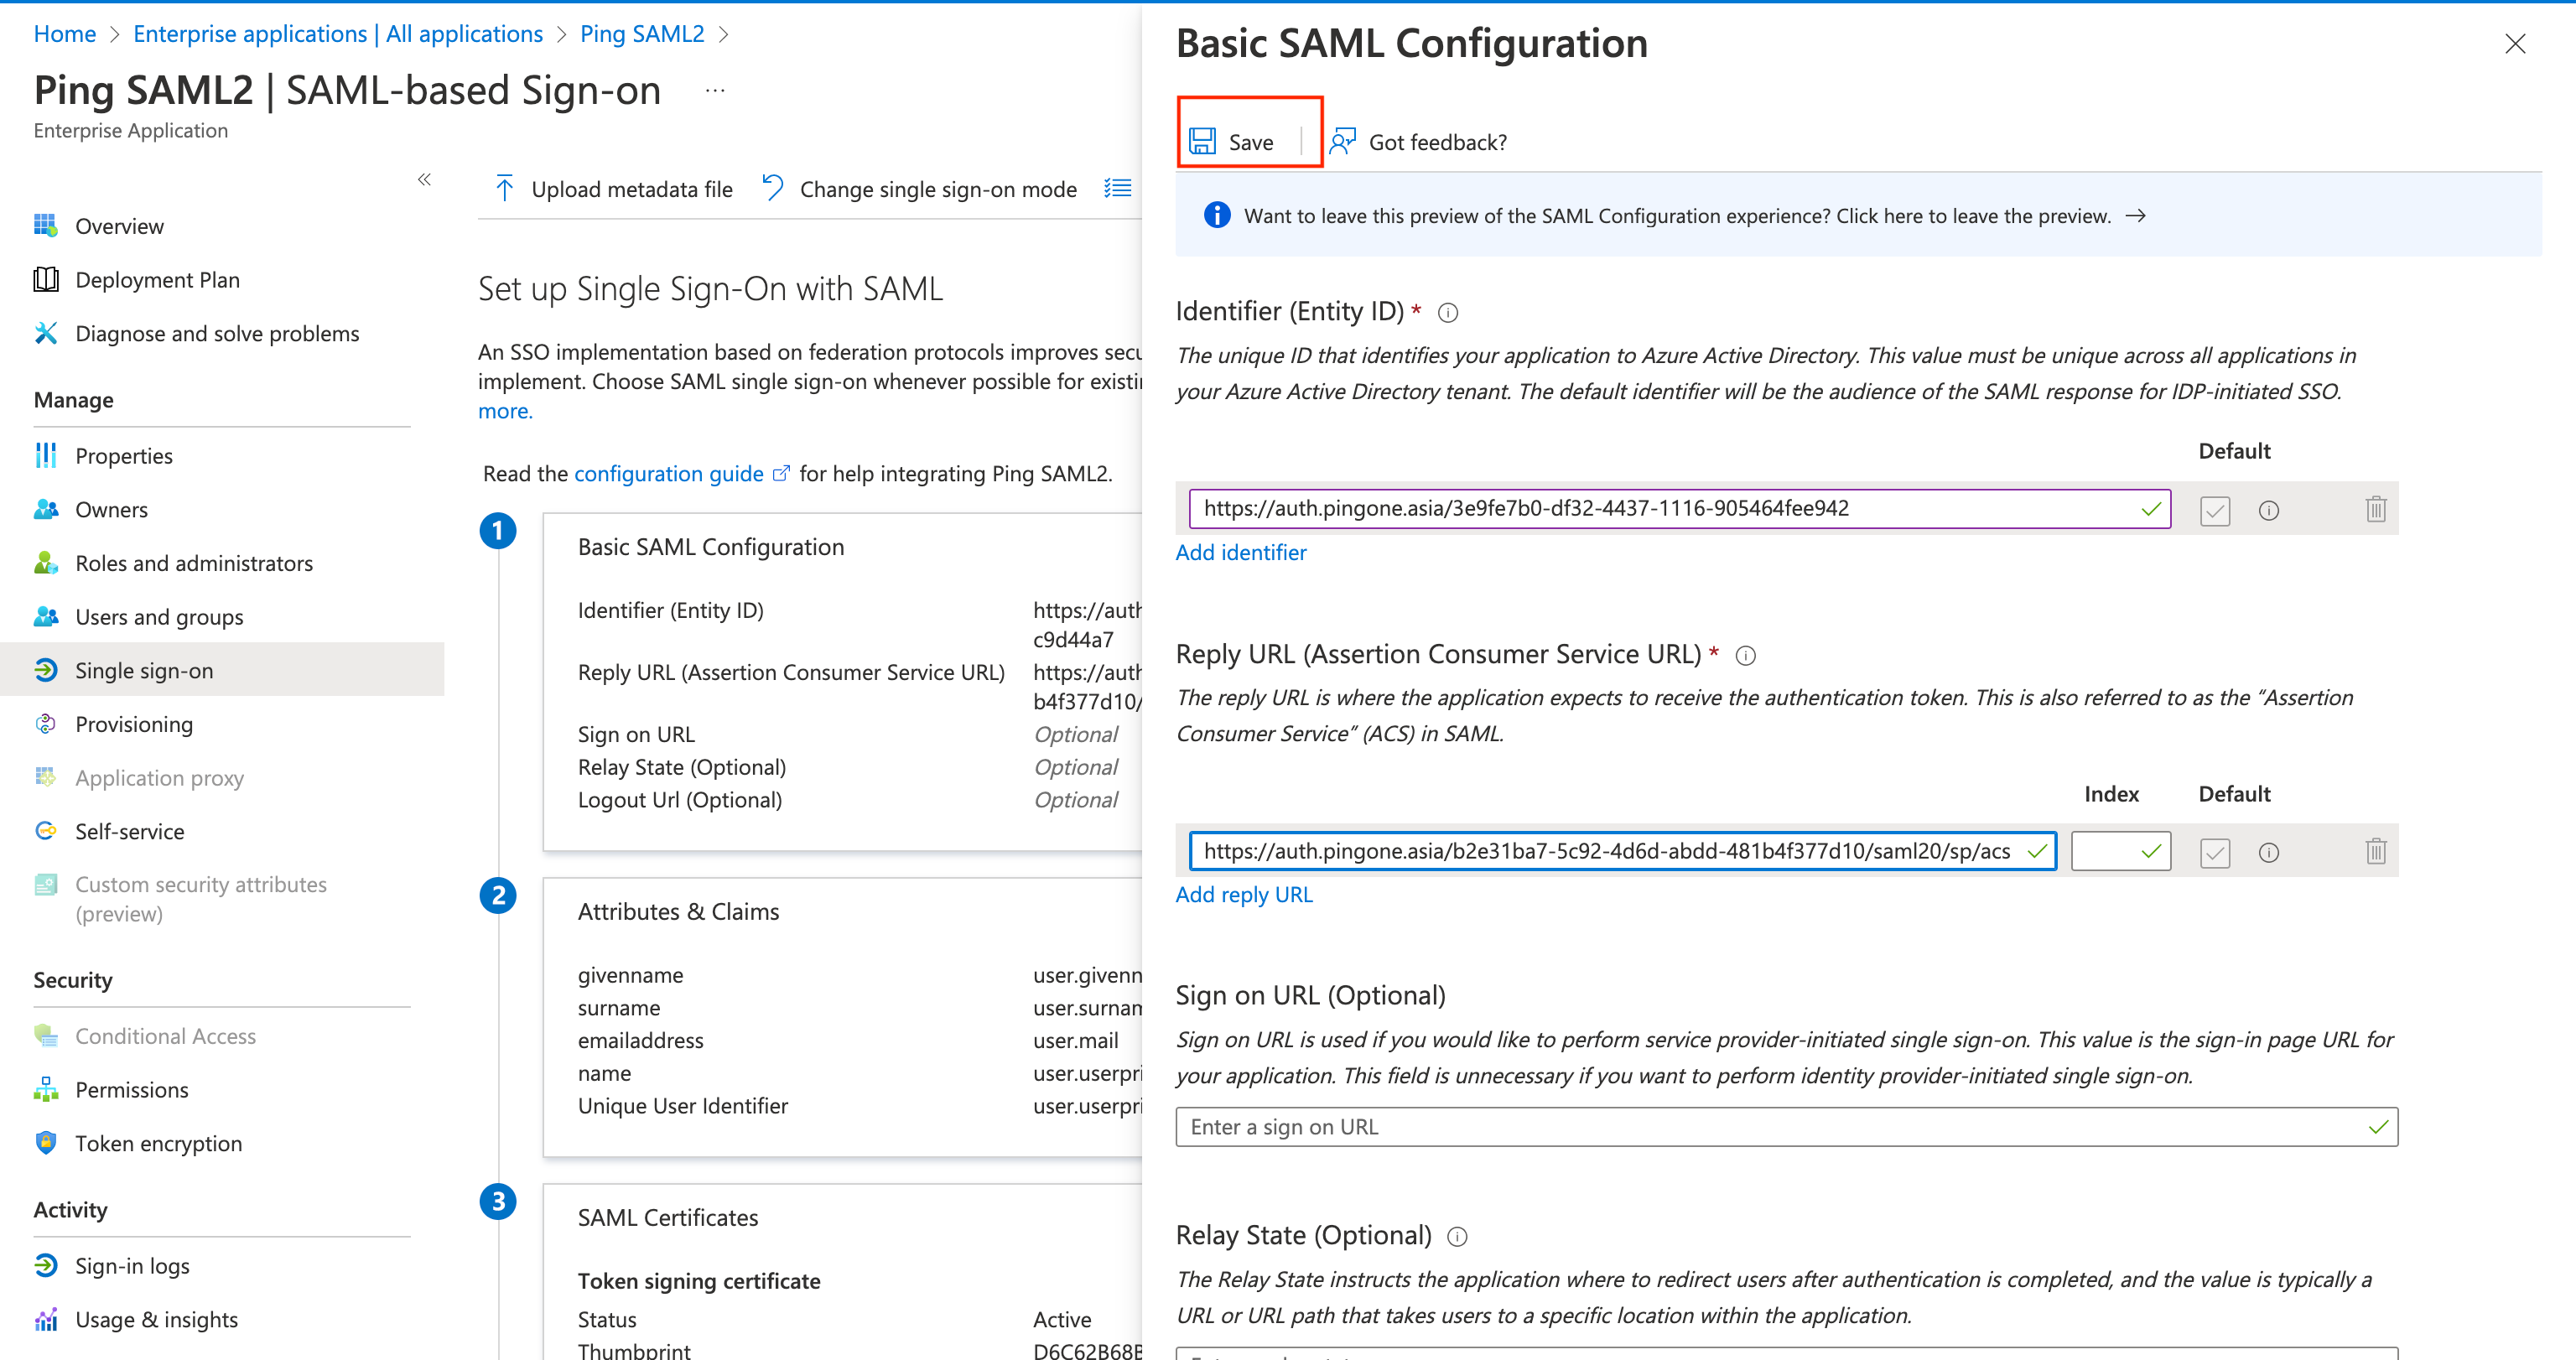
Edit Basic SAML Configuration
Click on Edit icon on the Basic SAML Configuration card. It is necessary to fill Identifier and Reply URL fields on the drawer. To do so, click on Add Identifier and Add reply URL buttons.
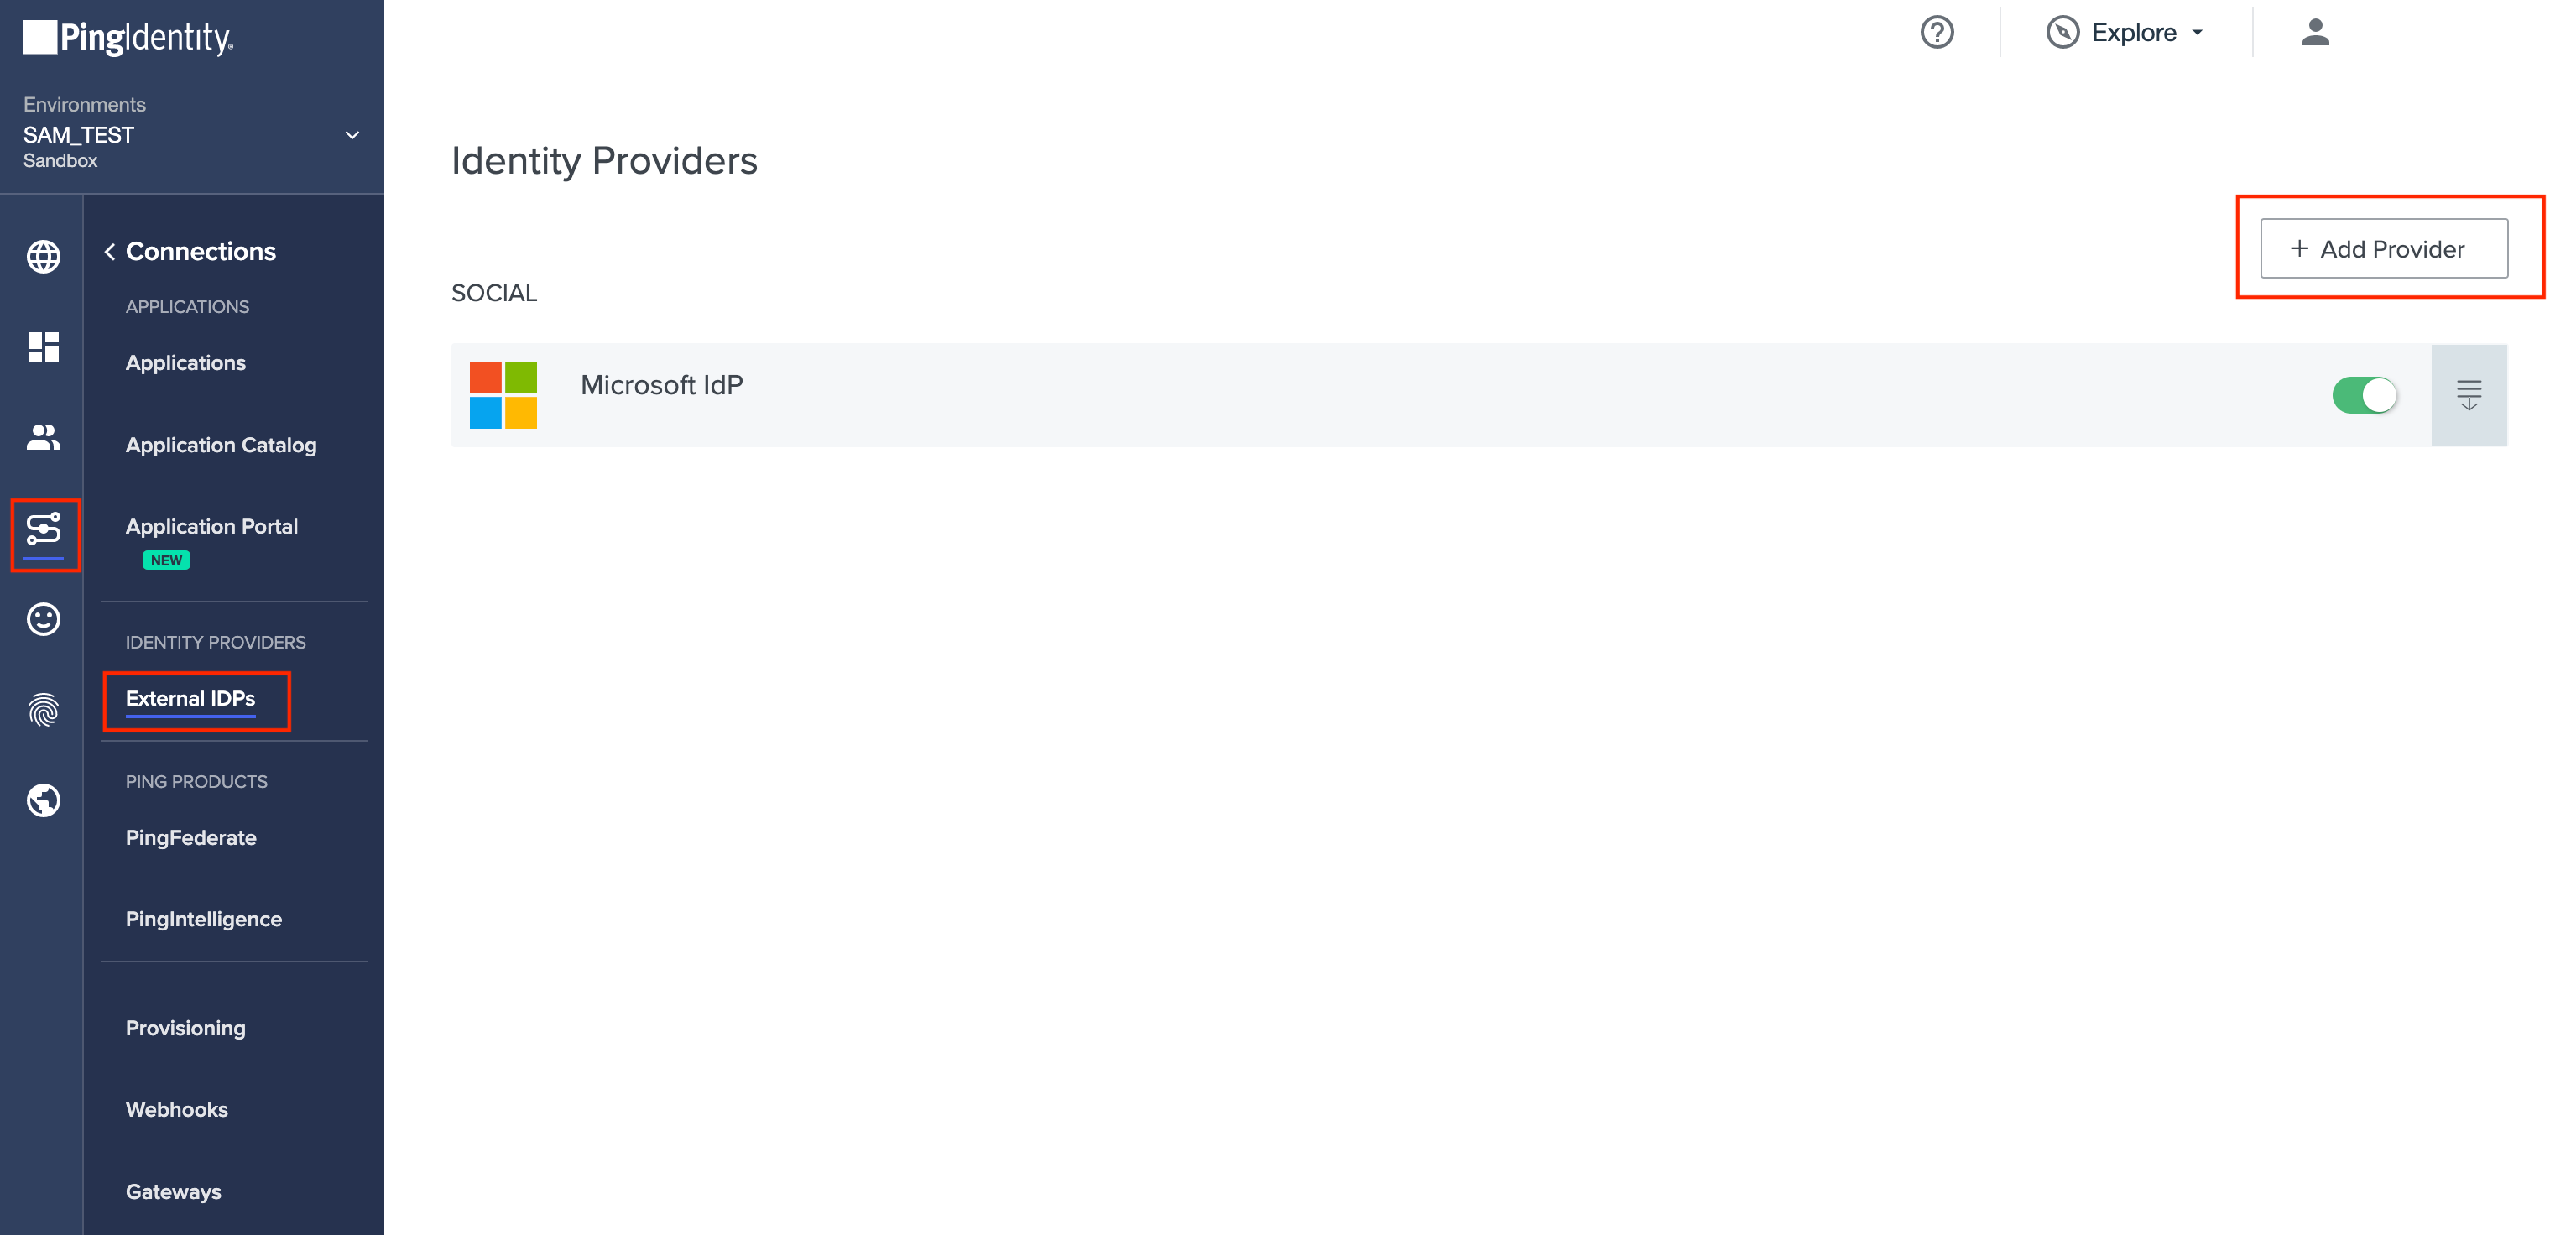
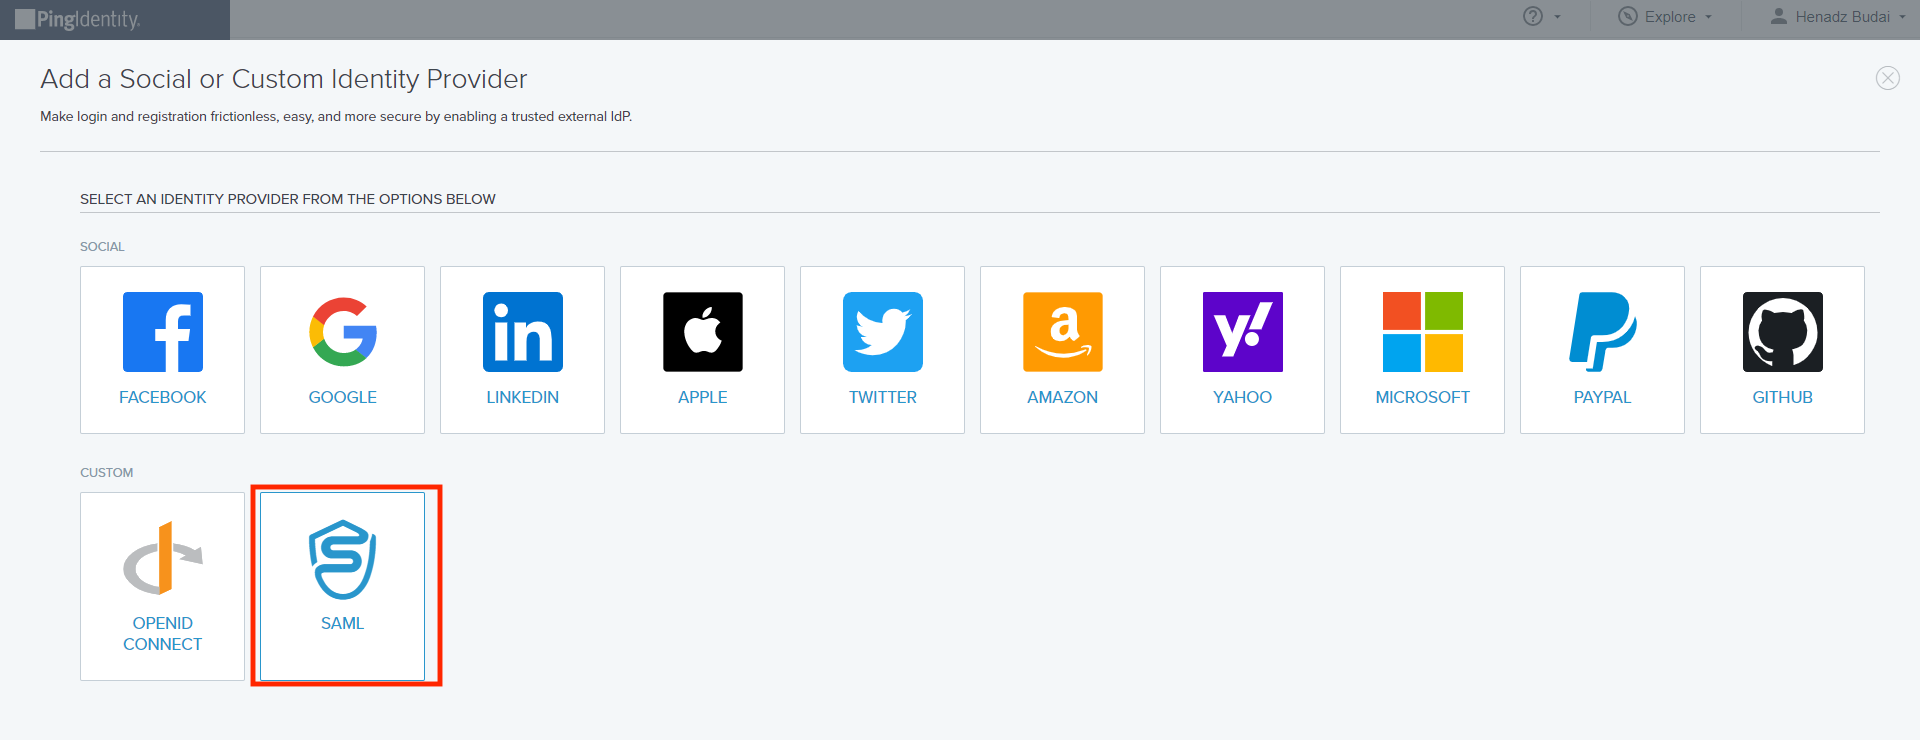
Set Up External IdP in PingOne
To fill the values from the previous step, we need to create an External IdP in PingOne. Go to Connections → External IDPs and click + Add Provider.
Configure SAML Profile
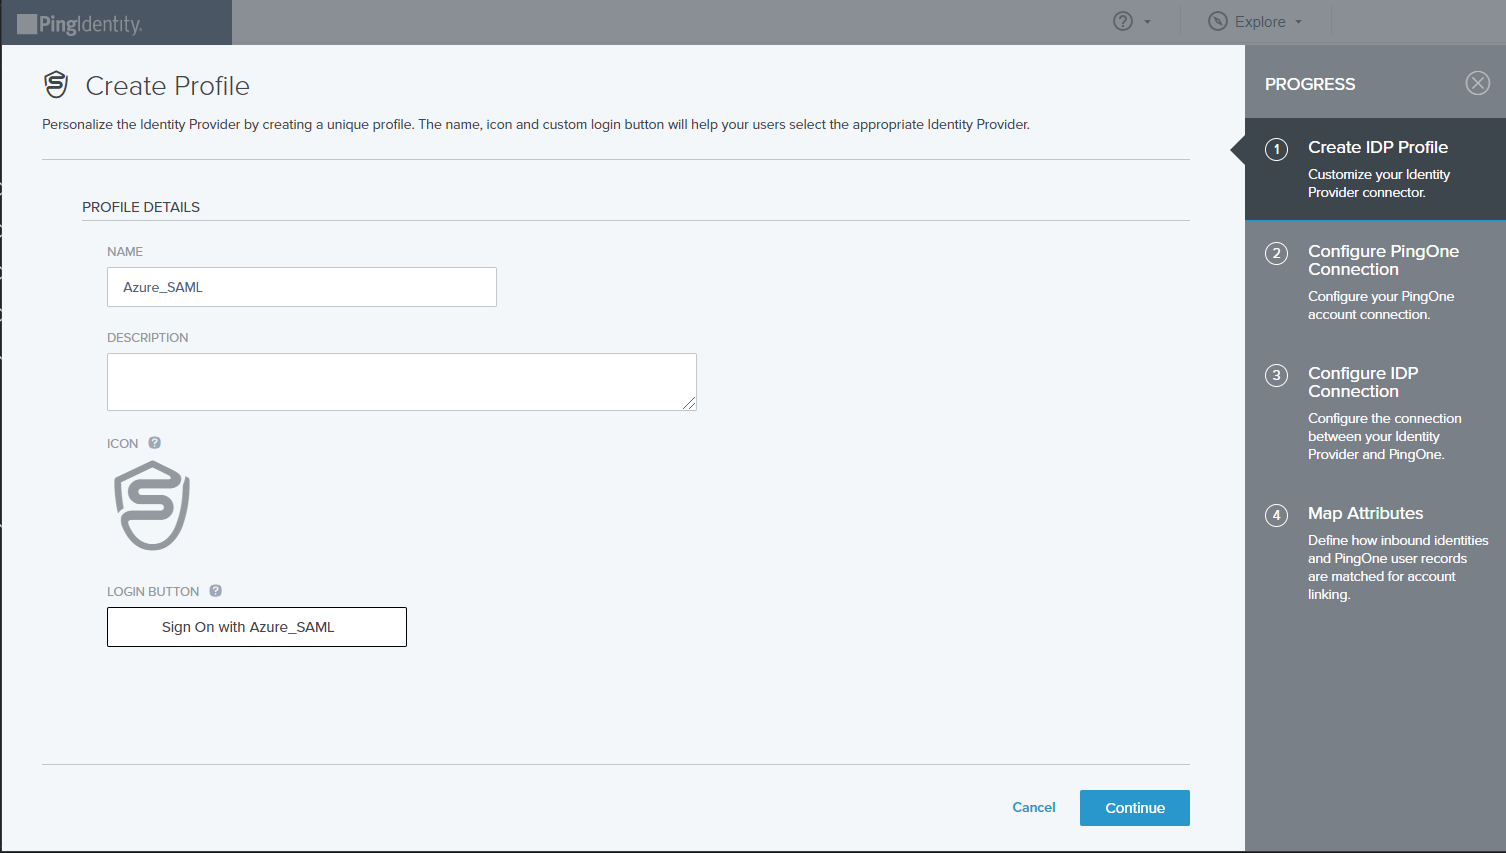
Click SAML. Then on the Create Profile screen, enter the following:
- Name. A unique identifier for the identity provider.
- Description (optional). A brief characterization of the identity provider.
- Icon (optional). An image to represent the identity provider. Use a file up to 1MB in JPG, JPEG, GIF, or PNG format.
- Login button (optional). An image will be used for the login button that the end user will see. Use a 300 X 42-pixel image.
Click Continue.
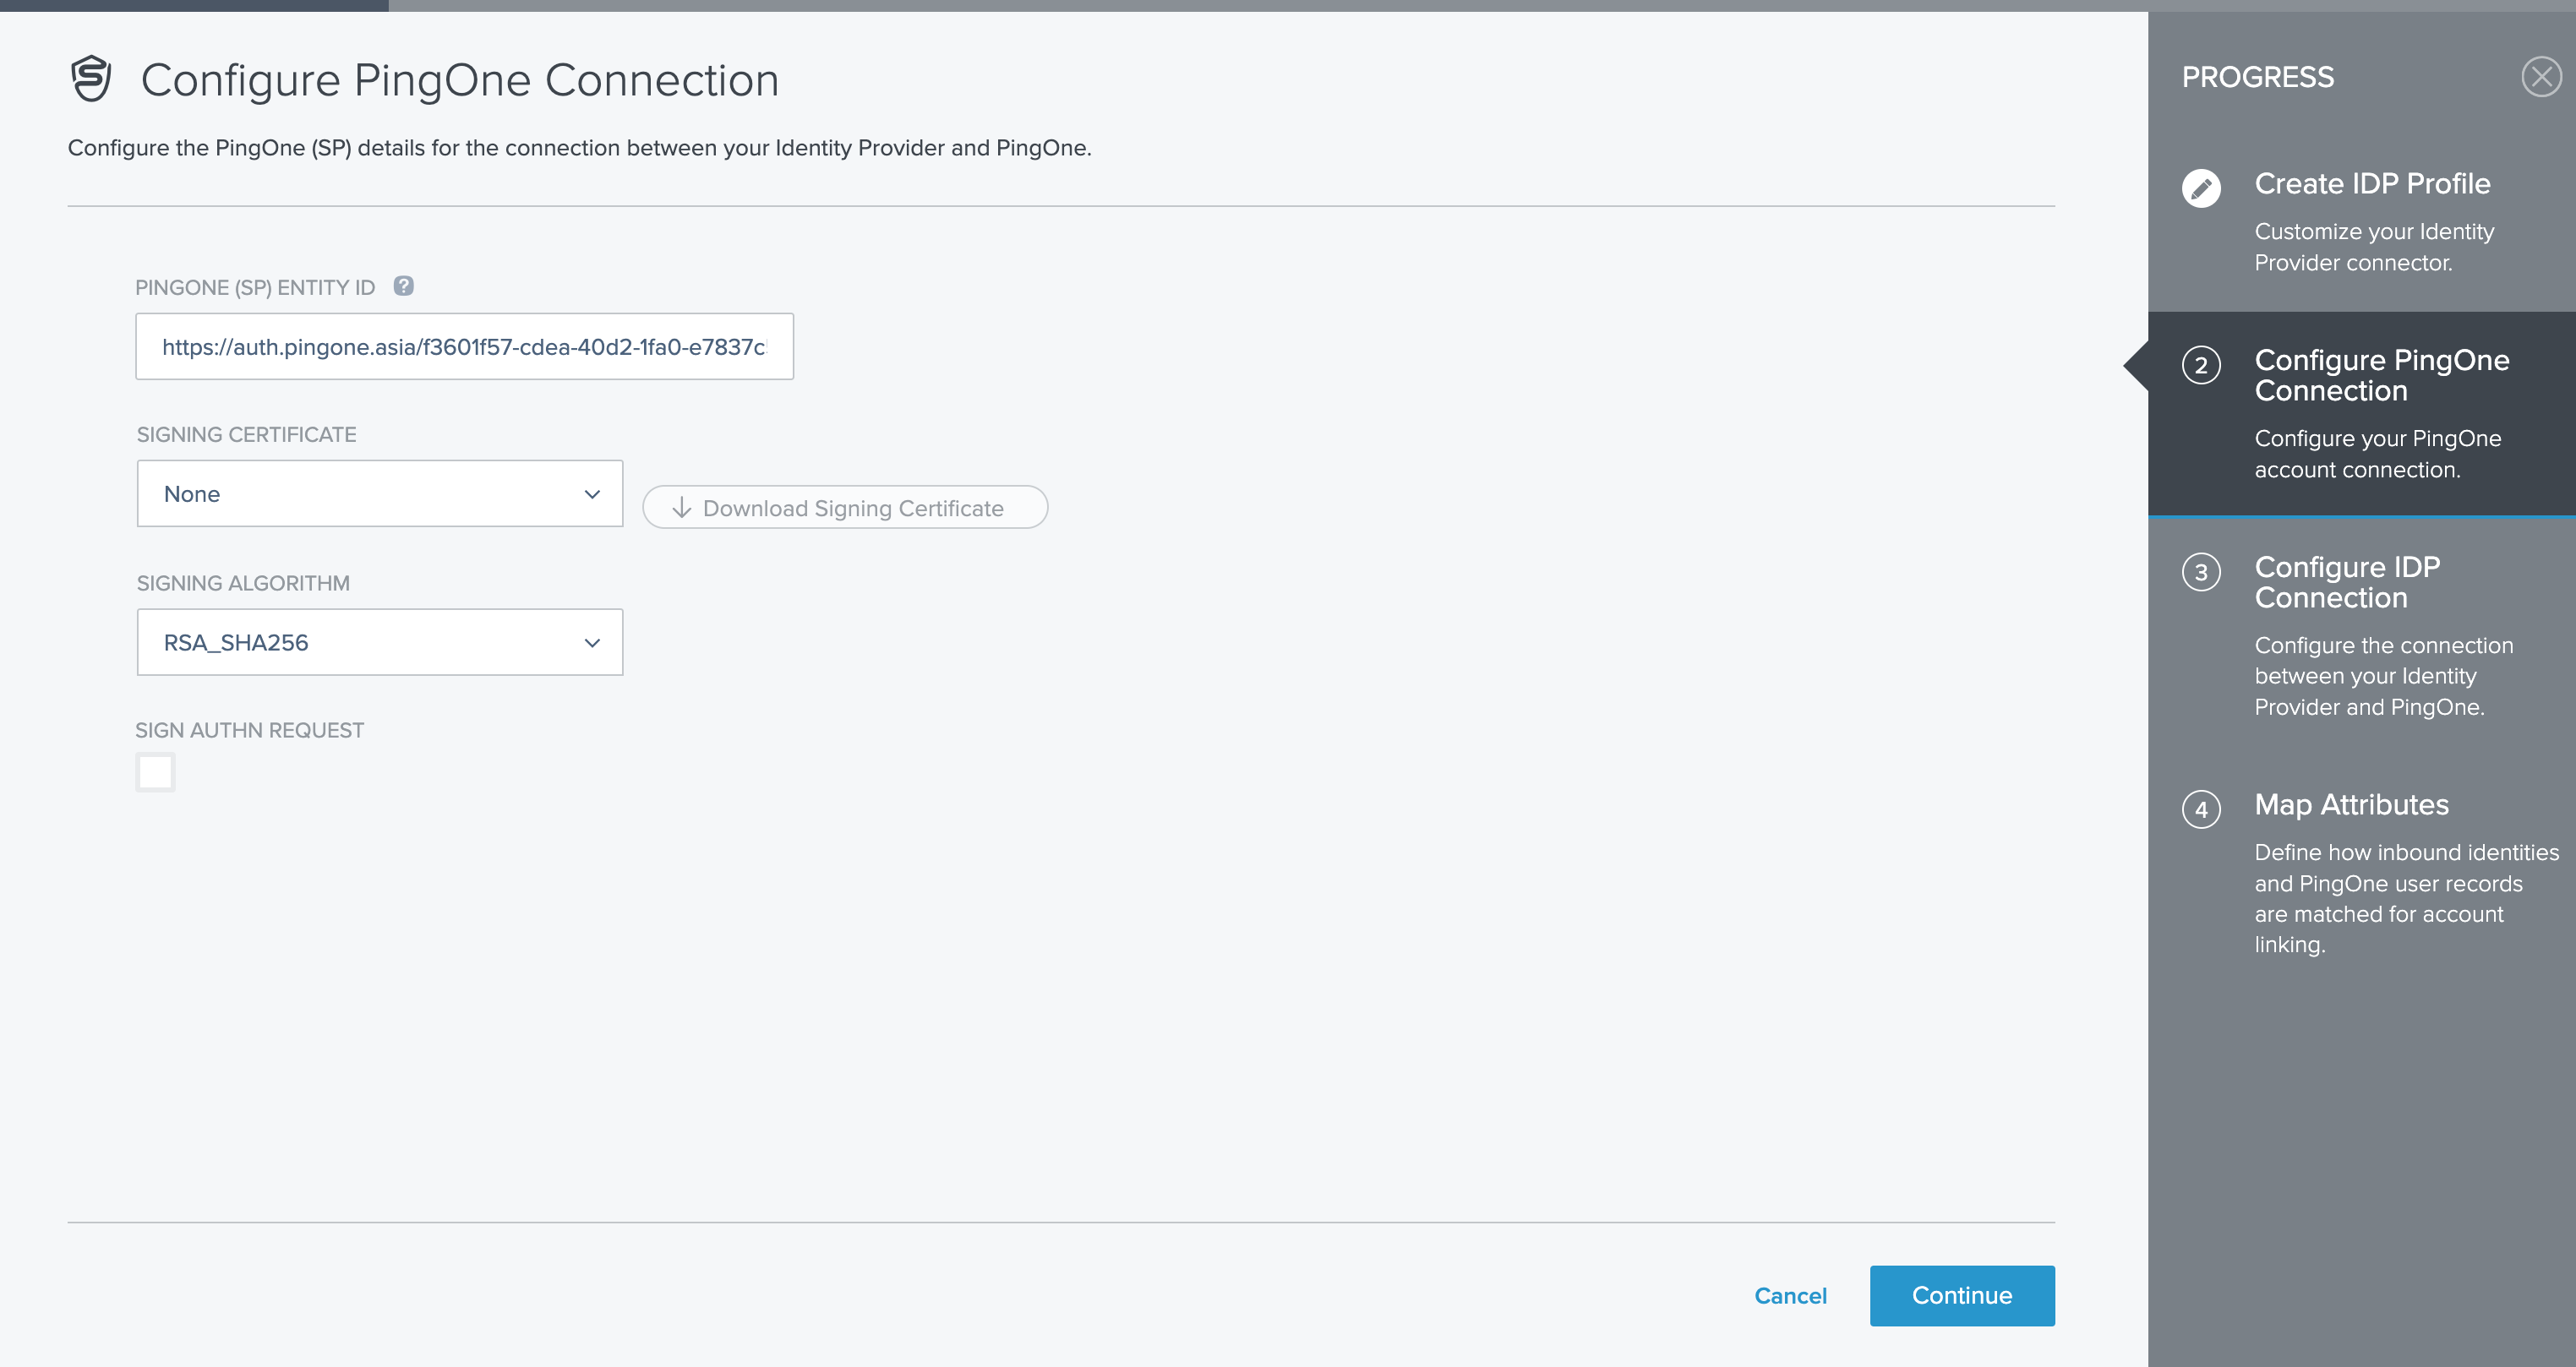
Copy PingOne (SP) Entity ID to Azure
On the Configure PingOne Connection screen, copy the PingOne (SP) entity ID and put the value into the Identifier field on the Basic SAML Configuration drawer in Azure (see Edit Basic SAML Configuration step).
Then click Continue.
Copy ACS Endpoint to Azure and Save
On the Configure IDP Connection screen, copy ACS ENDPOINT and fill the copied value into the Reply URL field on the Basic SAML Configuration drawer in Azure (see Edit Basic SAML Configuration step).
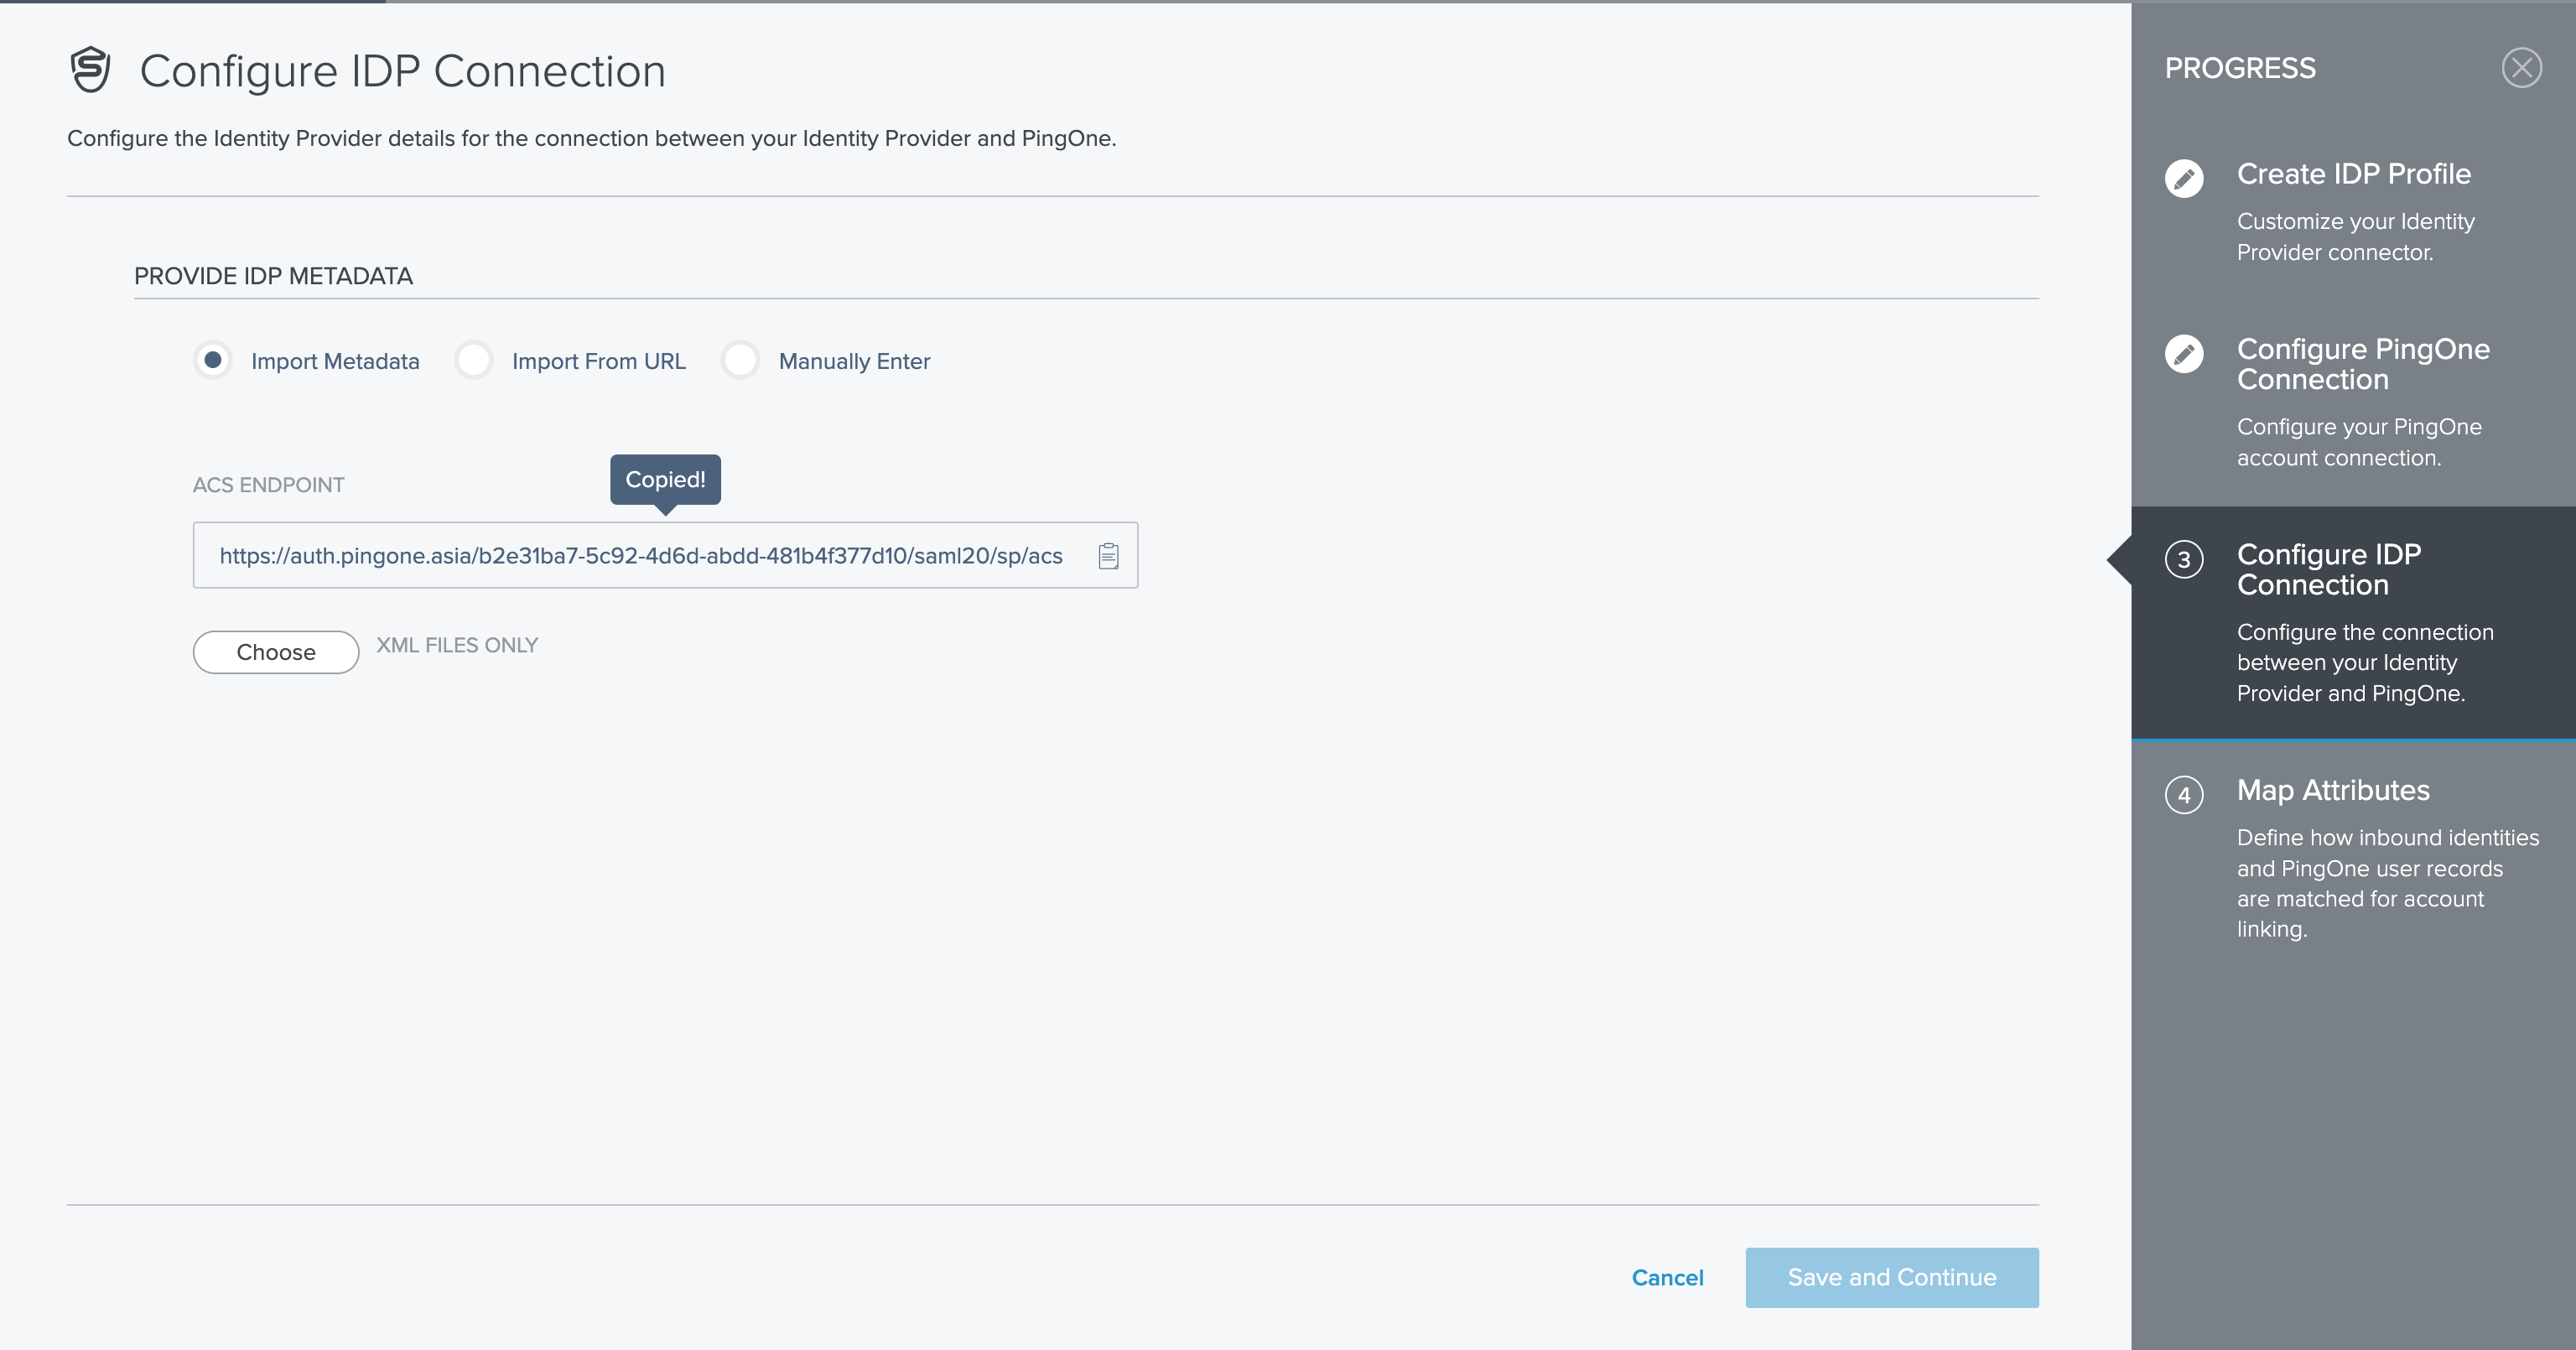
Click the Save button on the Basic SAML Configuration drawer in Azure.
Copy App Federation Metadata URL and Import to PingOne
In the SAML Certificates card, copy the App Federation Metadata URL.

Afterward, go back to PingOne and select the option Import from URL on the Configure IDP Connection screen, paste the App Federation Metadata URL, and click Import.
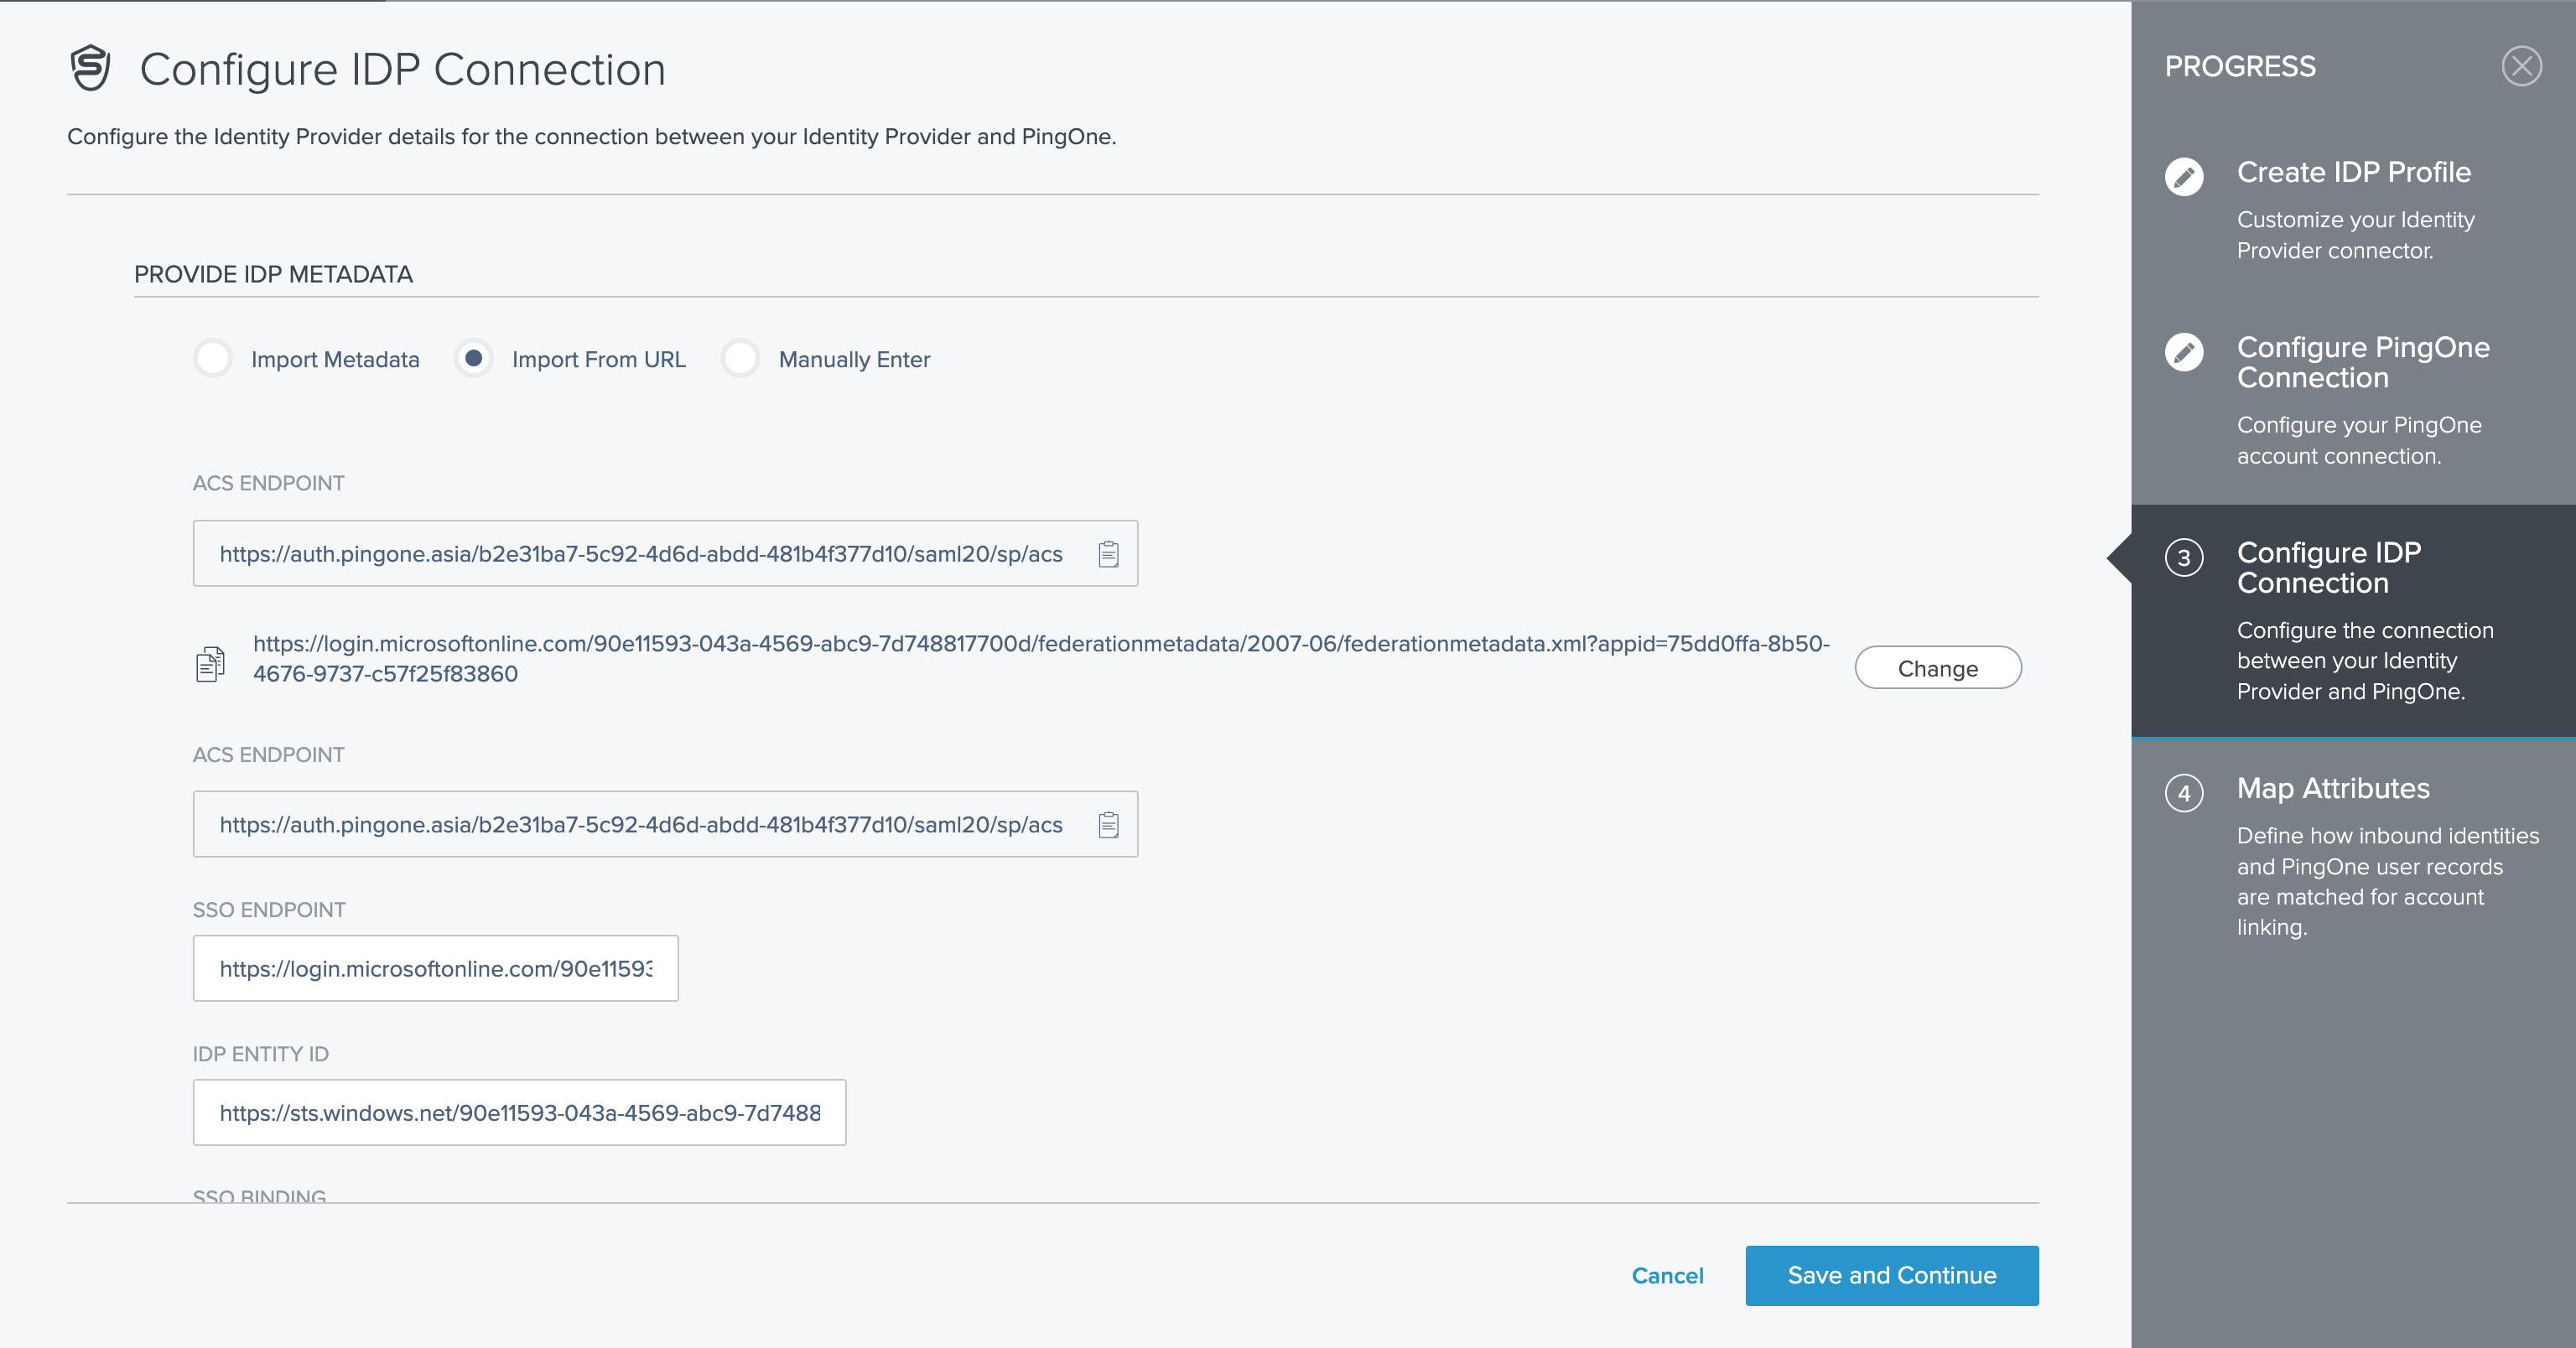
Click Save and Continue.
Complete SAML configuration
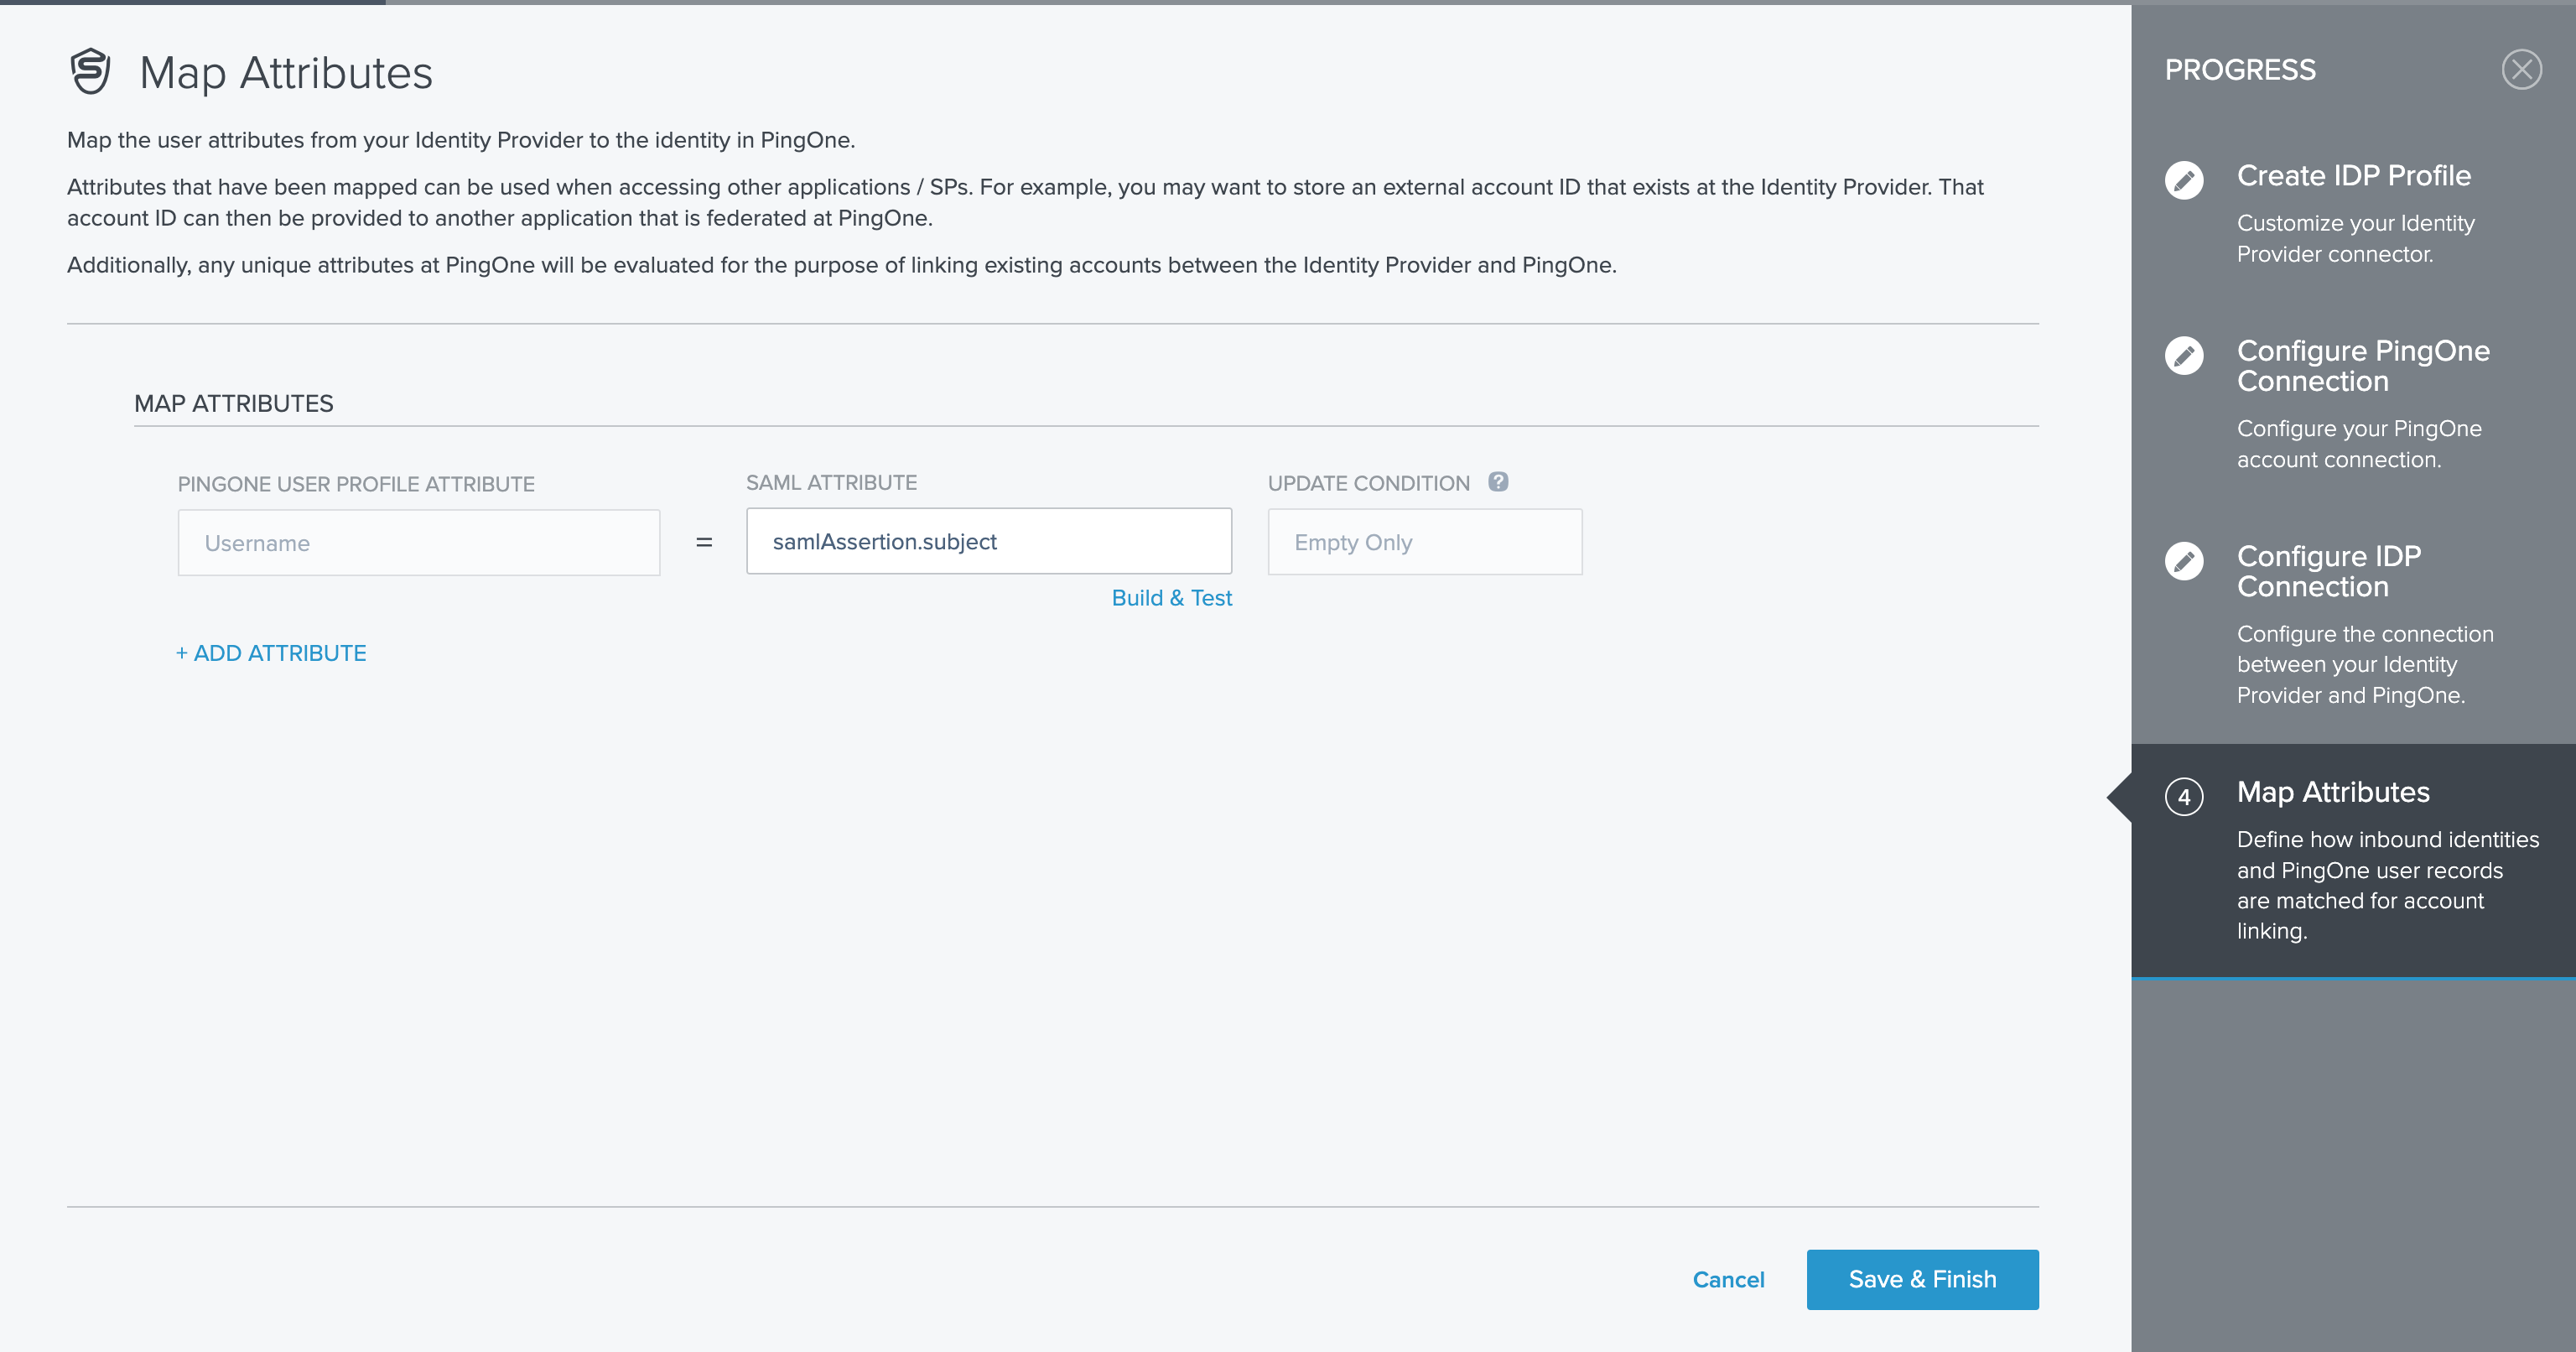
On the Map Attributes screen, click Save&Finish.
Do not forget
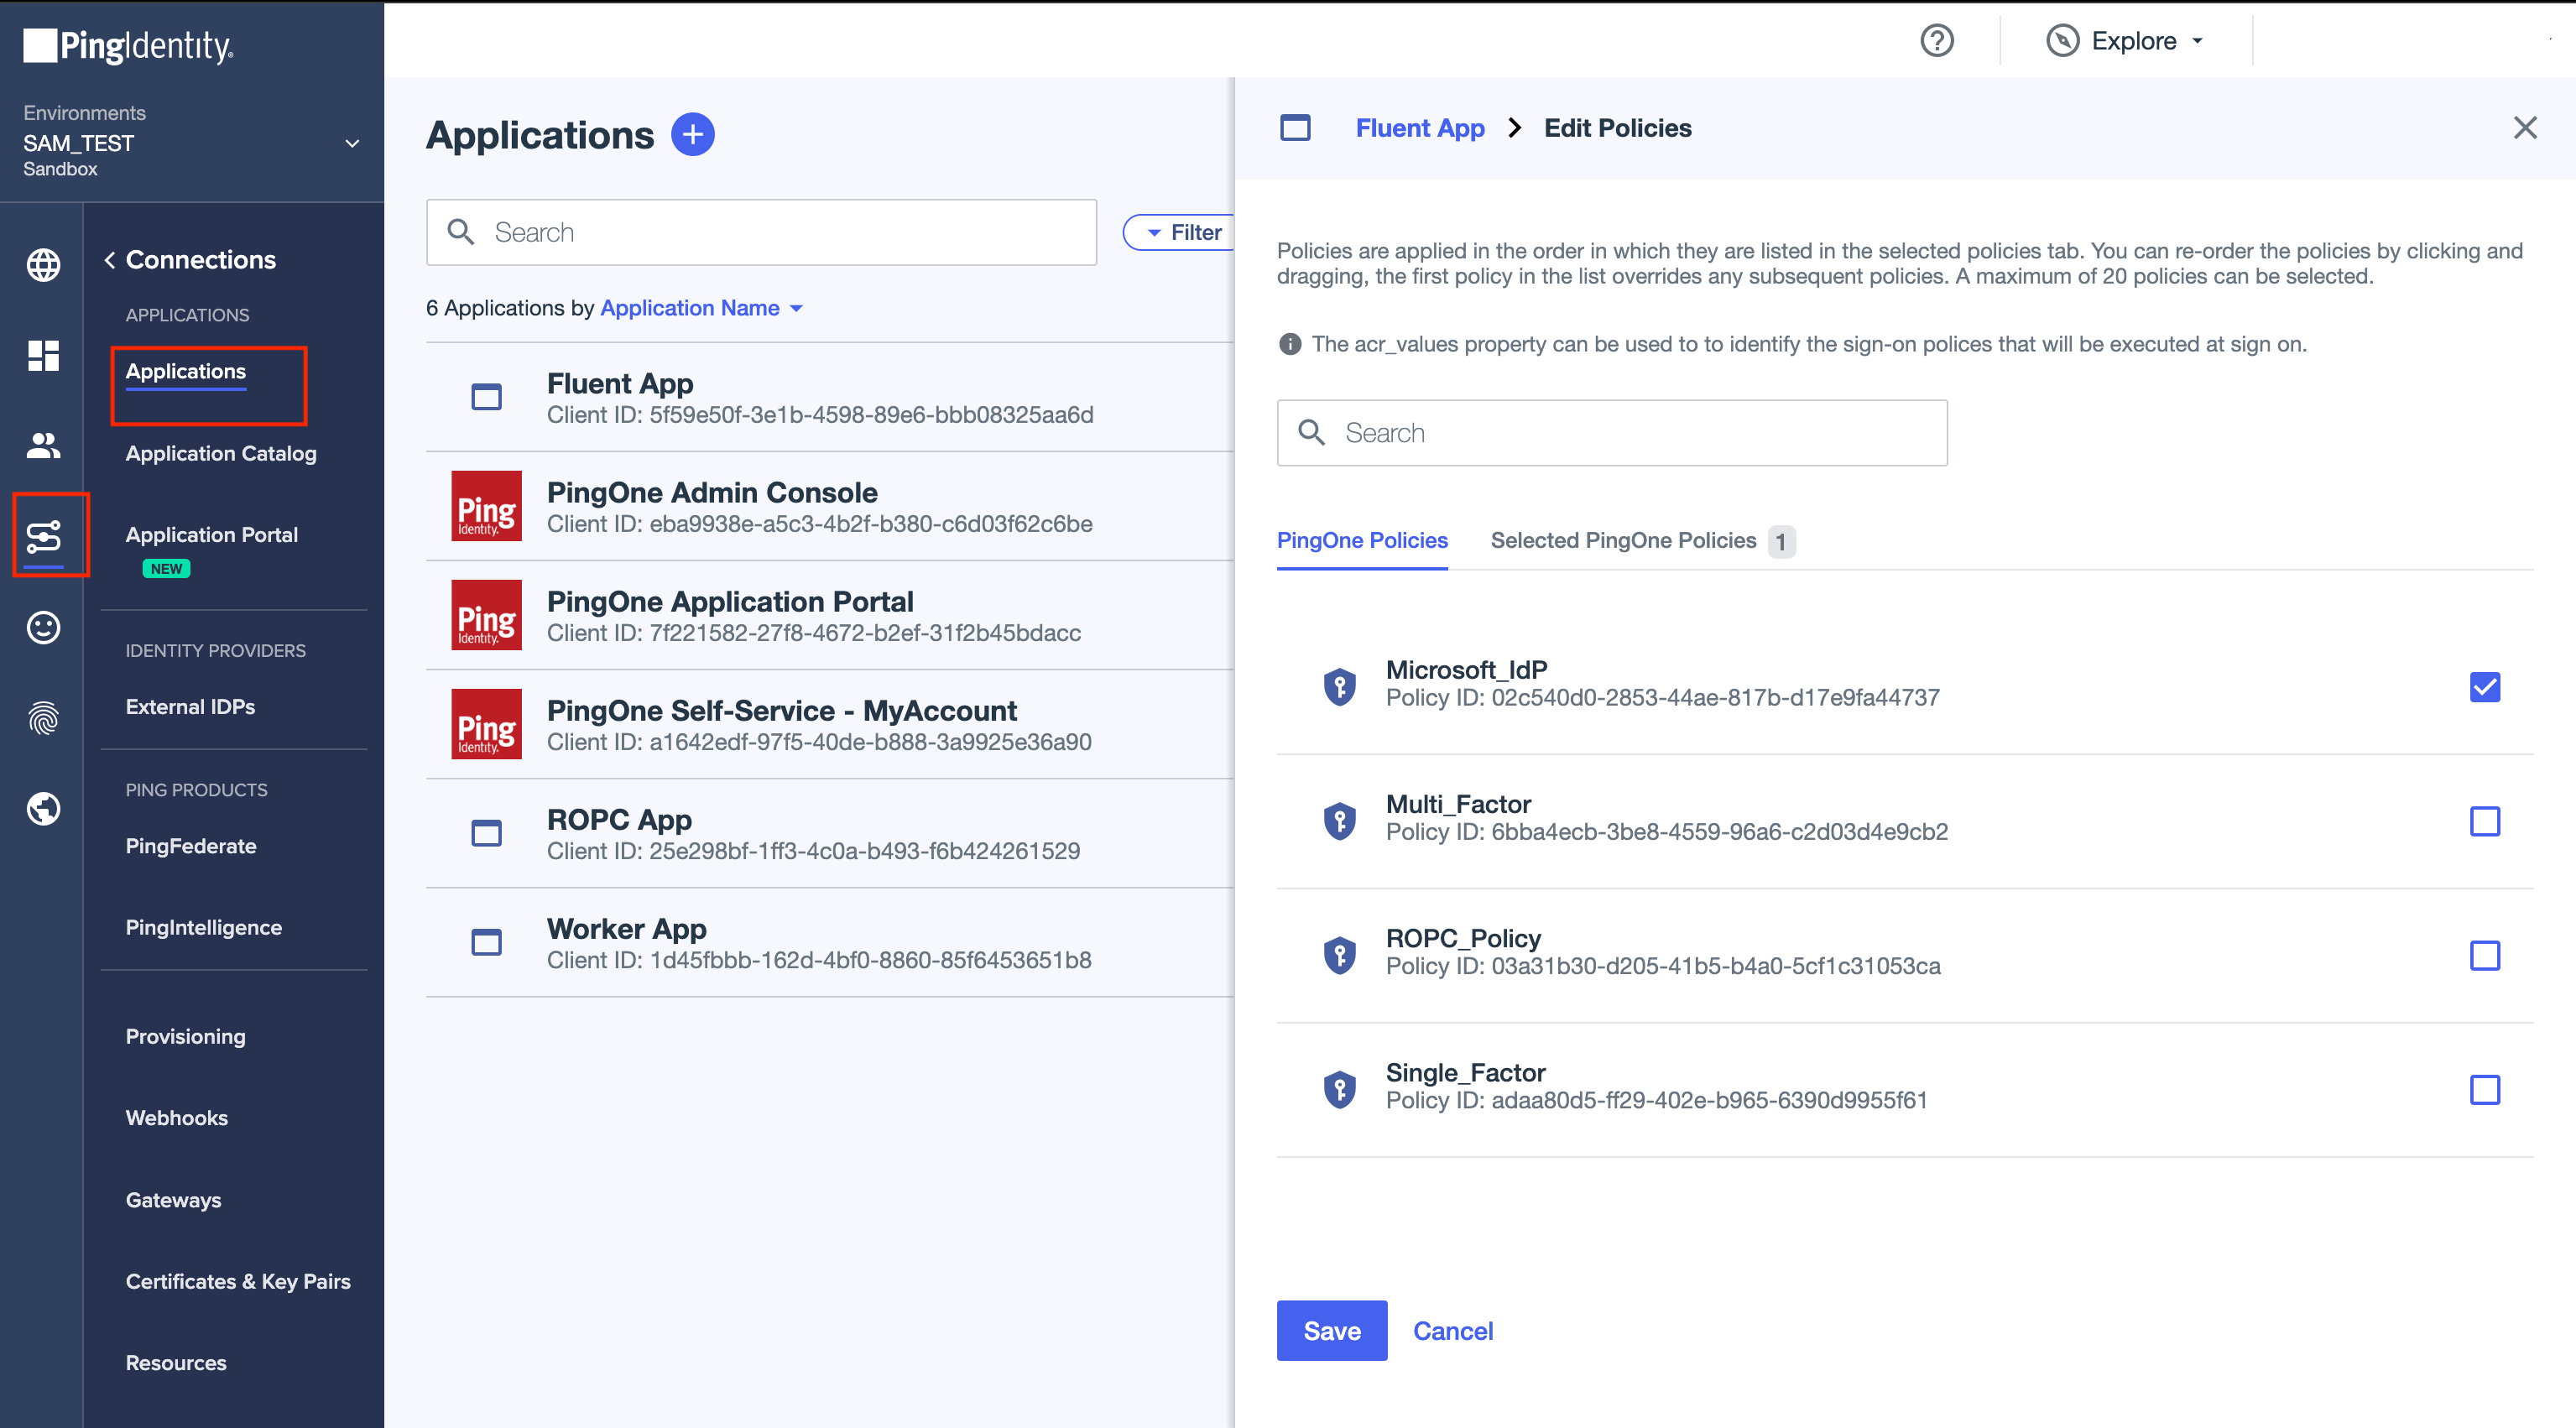
Enable External Identity Provider and Add to Authentication Policy
1. Enable the External Identity Provider.
2. Create a new Authentication Policy and add the newly created External Identity Provider to it.
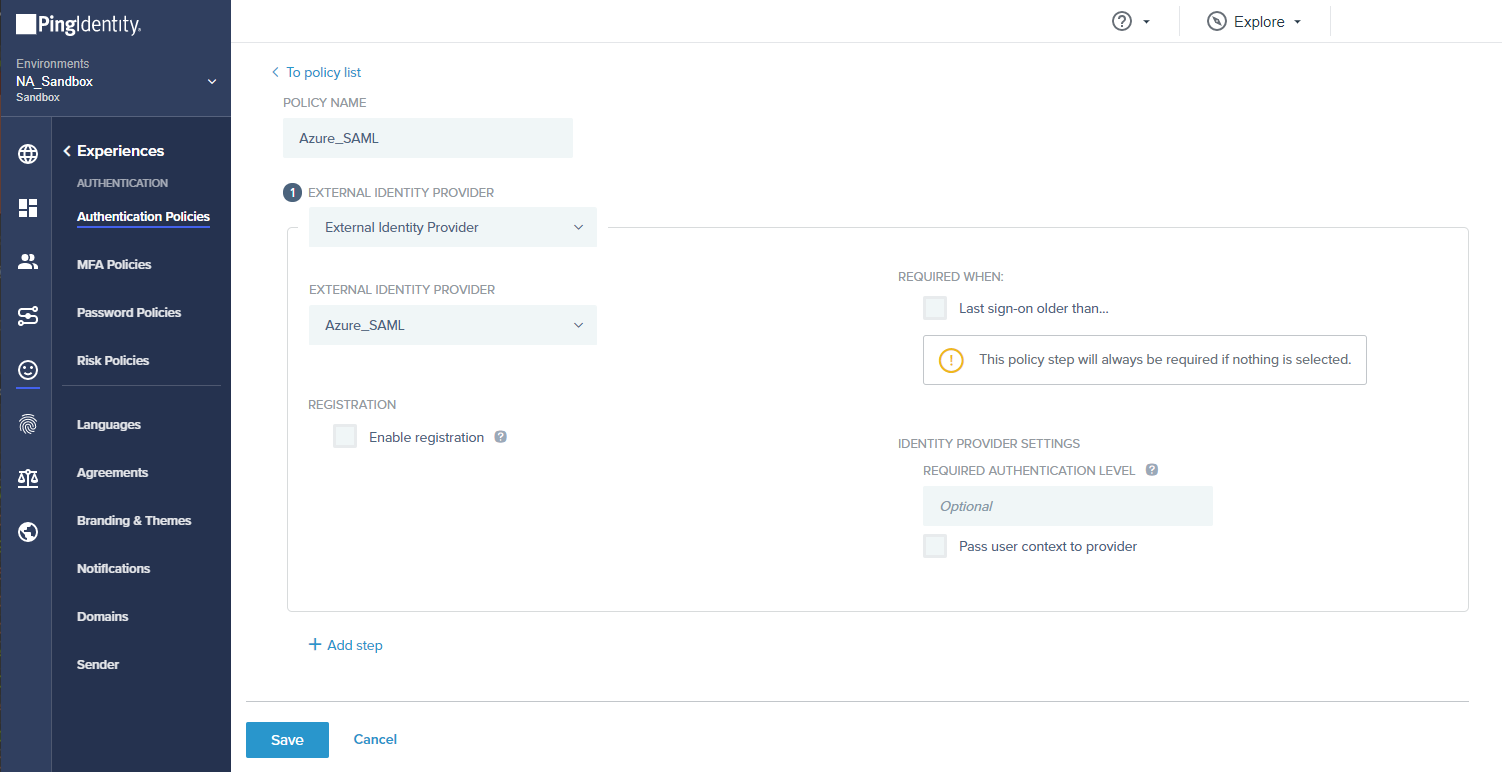
3. Add the Authentication Policy to the application.
Decide which users from the company should have access to Fluent App
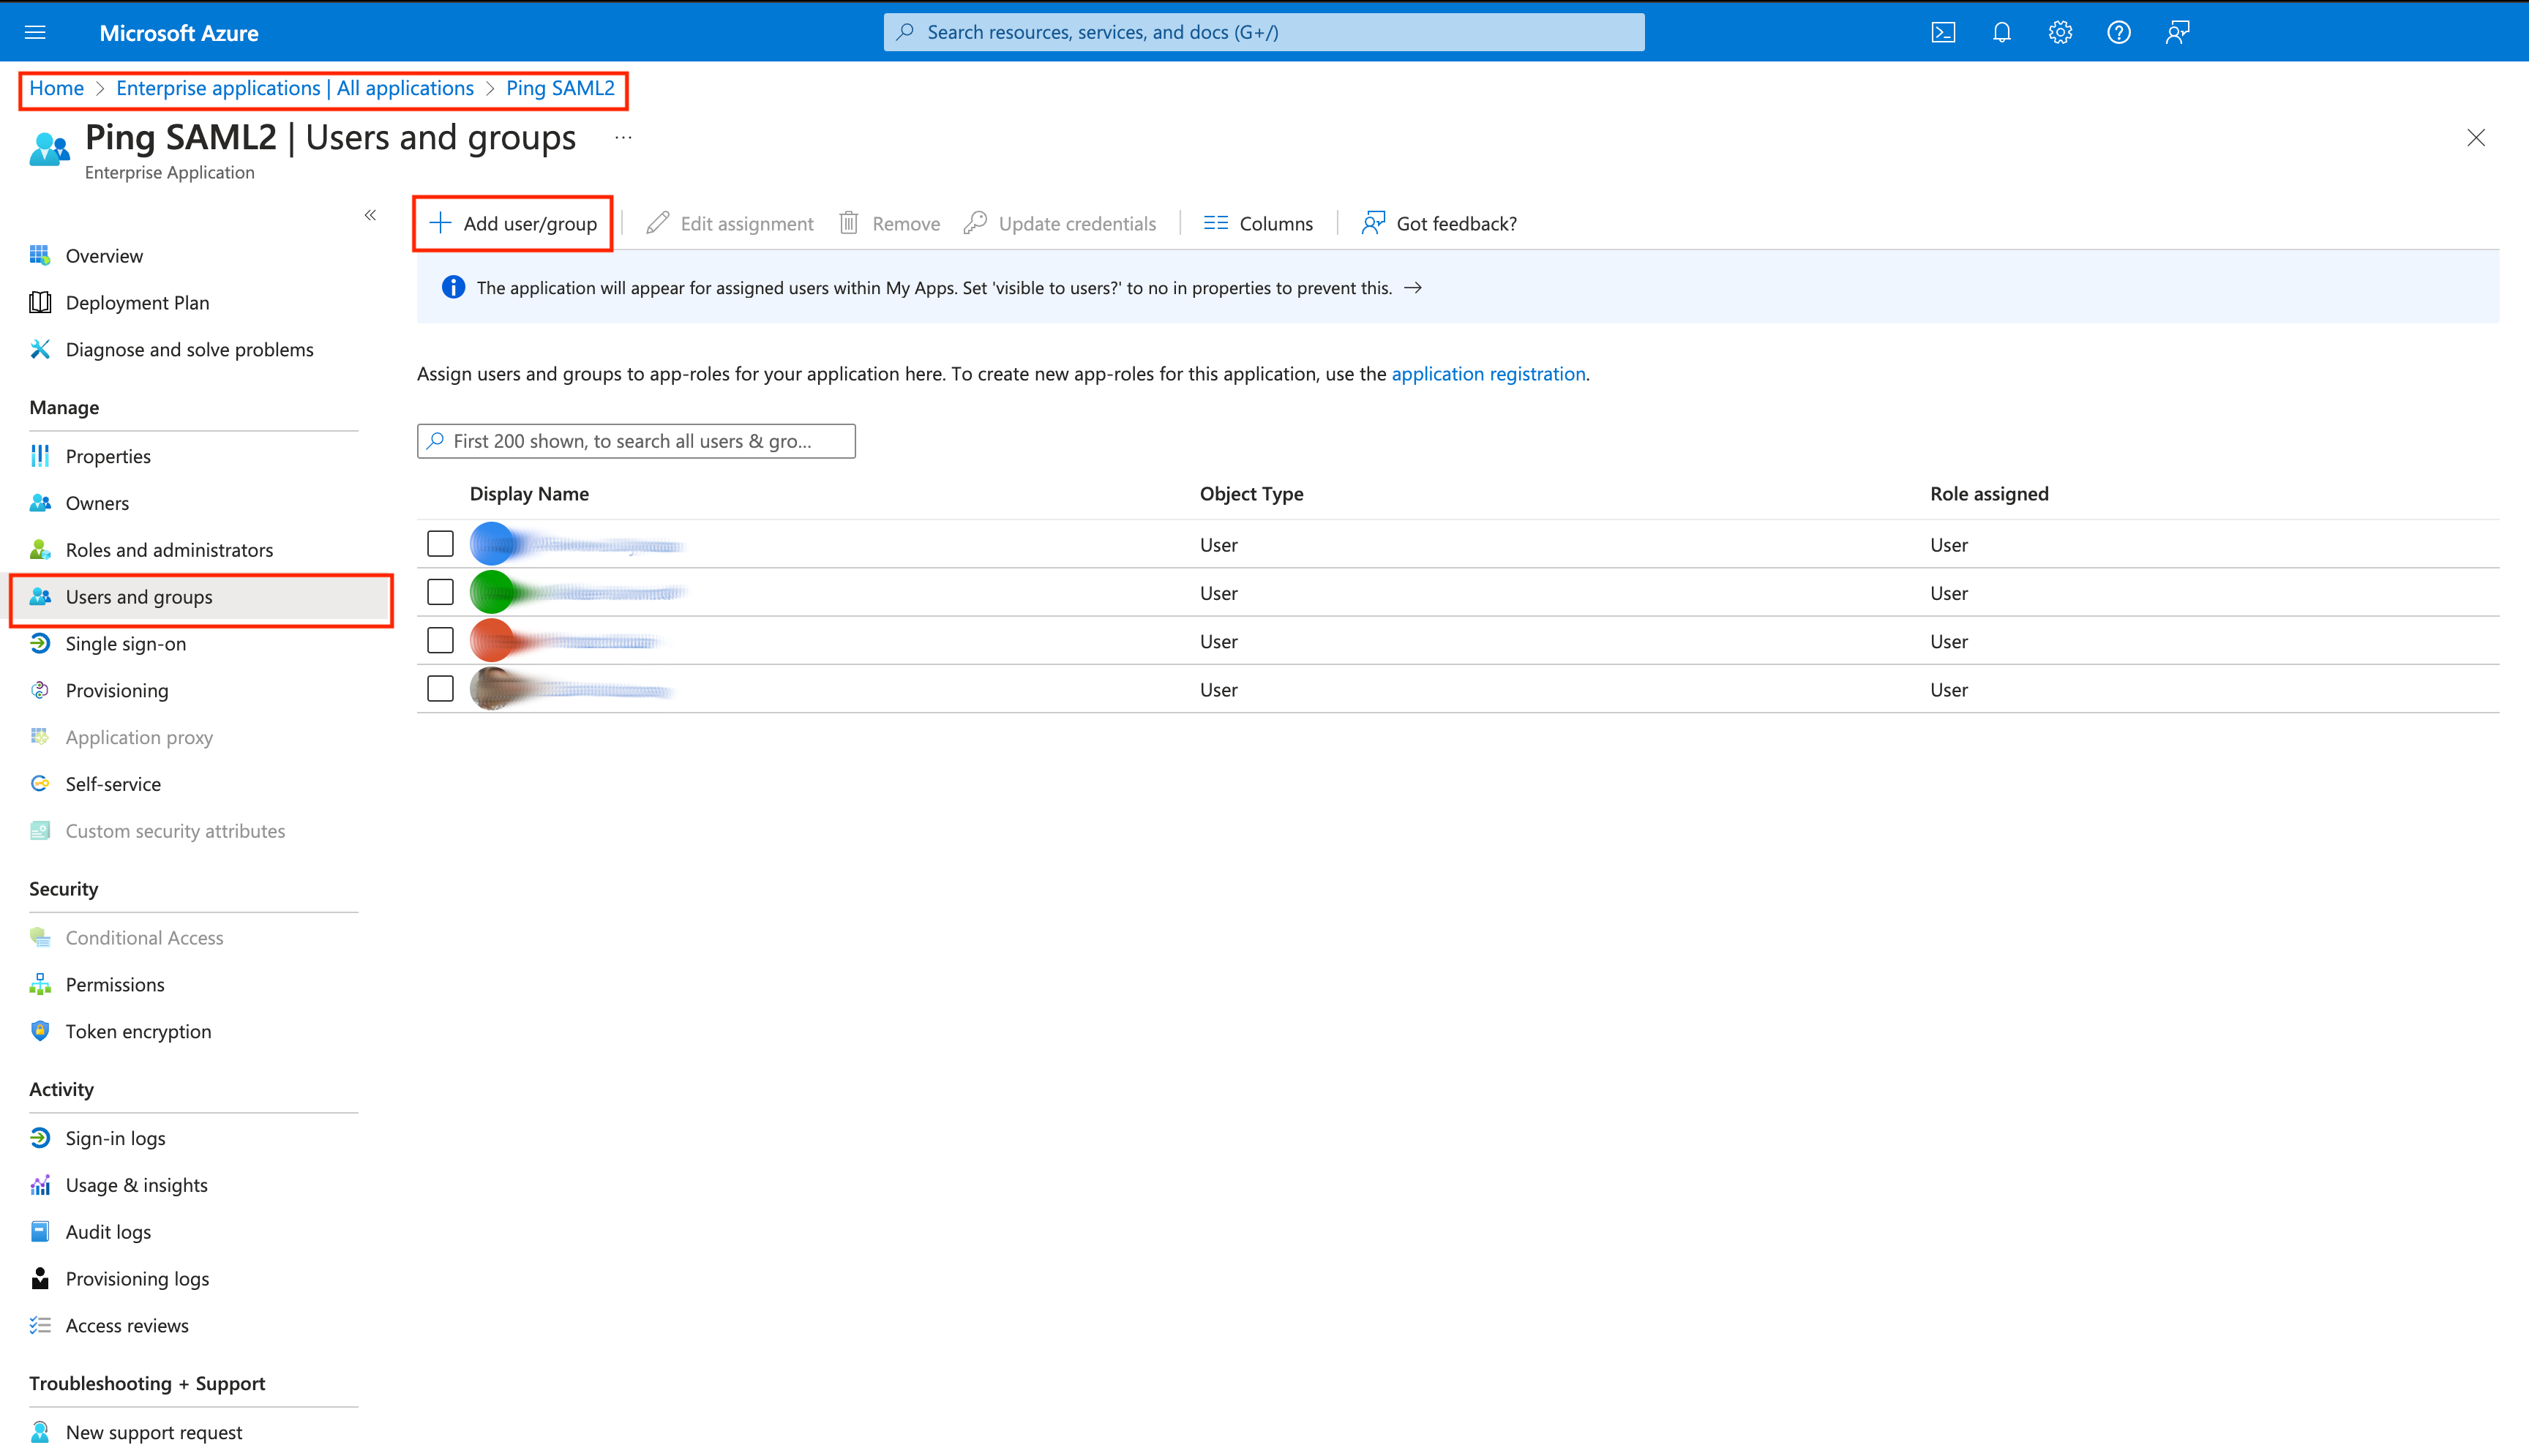
Access the Microsoft Azure portal, navigate to Enterprise applications, then All applications, and select your application. Go to the Manage section and select Users and groups. Then, proceed by clicking the Add user/group button to assign users and groups to application roles for the specific application.