Configure Okta connection via SAML
Author:
Fluent Commerce
Changed on:
26 Oct 2023
Key Points
- Register application with Okta
- Add the identity provider in PingOne
- Add Metadata URL
- Continue IDP Configuration
- Do not forget
Steps
 I. Register application with Okta
follow these steps below:
Step 1.
Go to Okta Portal. If an Okta account doesn’t exist, then you need to create one.
Step 2.
Go to Applications.
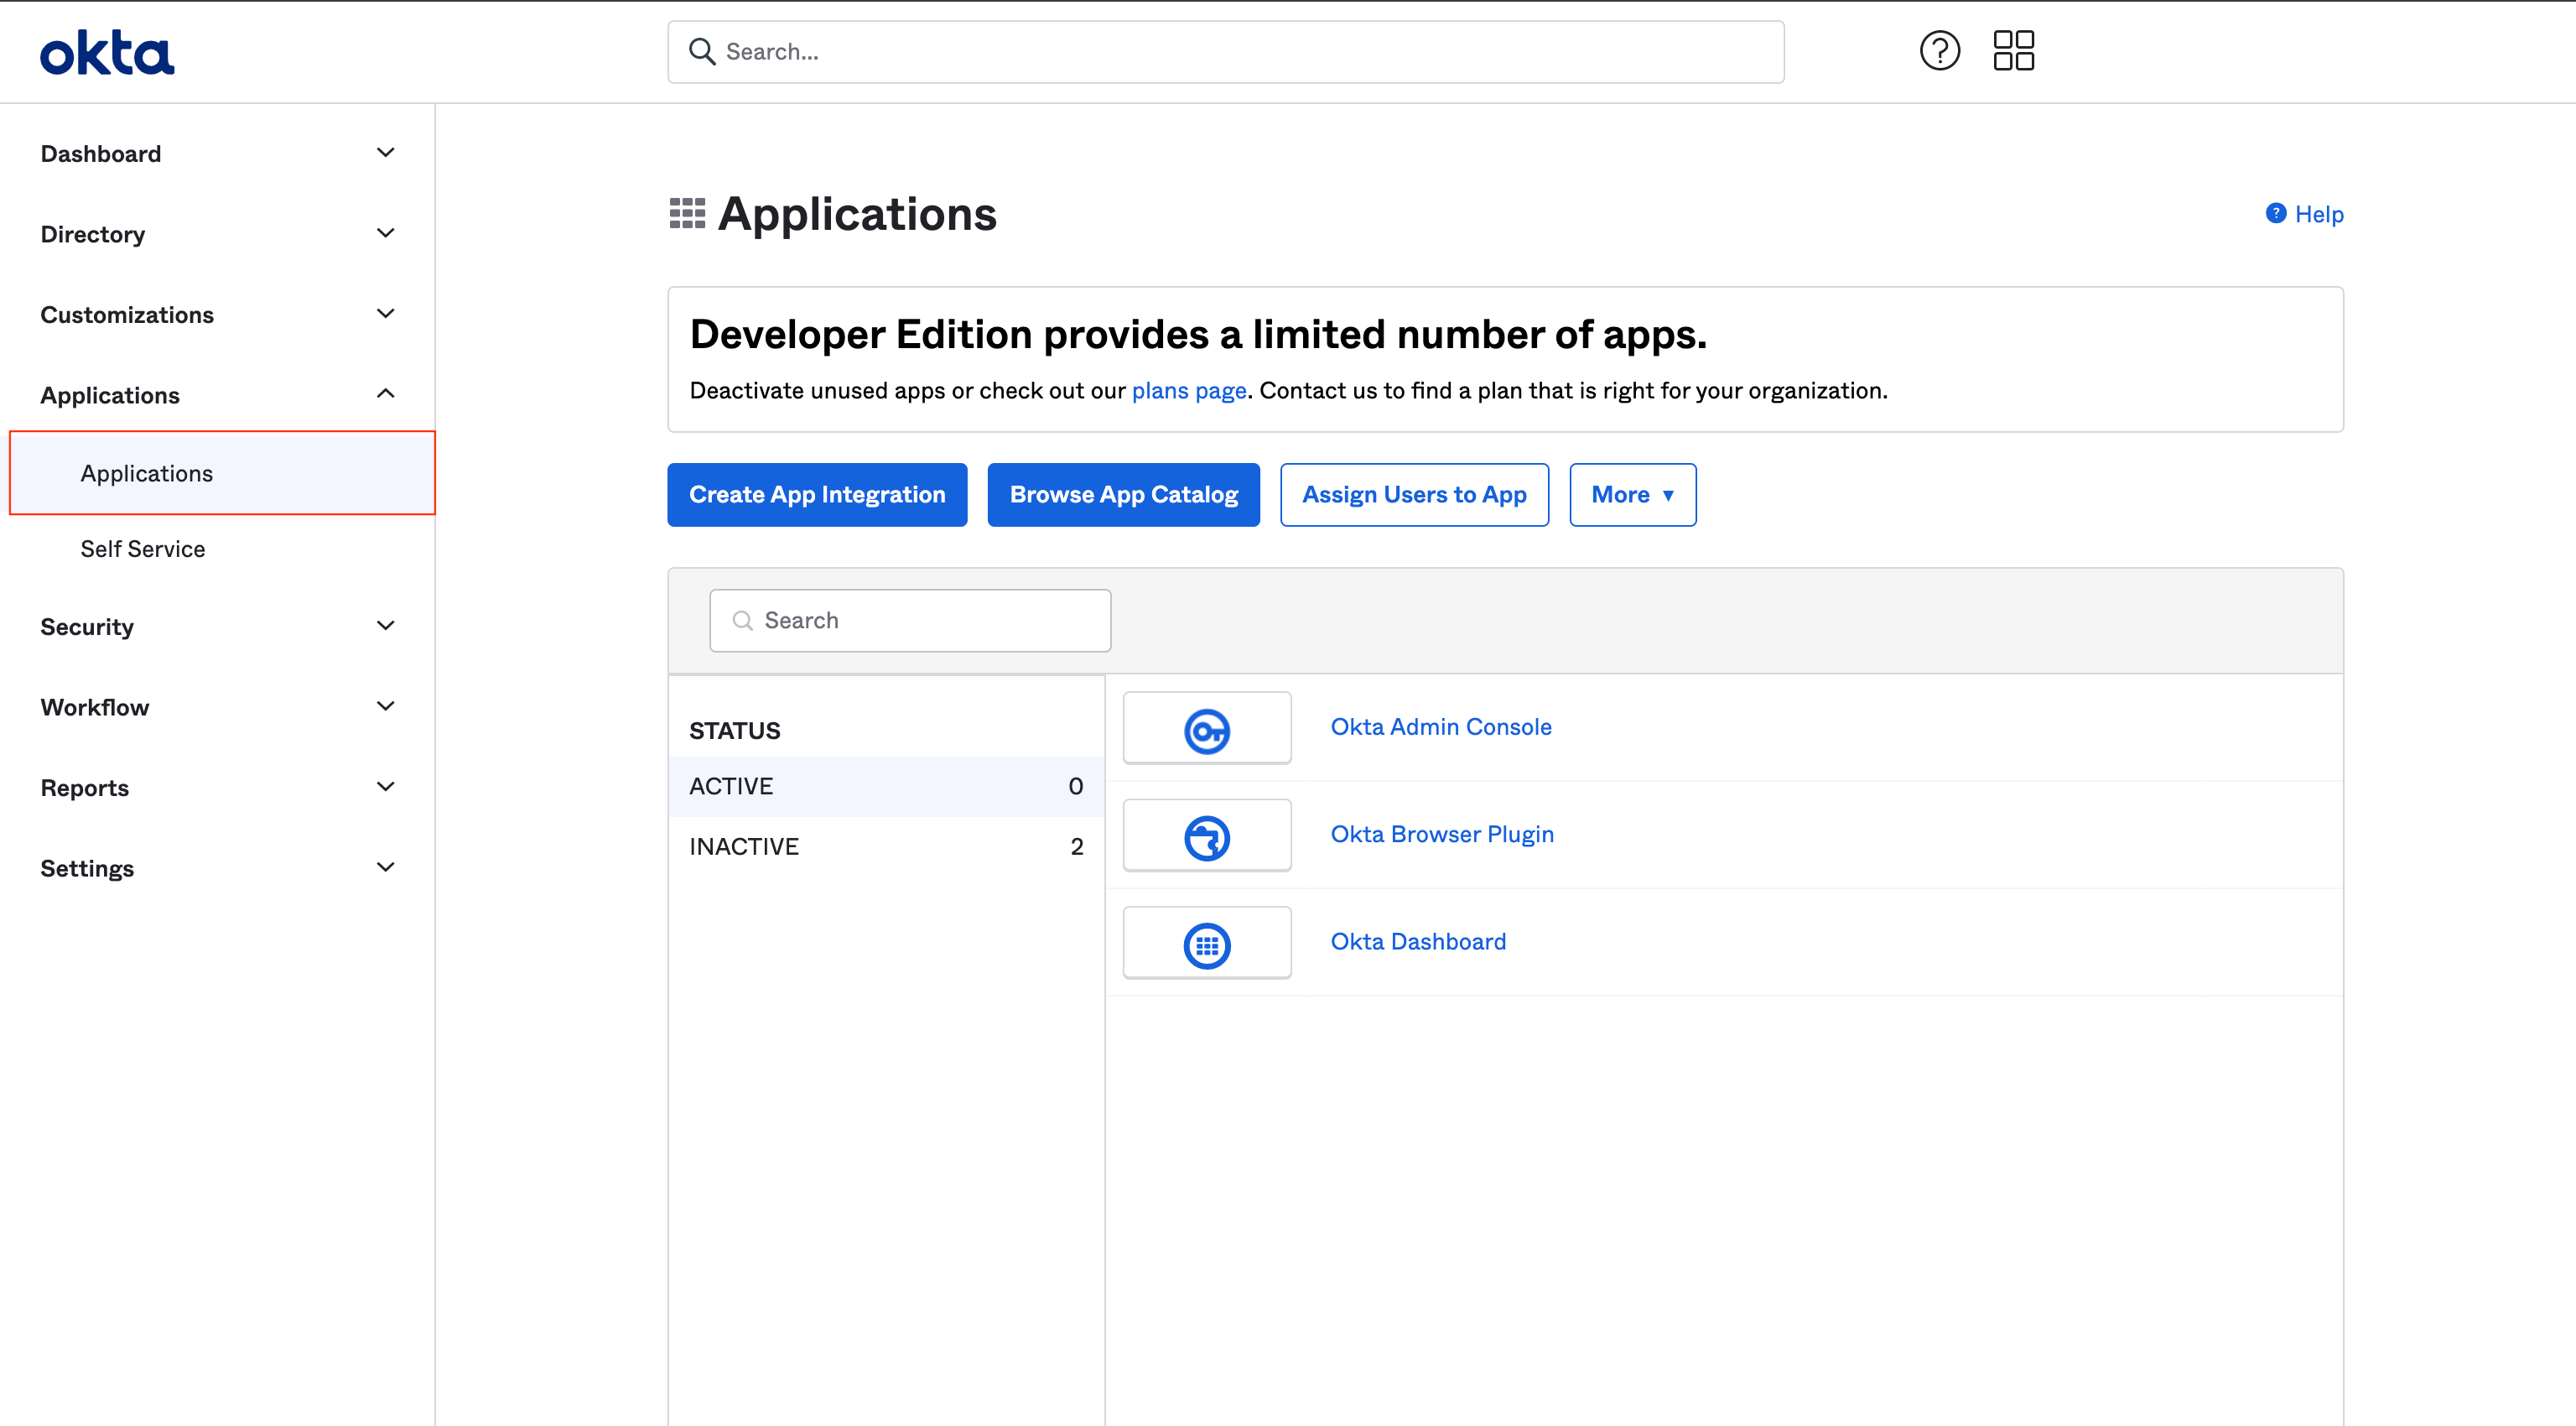
Step 3.
Click Create App Integration button.

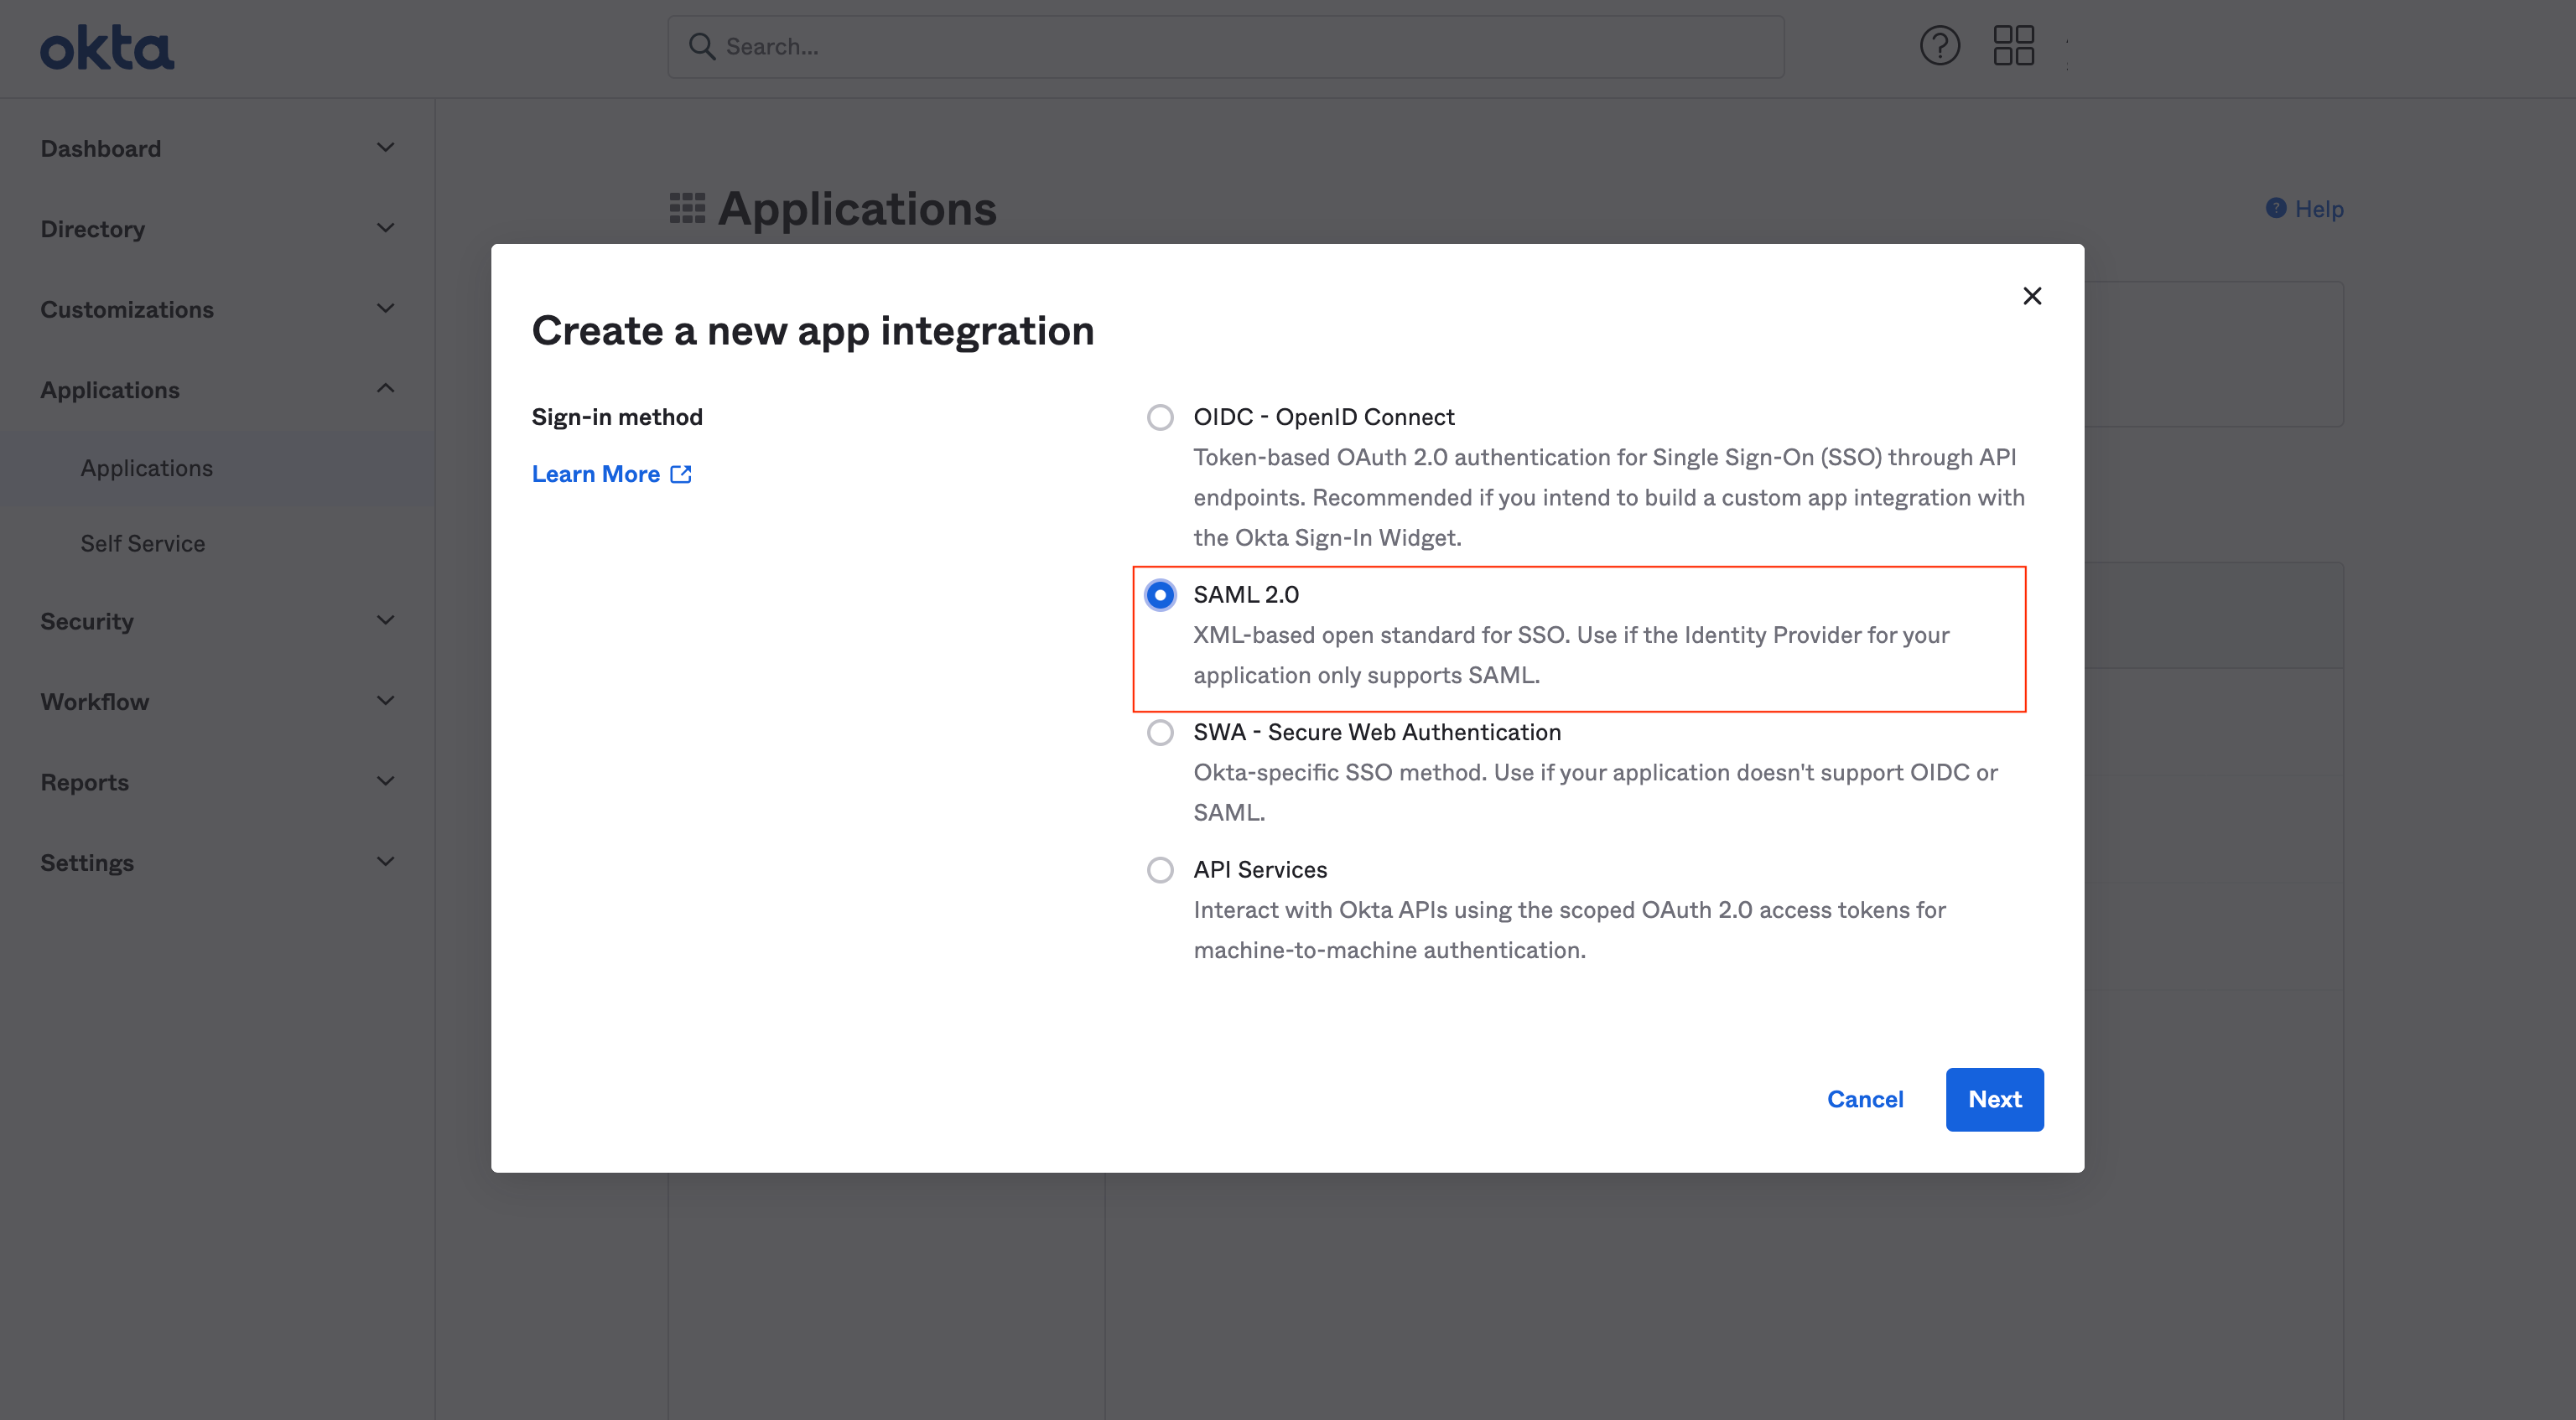
Step 4.
Select SAML 2.0 on Create a new app integration dialogue and press Next button.
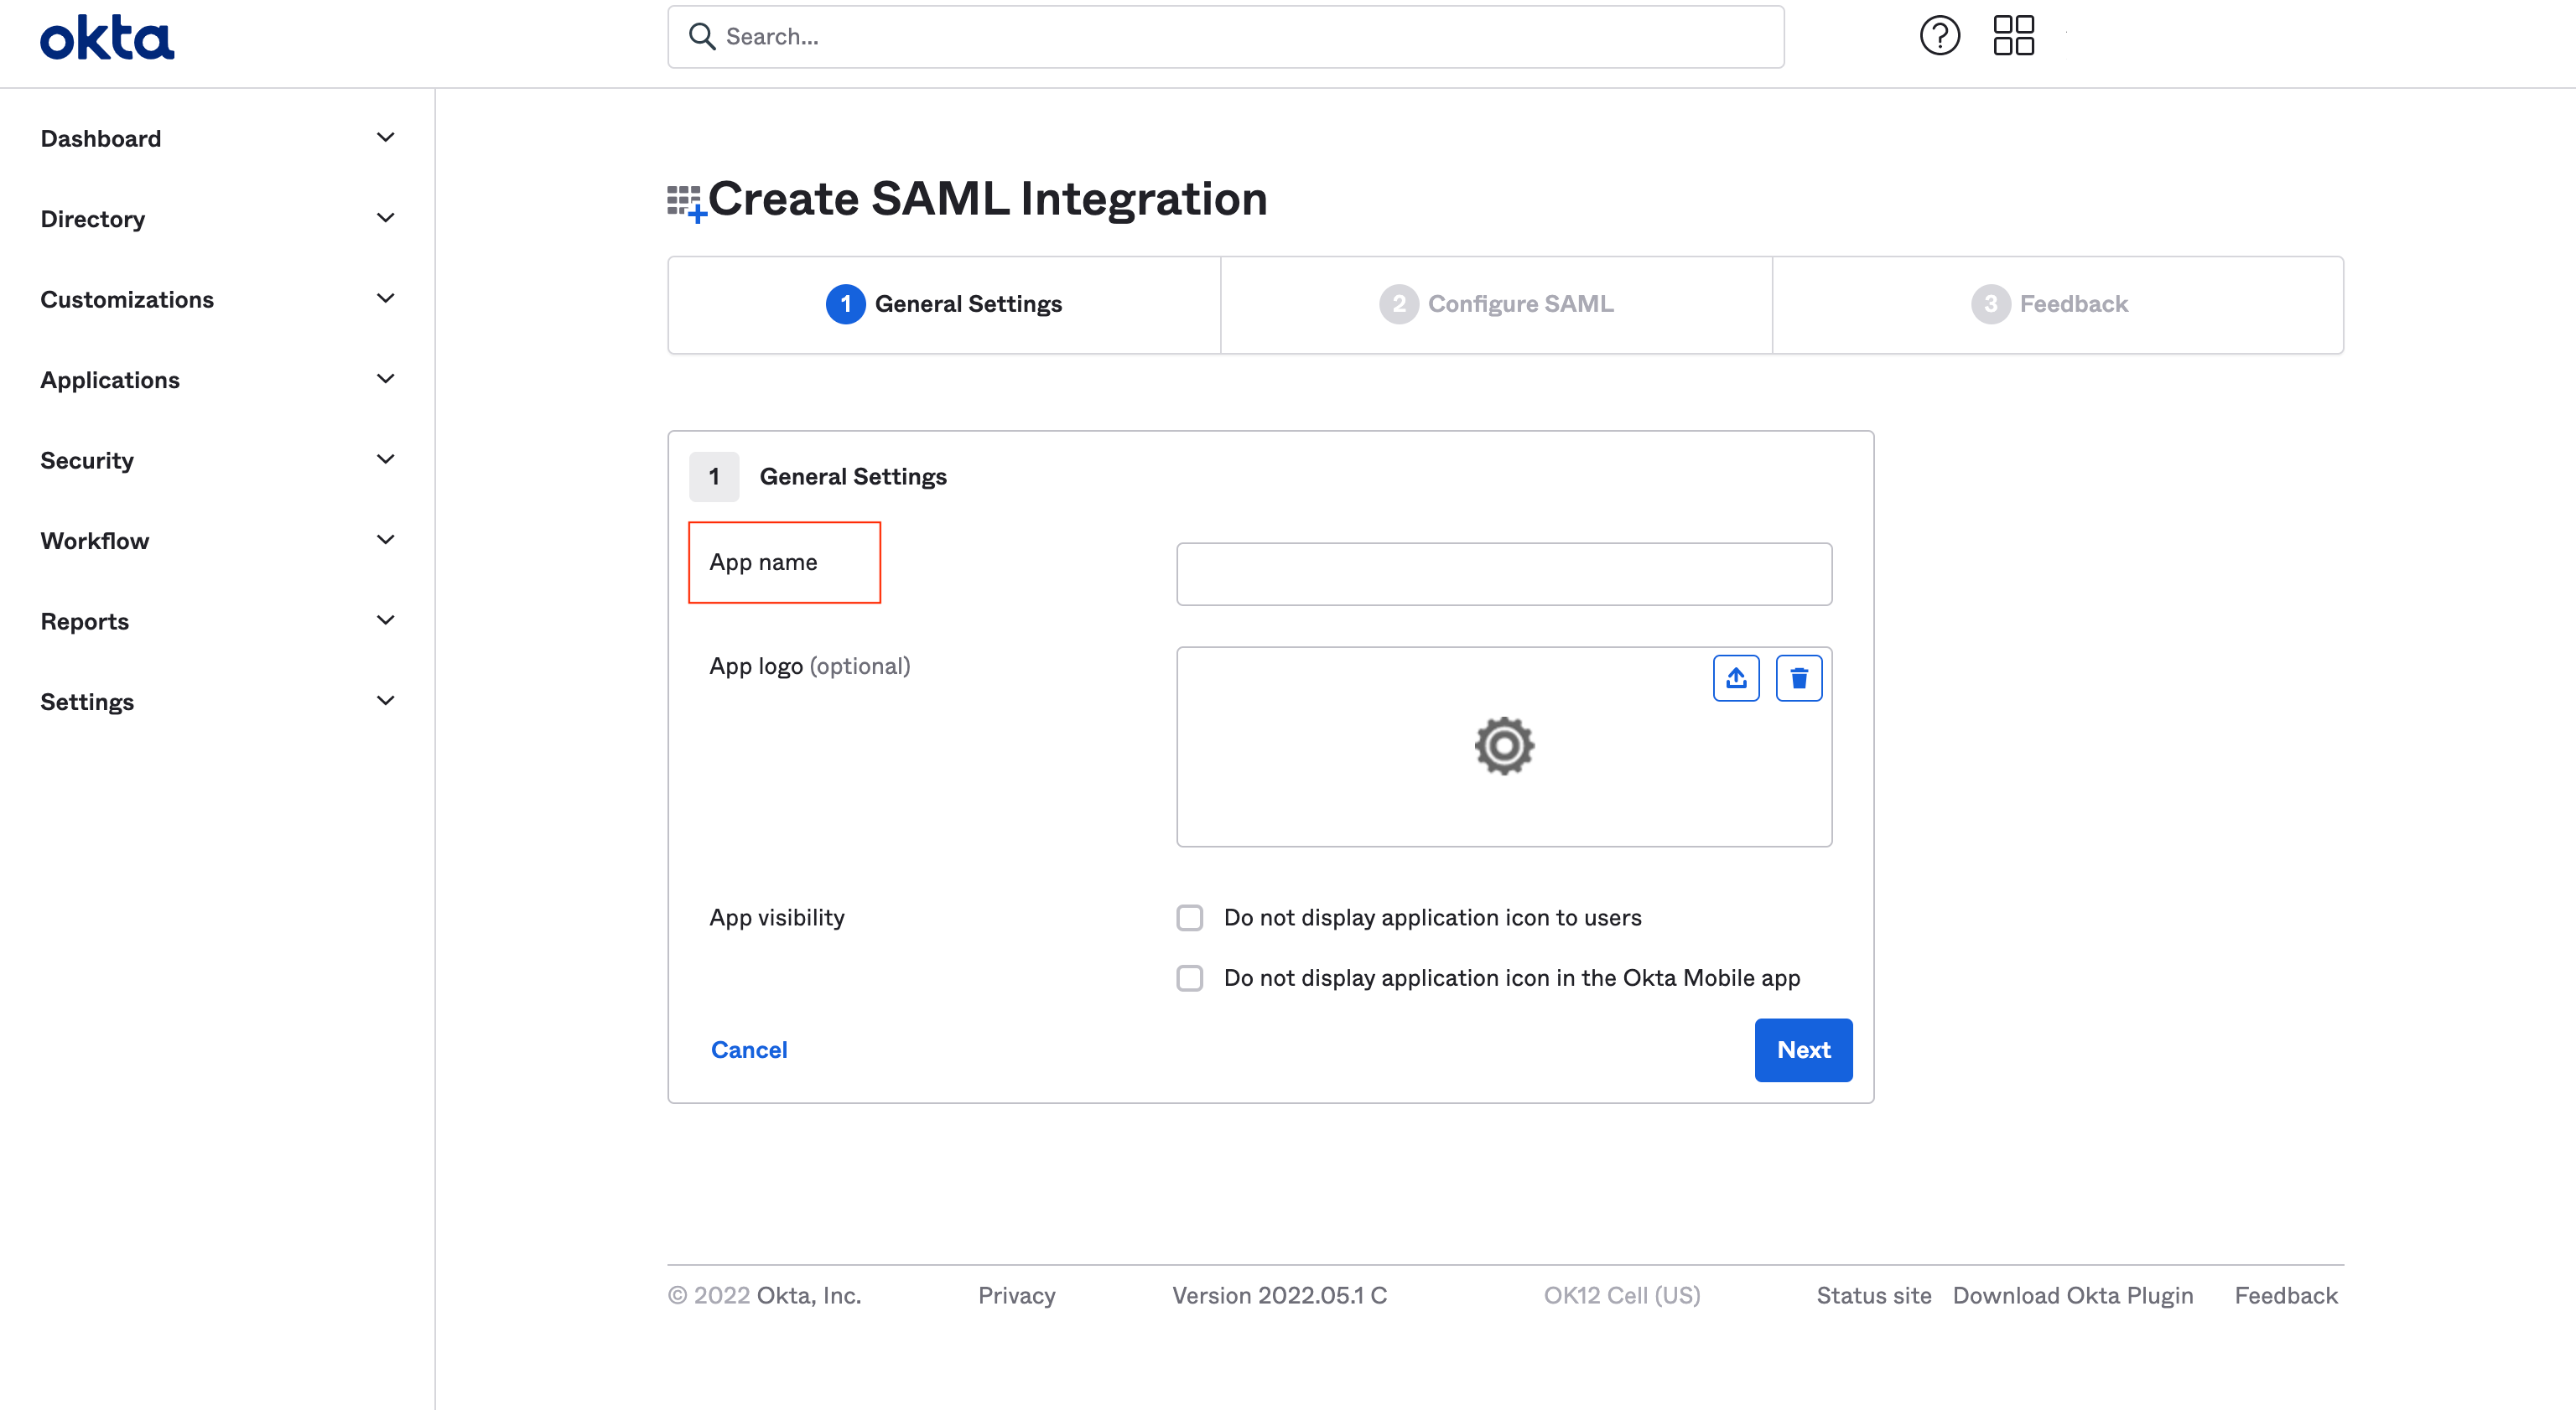
Step 5.
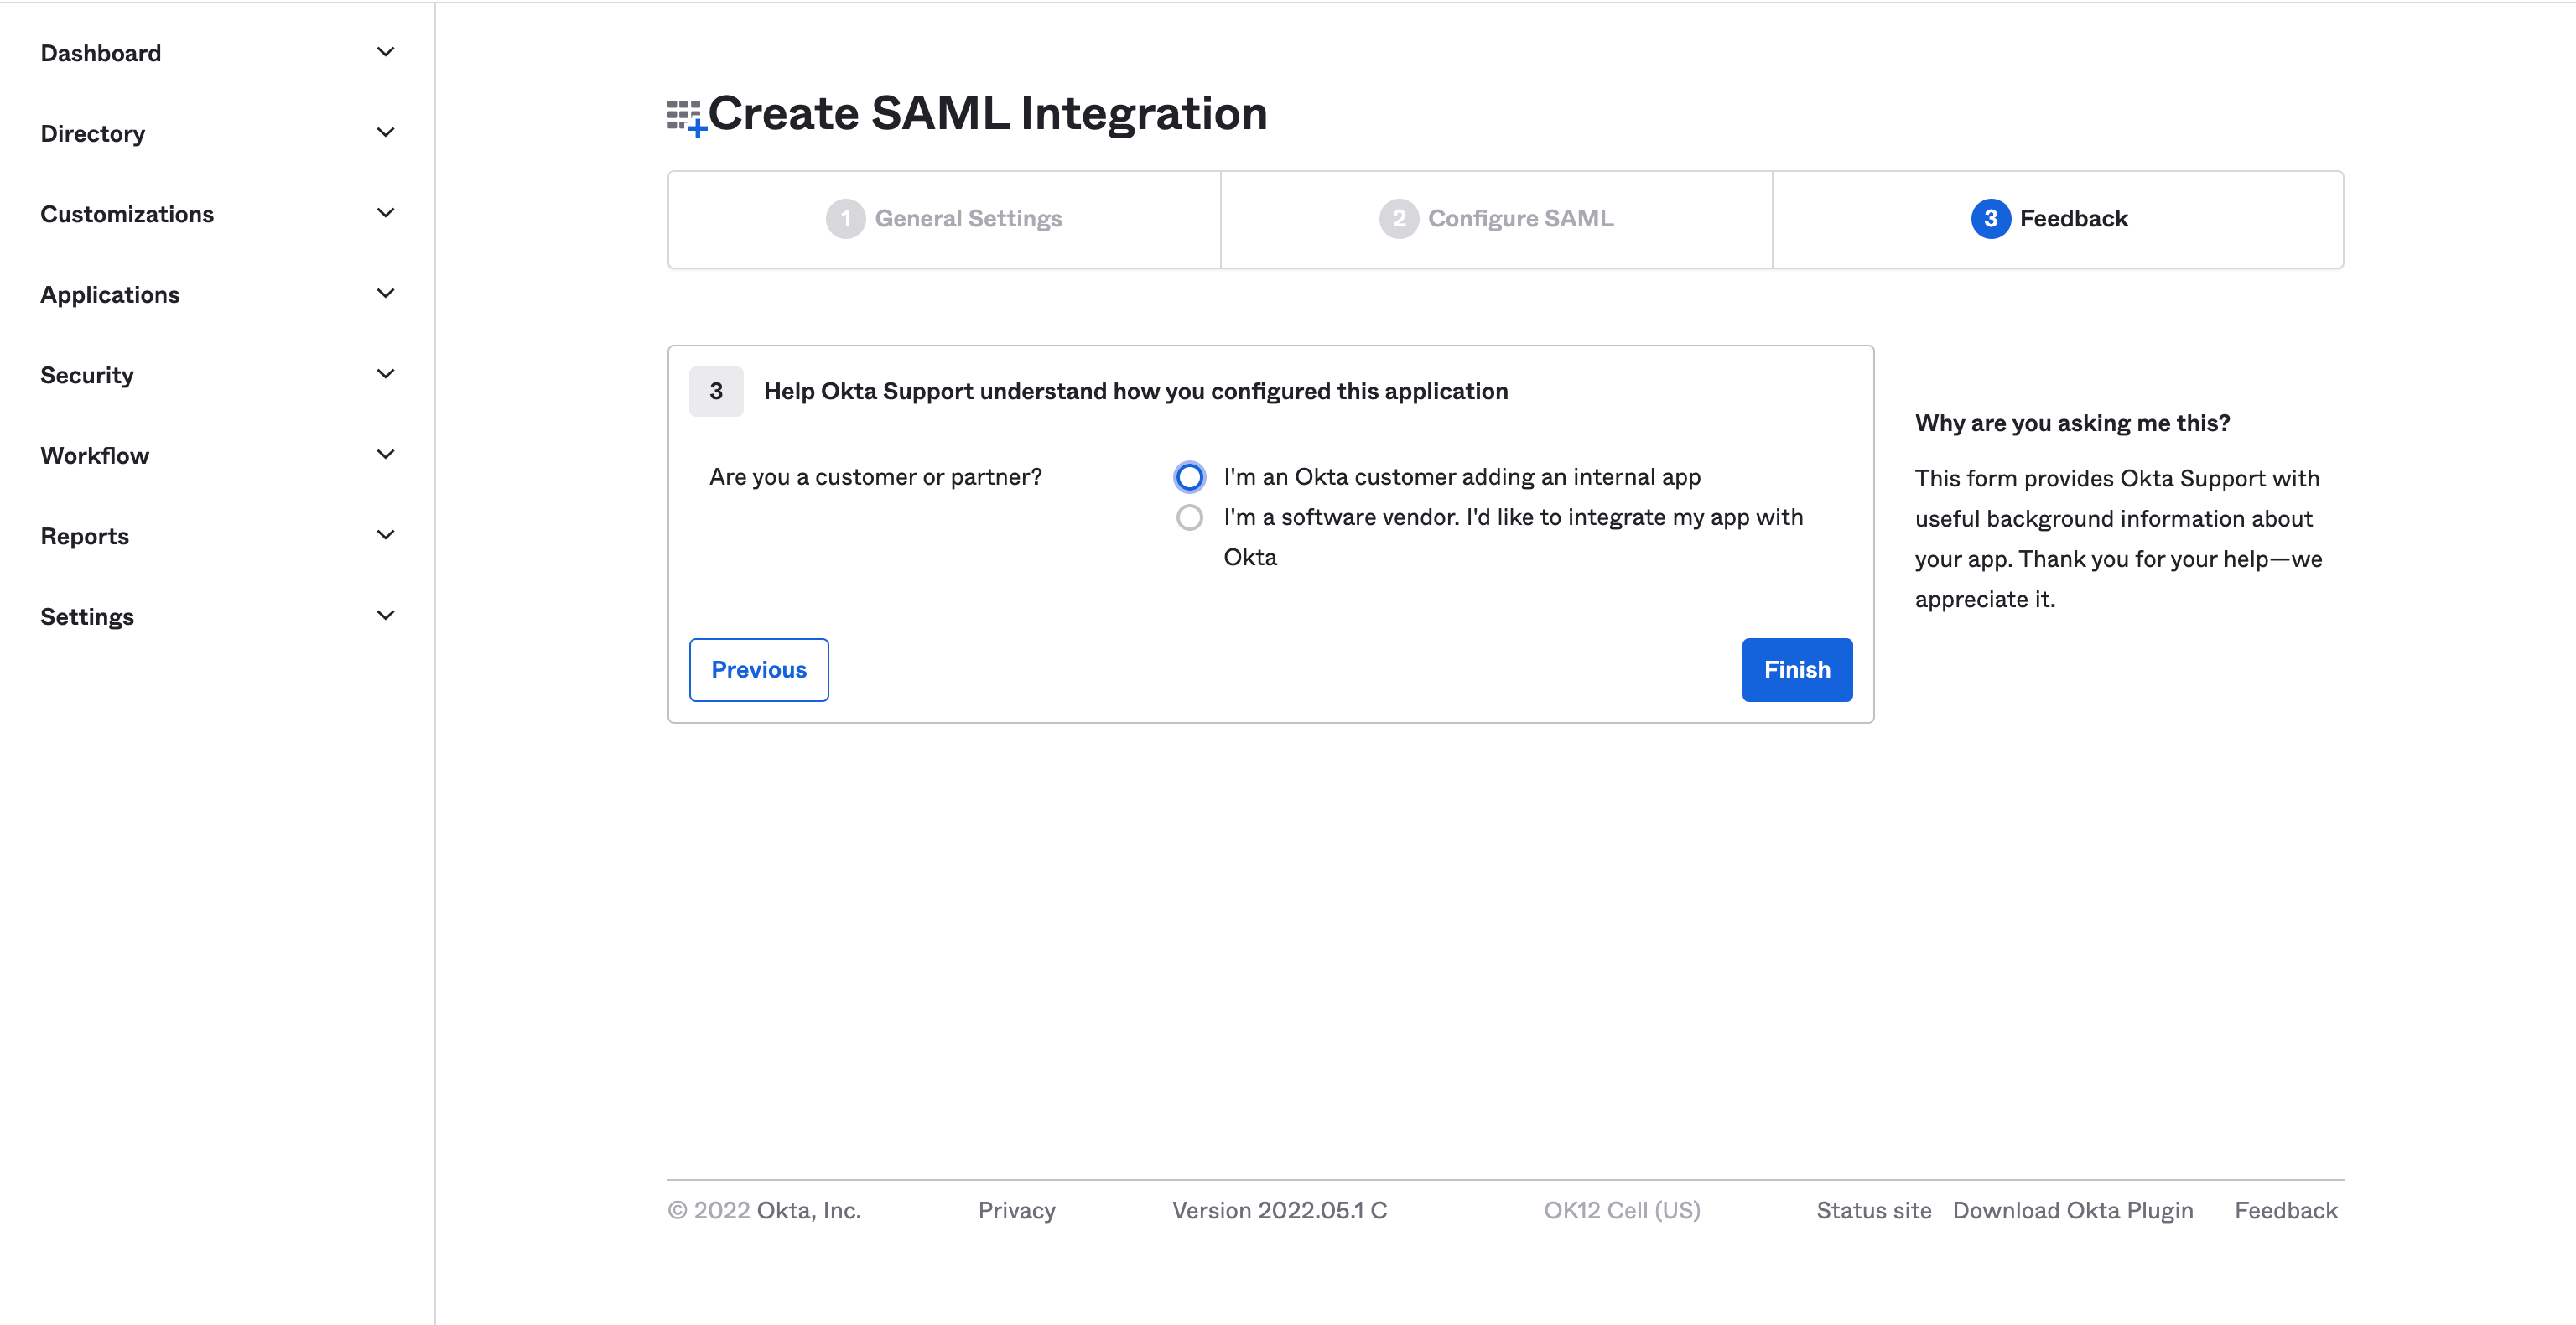
Create SAML Integration in next steps:
- Fill General Settings and click Next button.
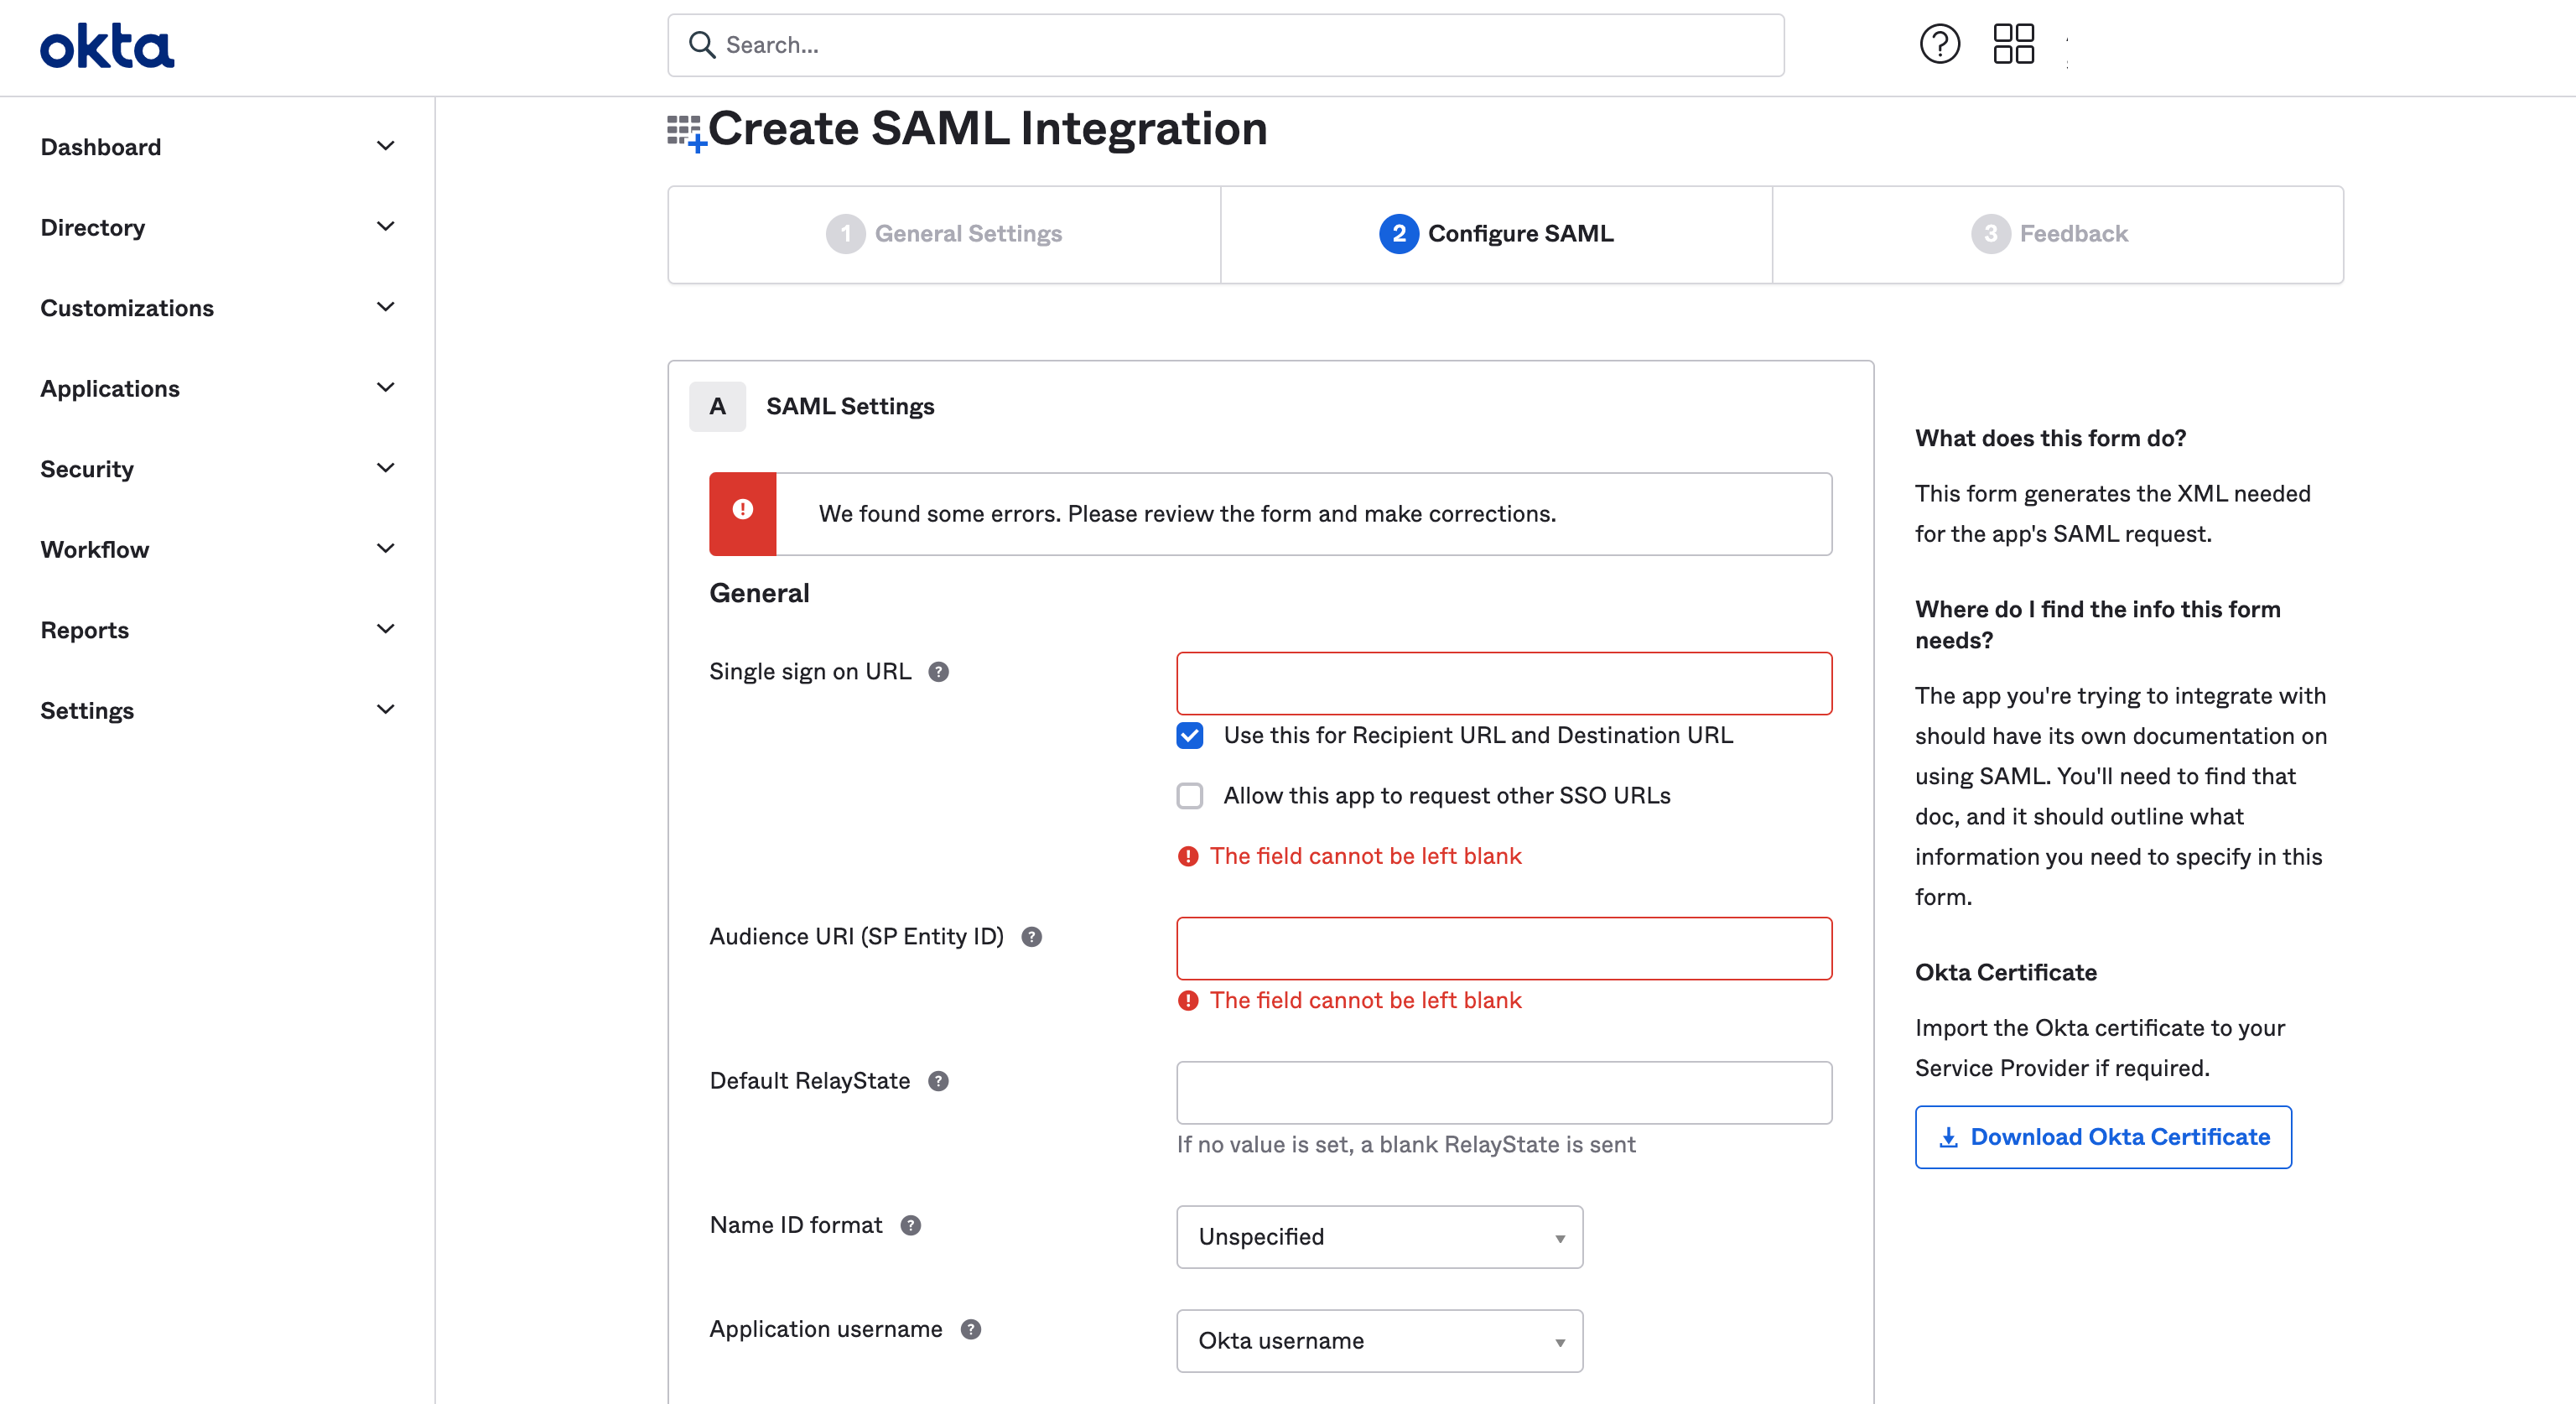
- Configure SAML and click Next button. Mandatory fields are: Single sign on URL and Audience URI (SP Entity ID).
- Leave your feedback and press Finish button.
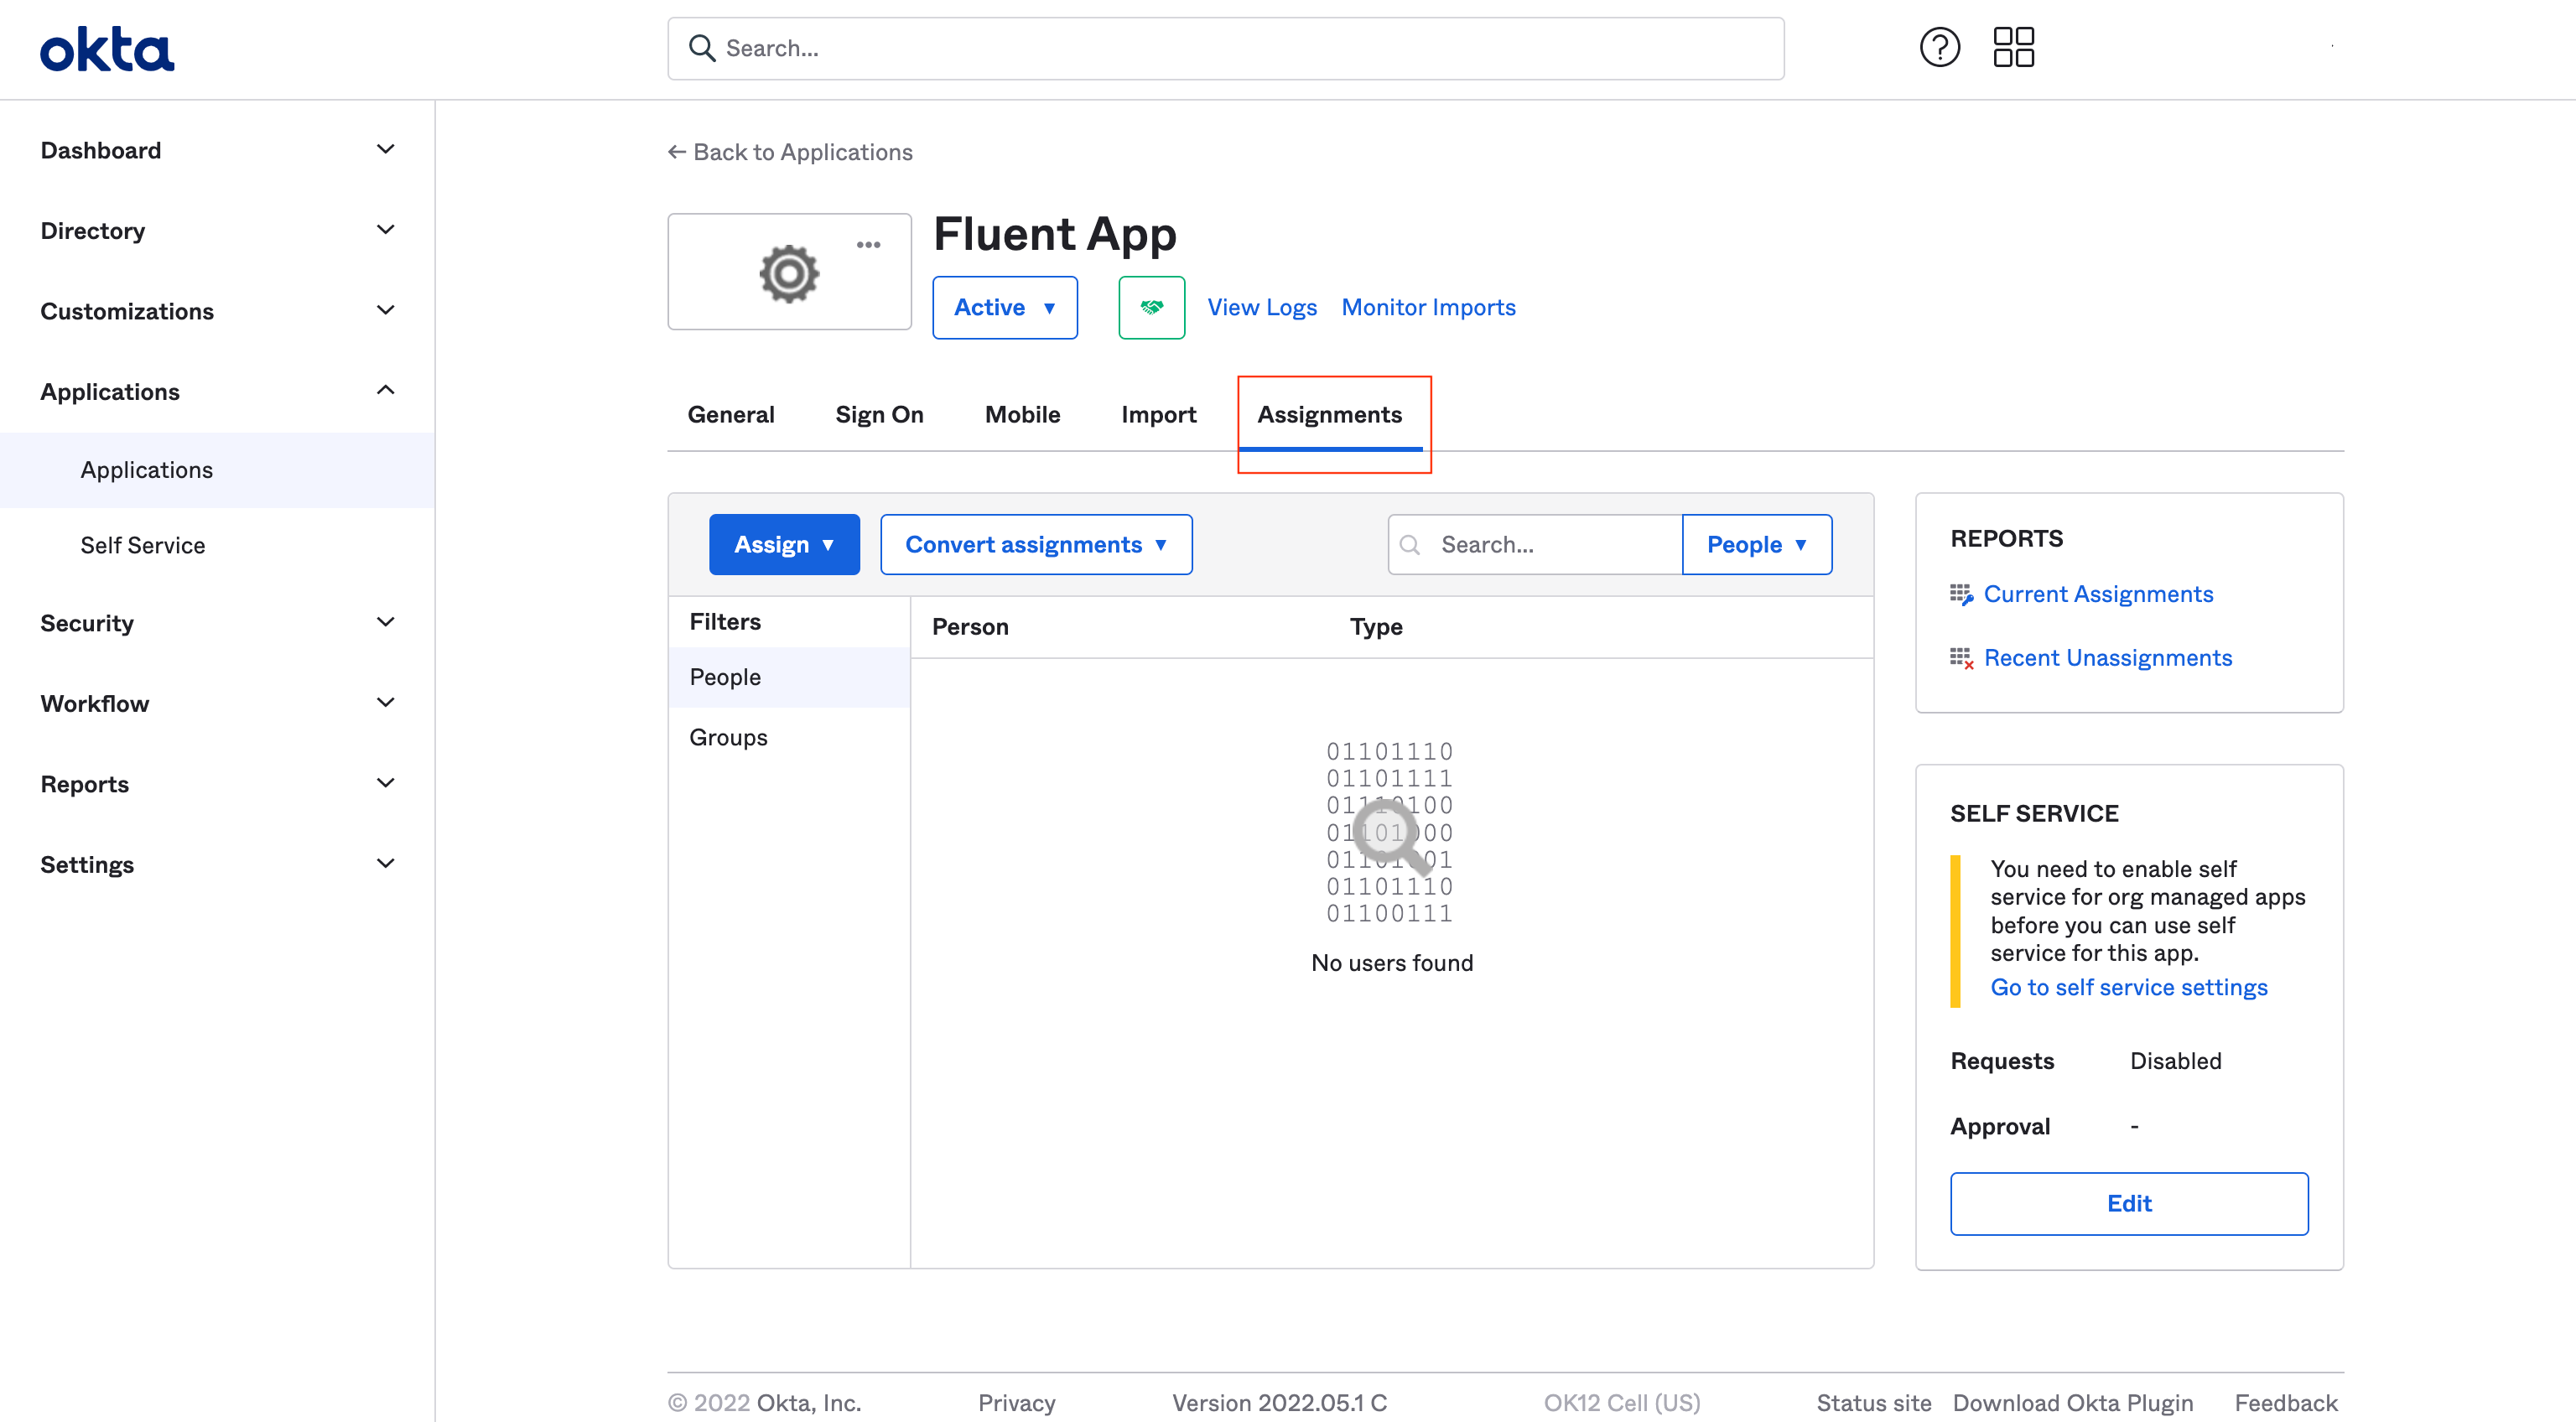
Step 6.
Go to Assignments tab
Add people or groups according to your requirements. This is always can be done later.
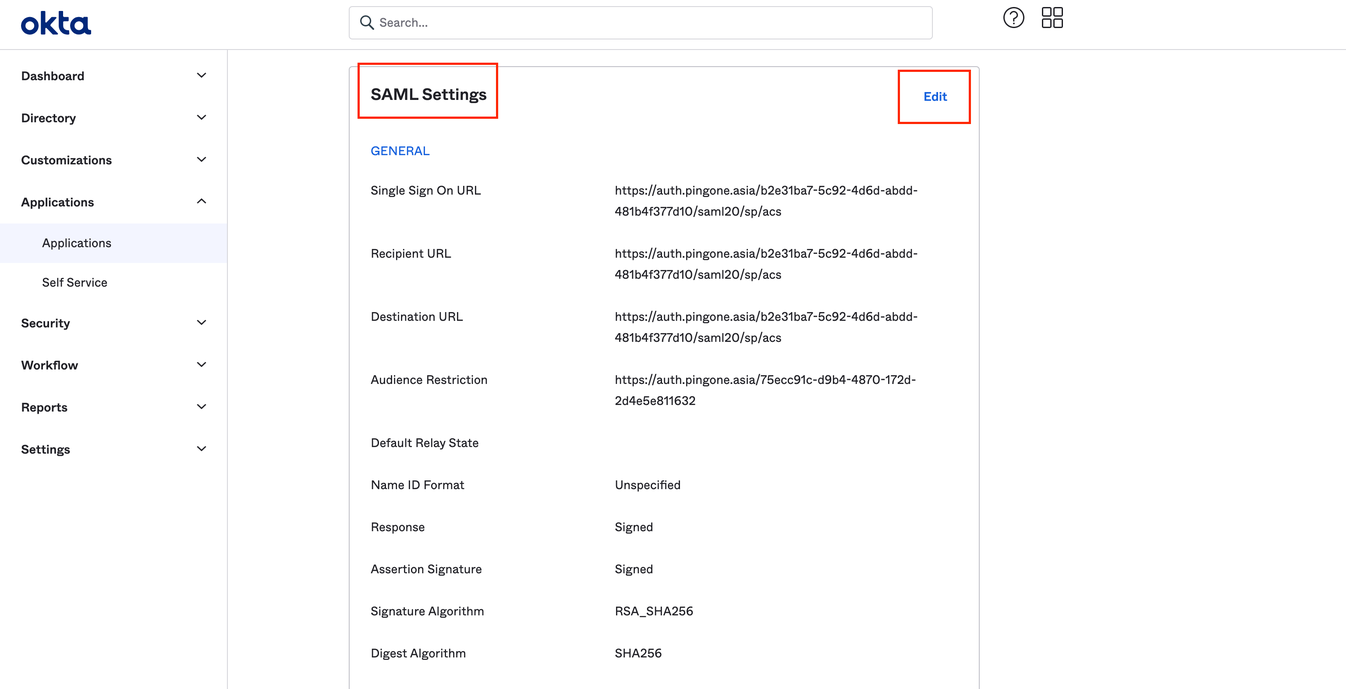
Step 7.
To edit the application (replace URL template with ACS ENDPOINT from Ping Identity) the following steps:
- Go Application > General > SAML Settings and press Edit button.
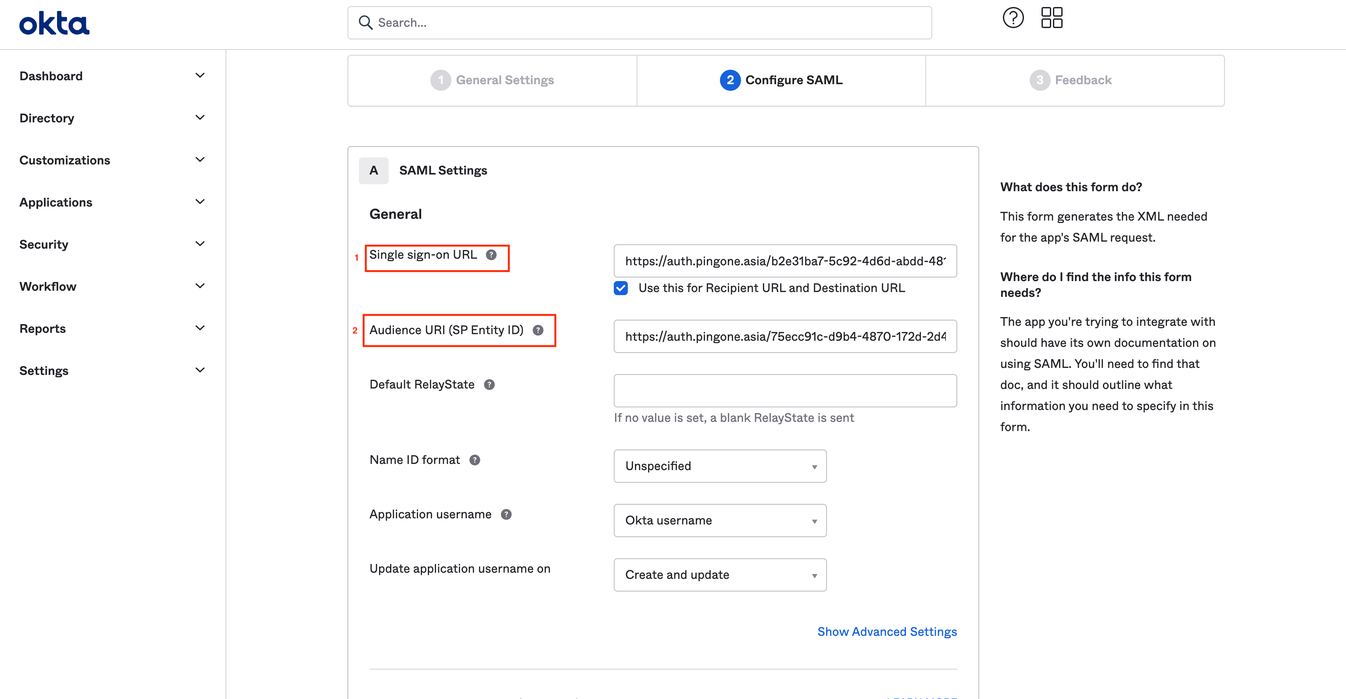
- On step Edit SAML Integration go to Configure SAML tab and paste:
- URL from Ping Identity ACS ENDPOINT field in the field Single sign-on URL;
- Value PINGONE (SP) ENTITY ID from PingIdentity in the field Audience URI (SP Entity ID).
II. Add the identity provider in PingOne
follow these steps below:
Step 1.
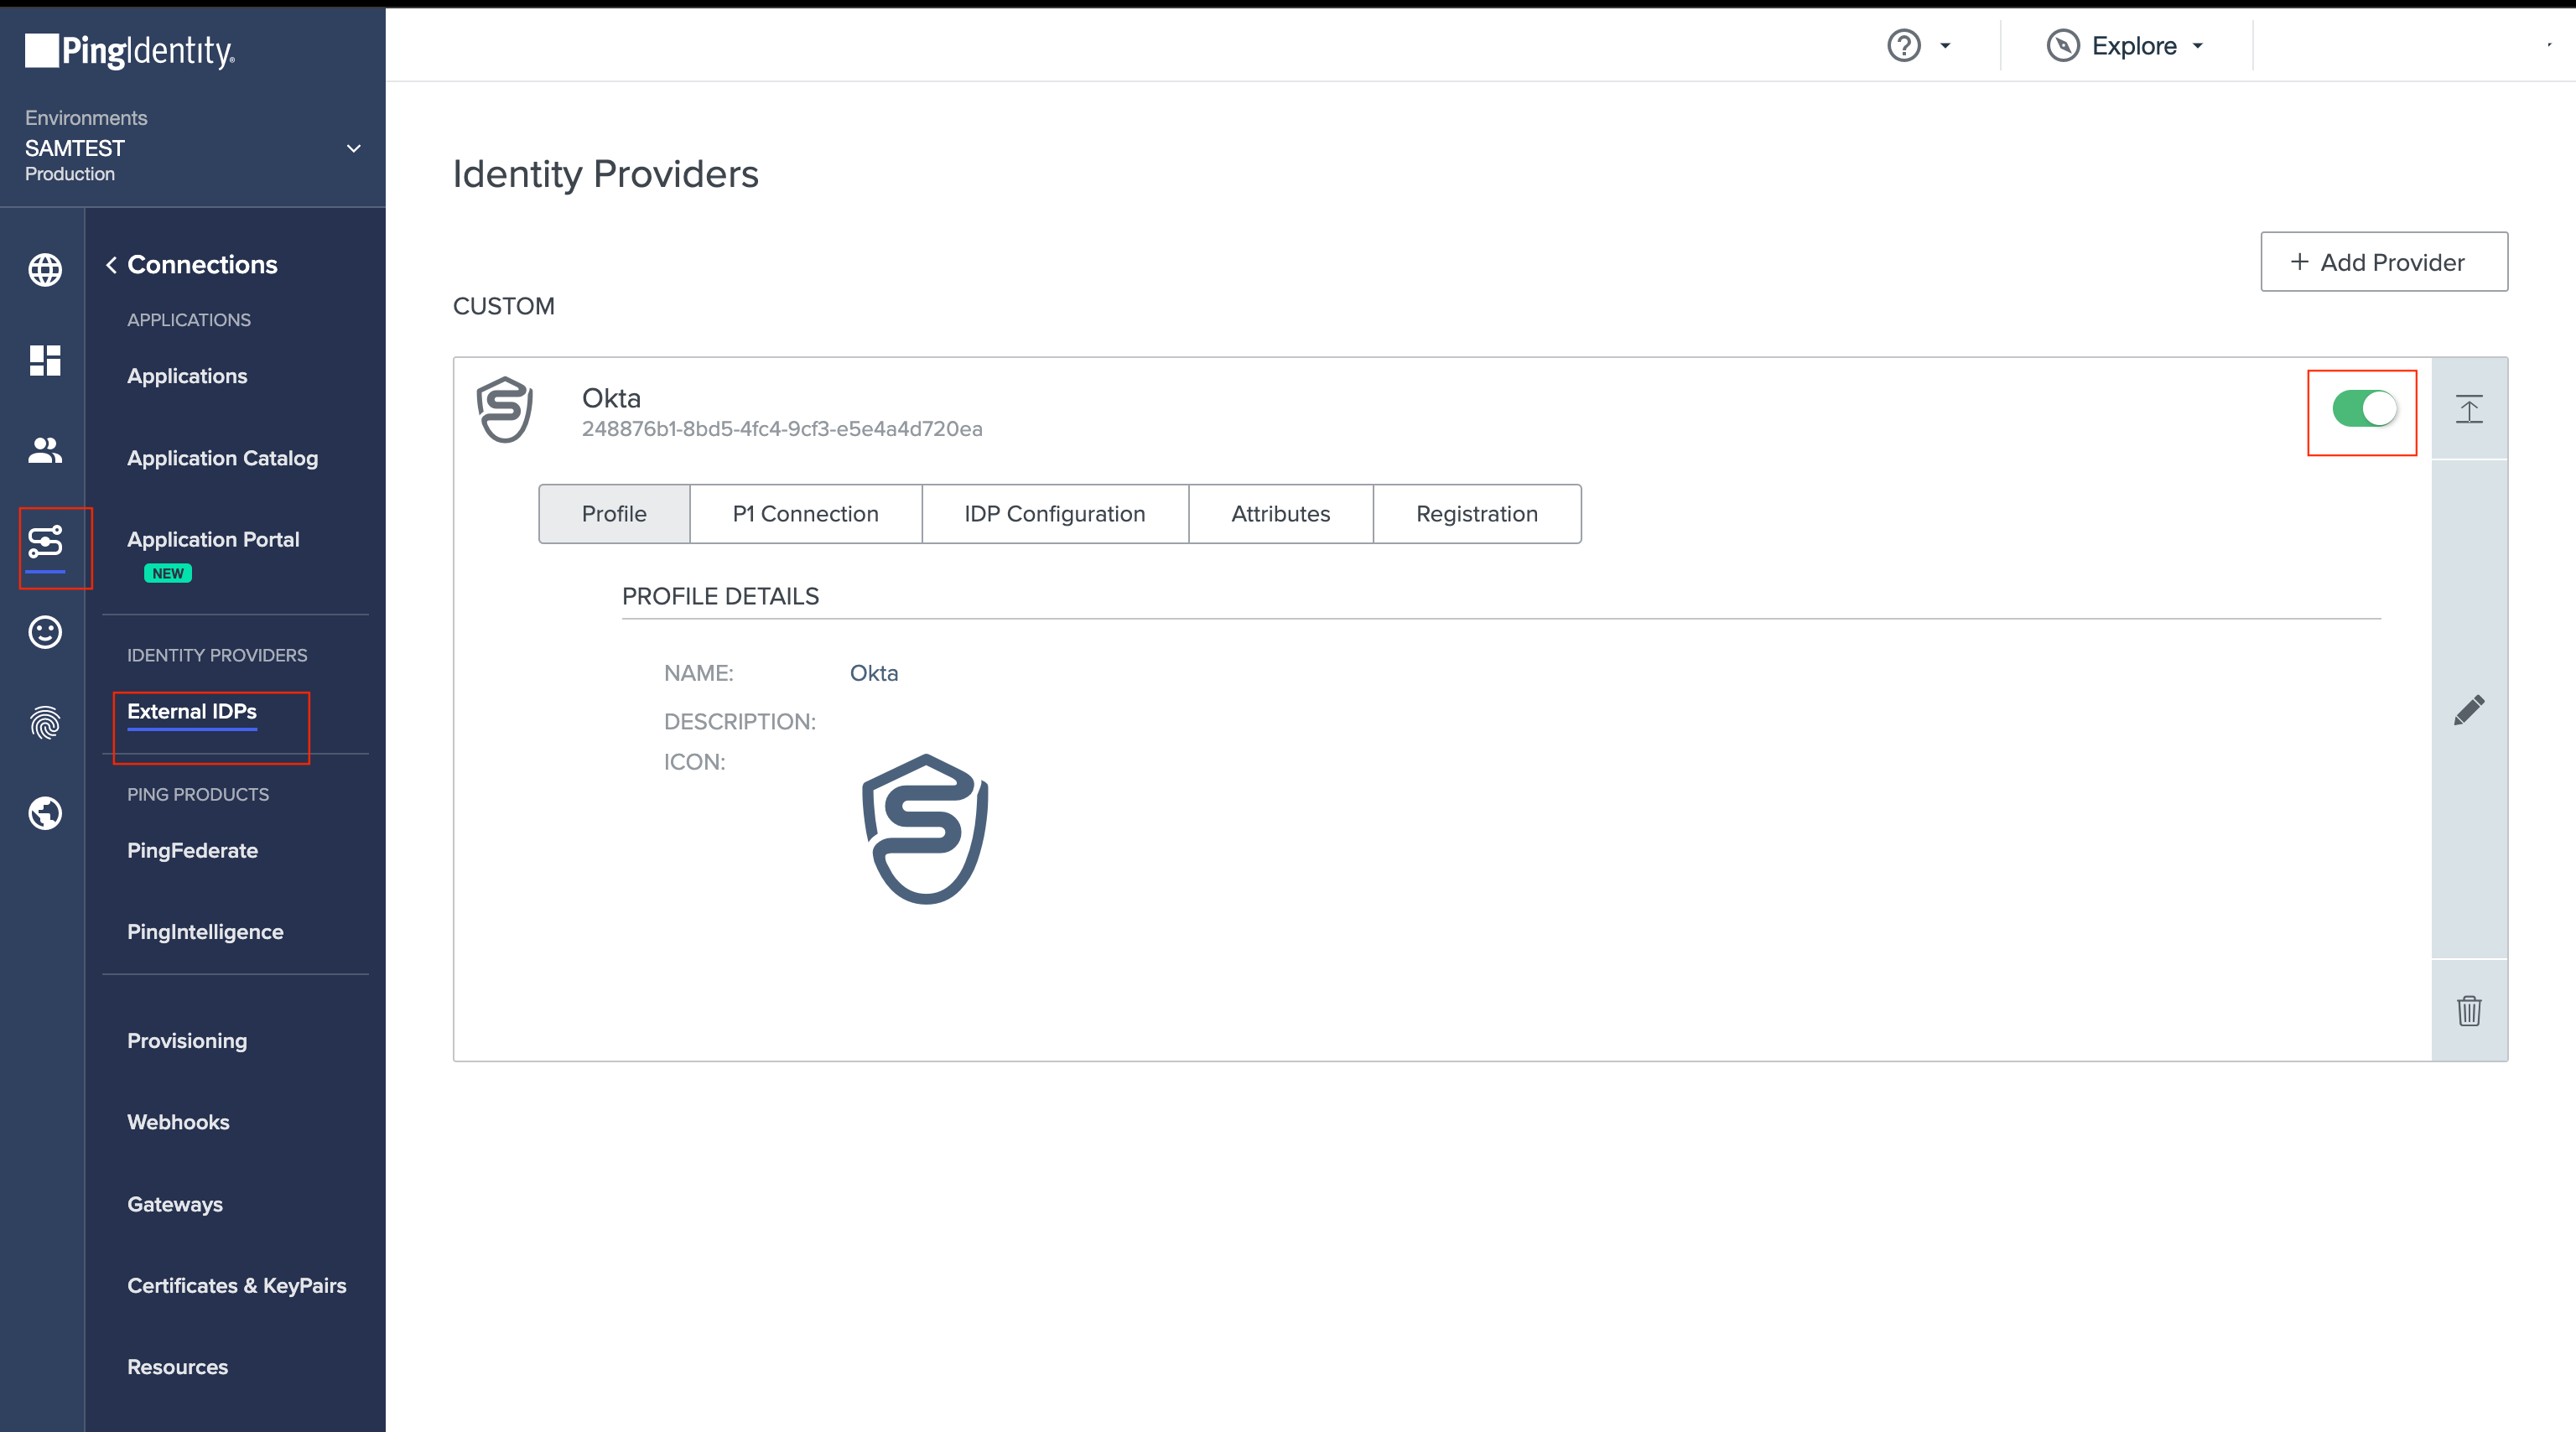
Go to Connections → External IDPs.
Step 2.
Click + Add Provider.
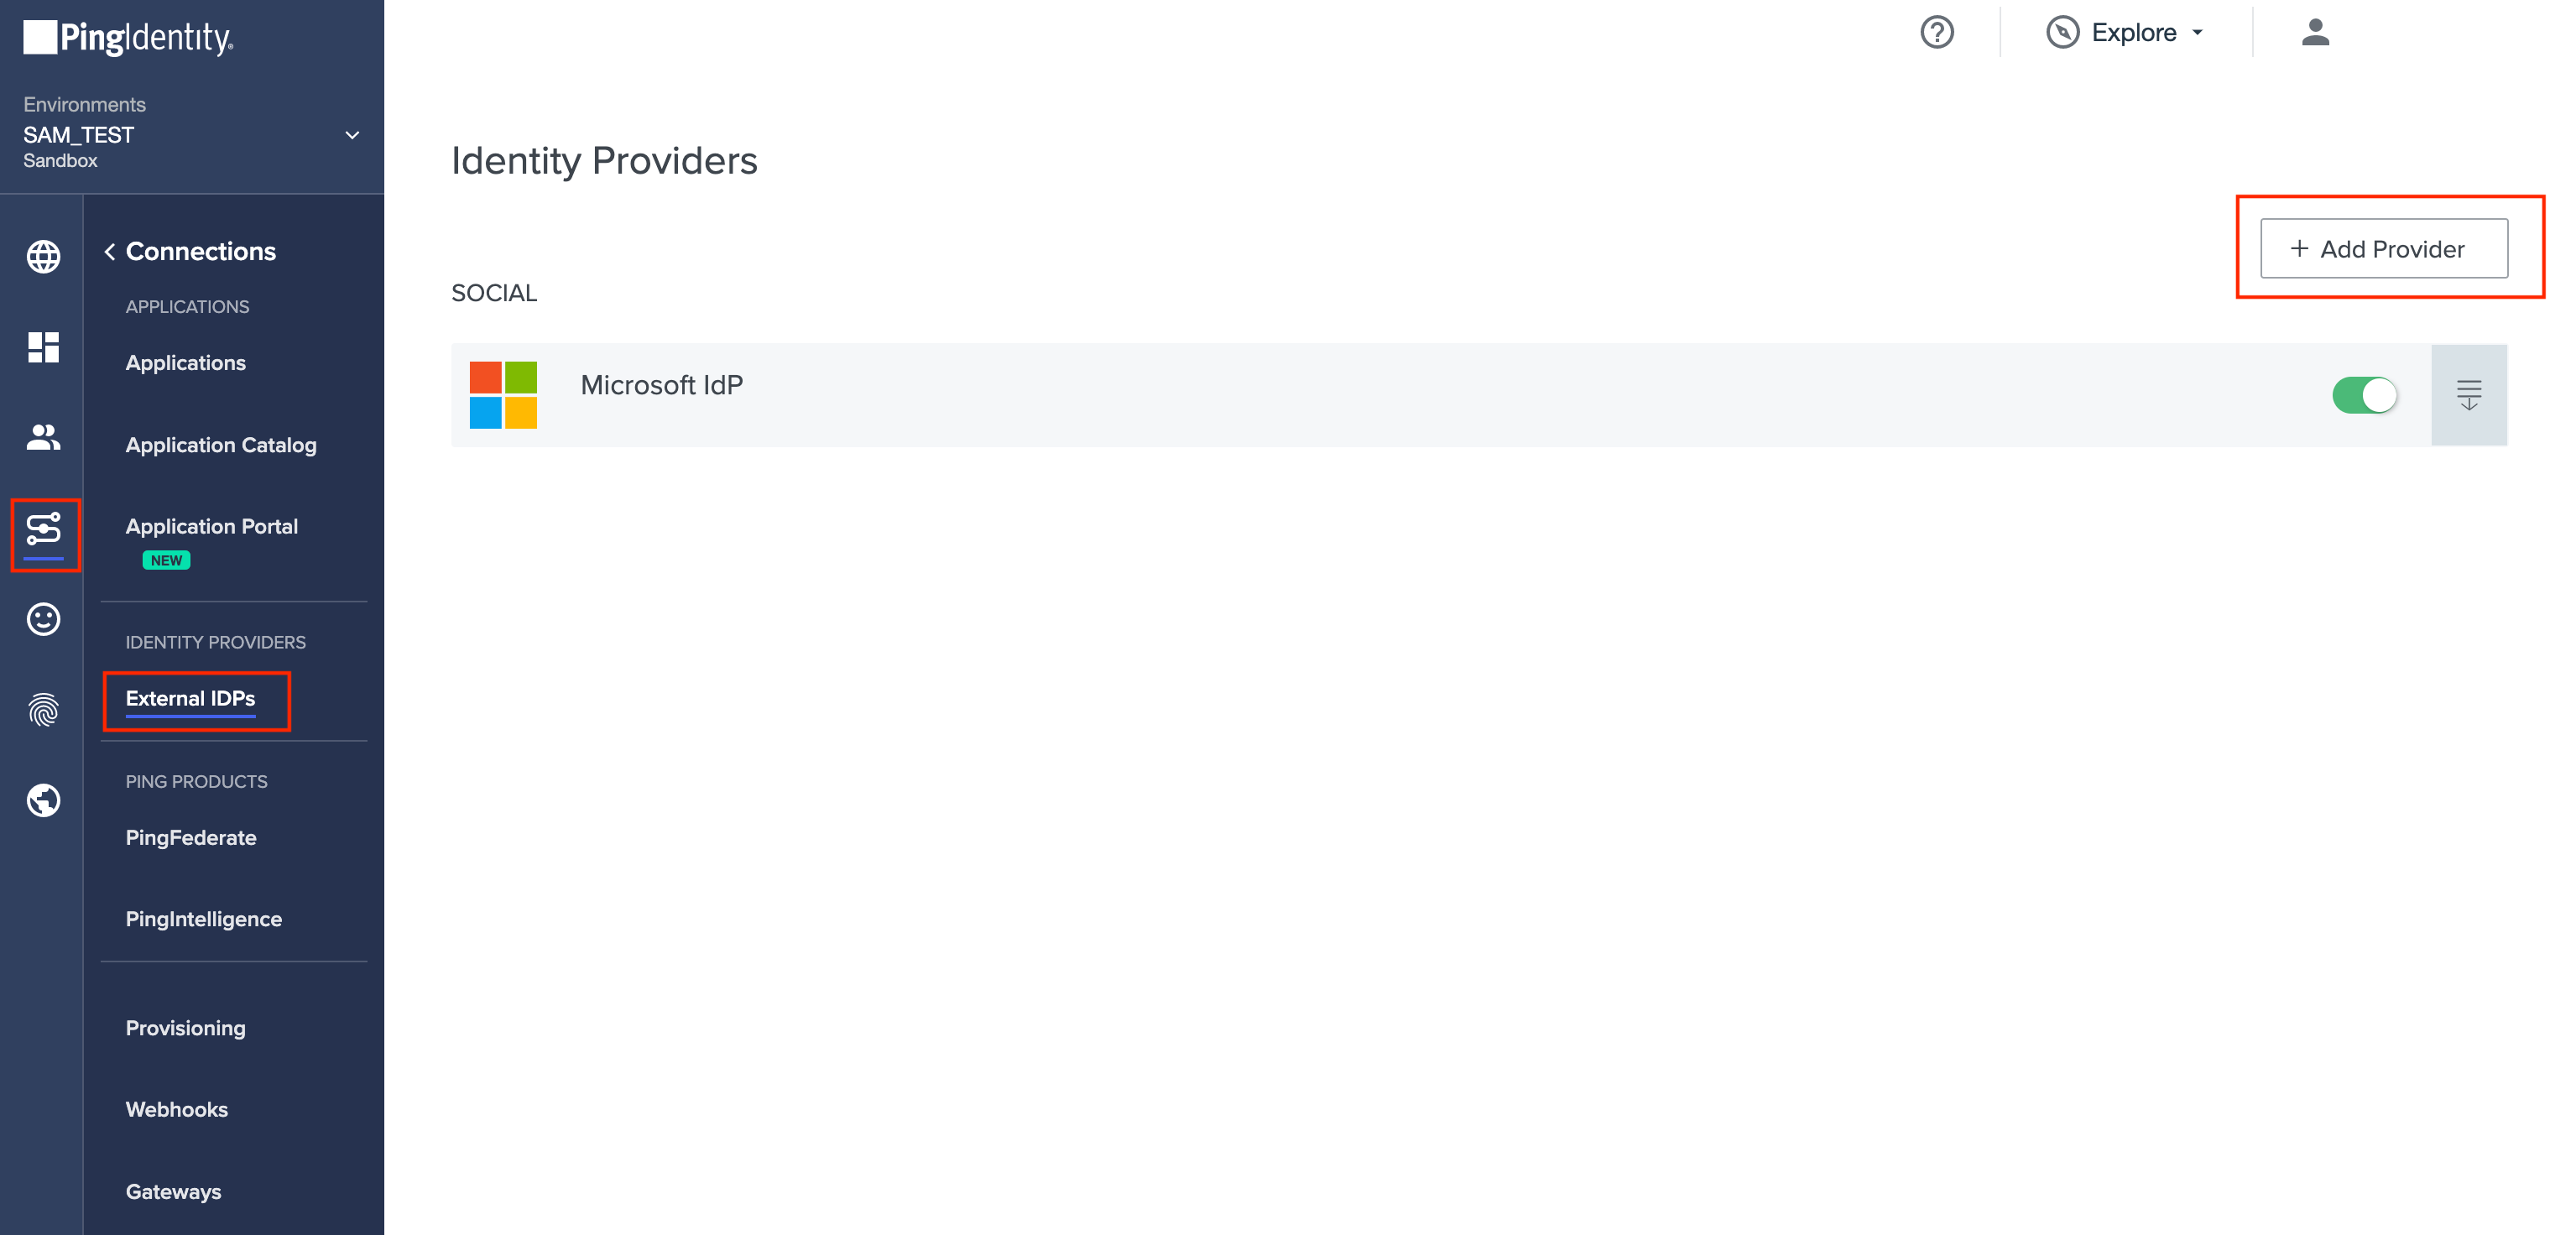
Step 3.
Click SAML.

Step 4.
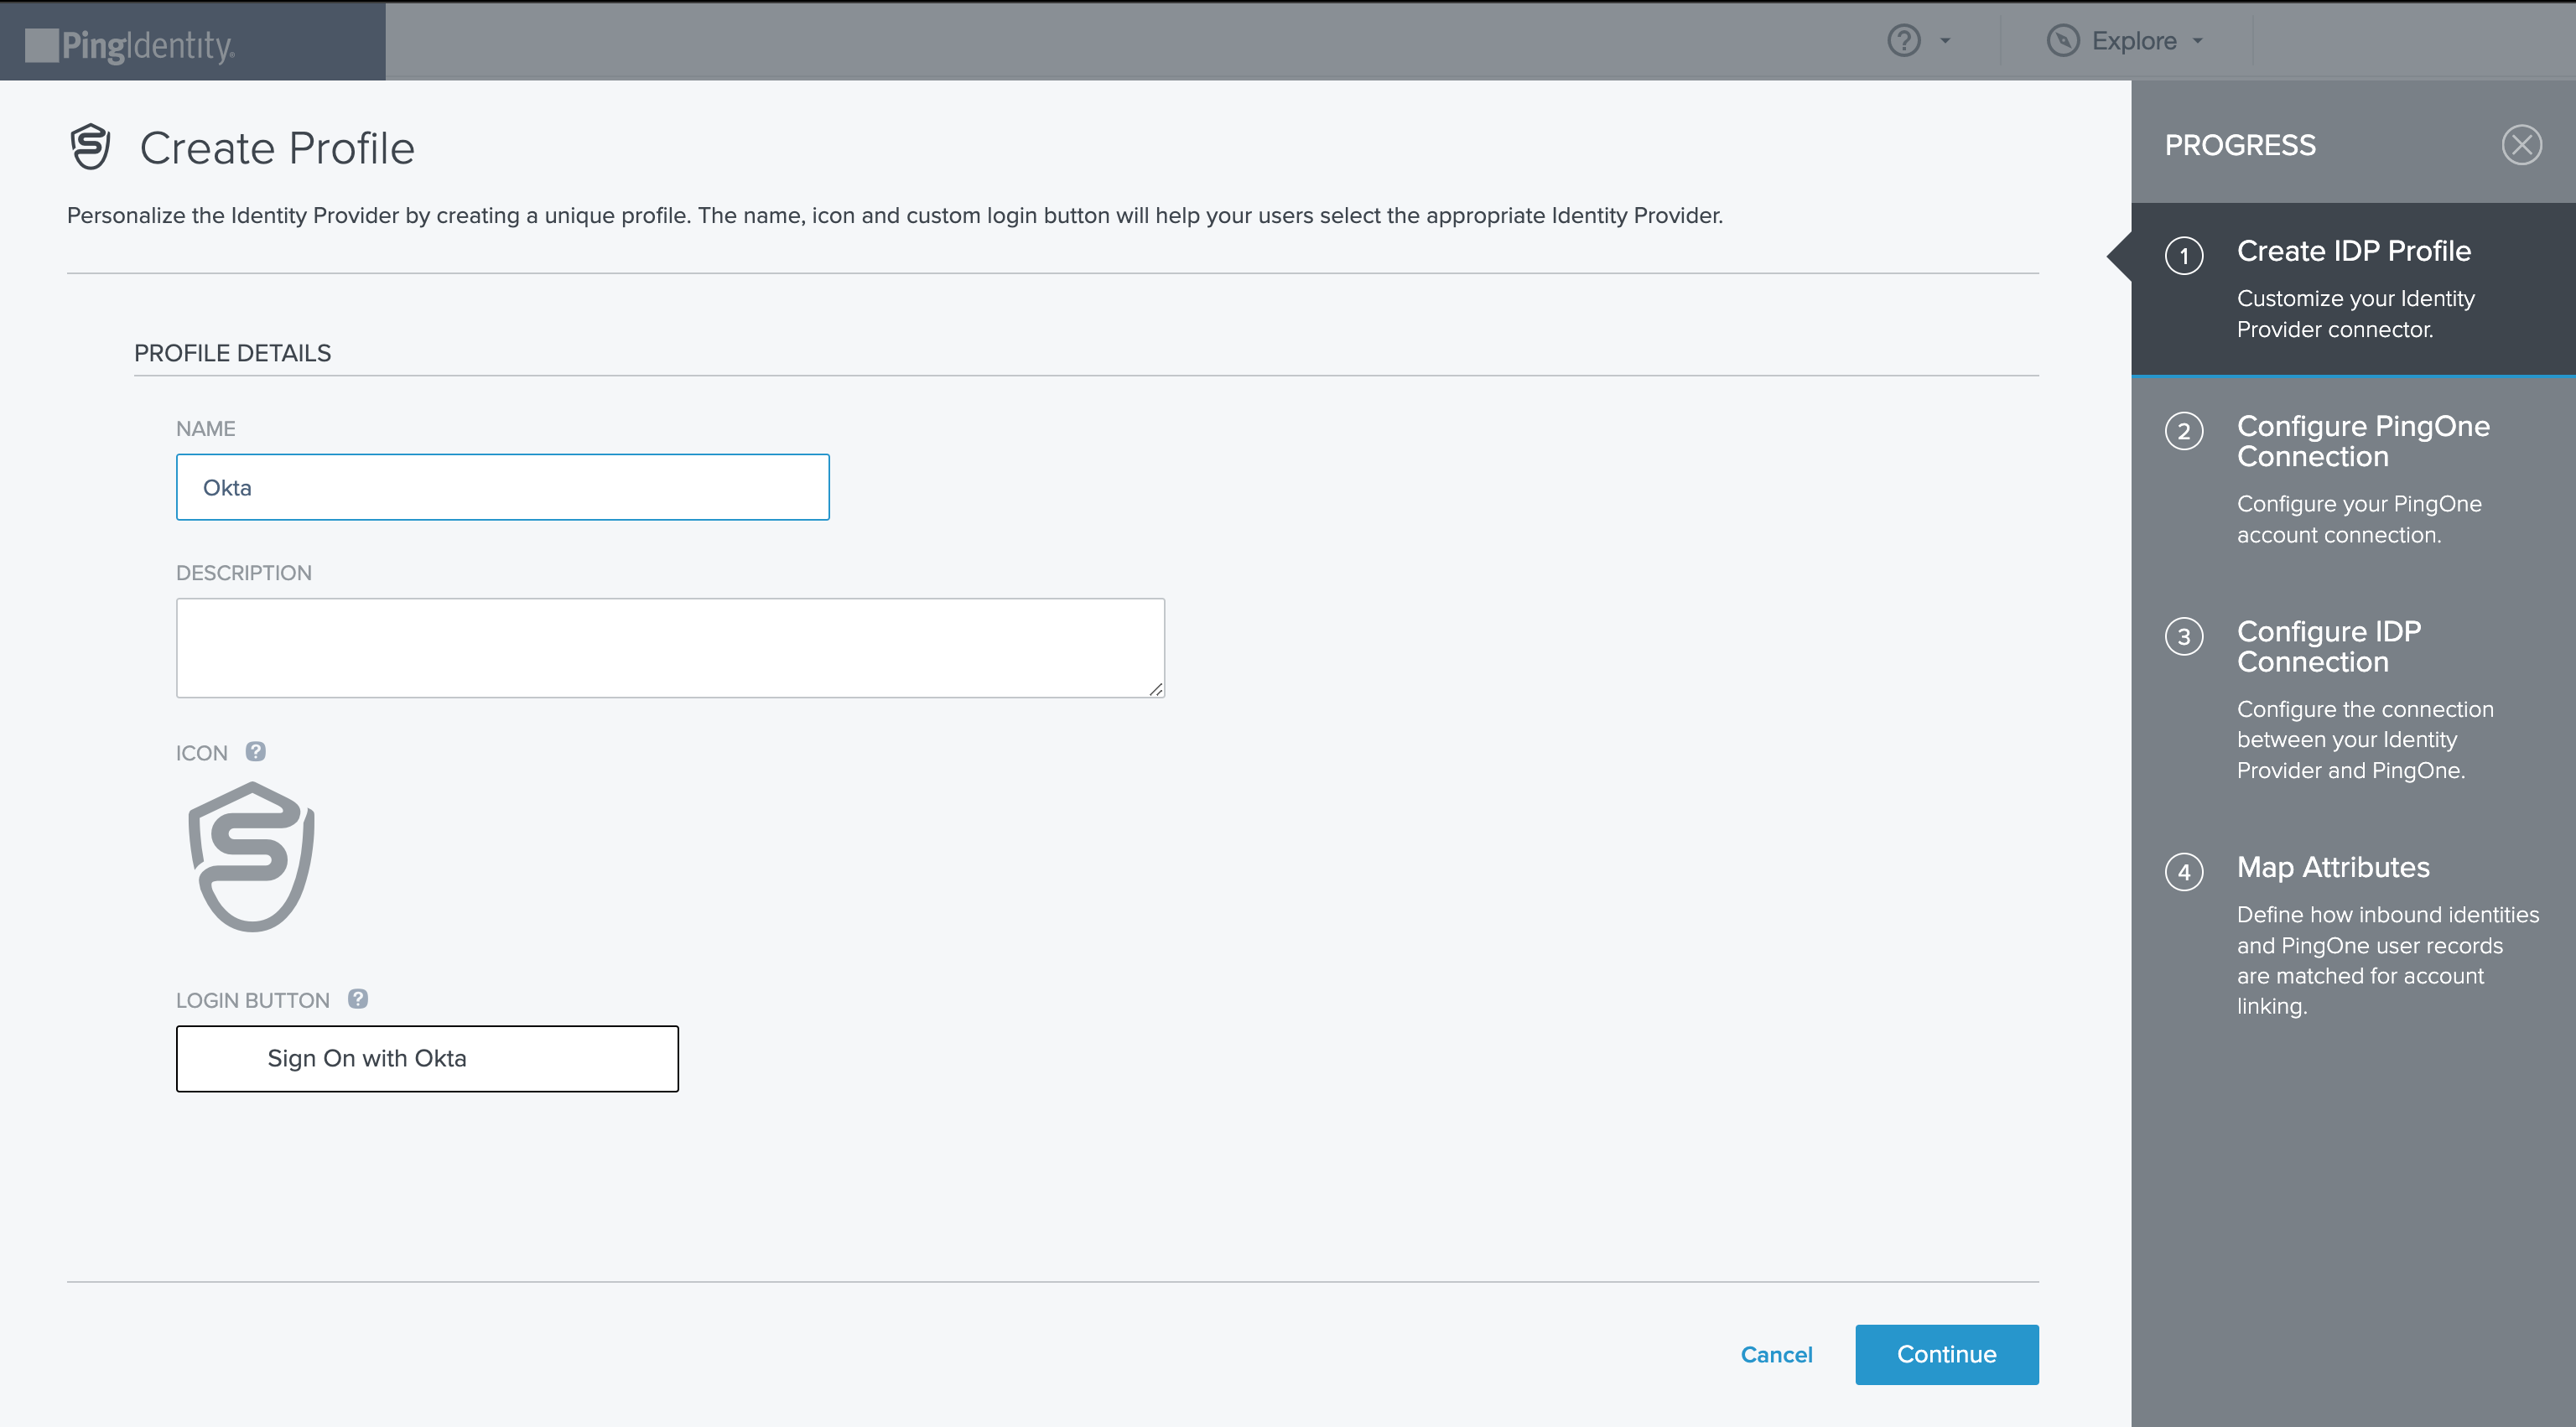
On the Create Profile screen, enter the following:
- Name. A unique identifier for the identity provider.
- Description (optional). A brief characterization of the identity provider.
- Icon (optional). An image to represent the identity provider. Use a file up to 1MB in JPG, JPEG, GIF, or PNG format.
- Login button (optional). An image to be used for the login button that the end user will see. Use a 300 X 42 pixel image.
Step 5.
Click Continue.
Step 6.
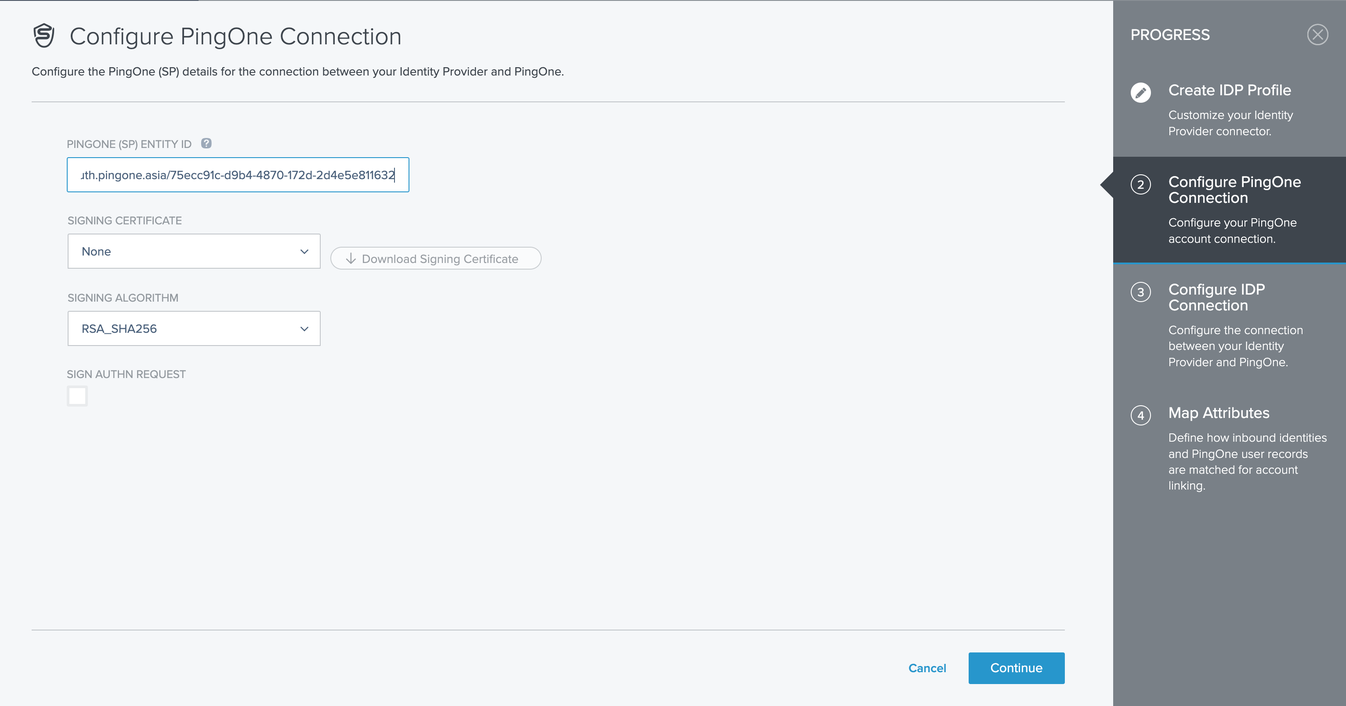
On the Configure PingOne Connection screen, following options can be configured:
- PingOne (SP) entity ID. The entity ID for the Service Provider, which is used as the when PingOne sends a request to the external identity provider (= Application (client) ID). The identity provider can also use this value to ensure that requests from the Service Provider are valid. By default, this ID is based on the value you entered for Name.
`Issuer` - Signing certificate. Specifies the service provider’s signing certificate.
- Signing algorithm. Select the algorithm to be used for signing metadata. The options are RSA\SHA256, RSA\SHA384, and RSA\SHA512.
- Sign AuthN request. Specifies whether the SAML authentication request will be signed when sending it to the identity provider.
Step 7.
Click Continue.
Step 8.
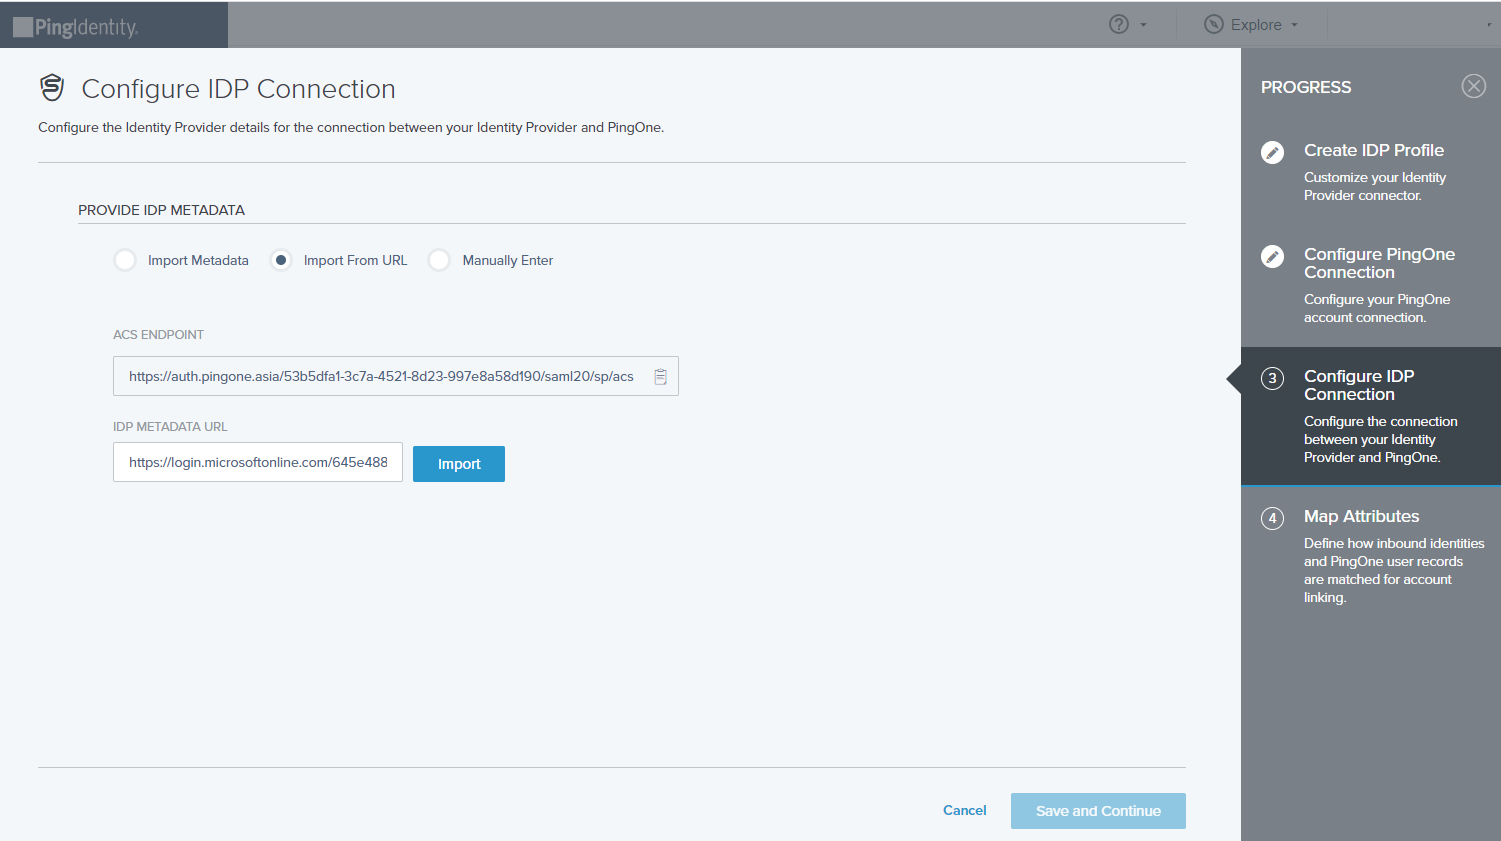
On the Configure IDP Connection screen, specify the details of the connection between the identity provider and PingOne. You can enter the values manually, or import them from a file.
- Import metadata. Select this option to import the configuration details from an XML metadata file. Click Choose, and then select an XML metadata file on your file system. Click Open.
- Import from URL. Select this option to import the configuration details from an IdP metadata URL. The URL must be a valid absolute URL. Enter the URL and then click Import.
III. Add Metadata URL
follow these steps below:
Step 1.
Go to Okta > Applications > Application > Sign On.
Step 2.
Click on Actions button and select View IdP metadata.

Step 3.
Copy URL from the page.
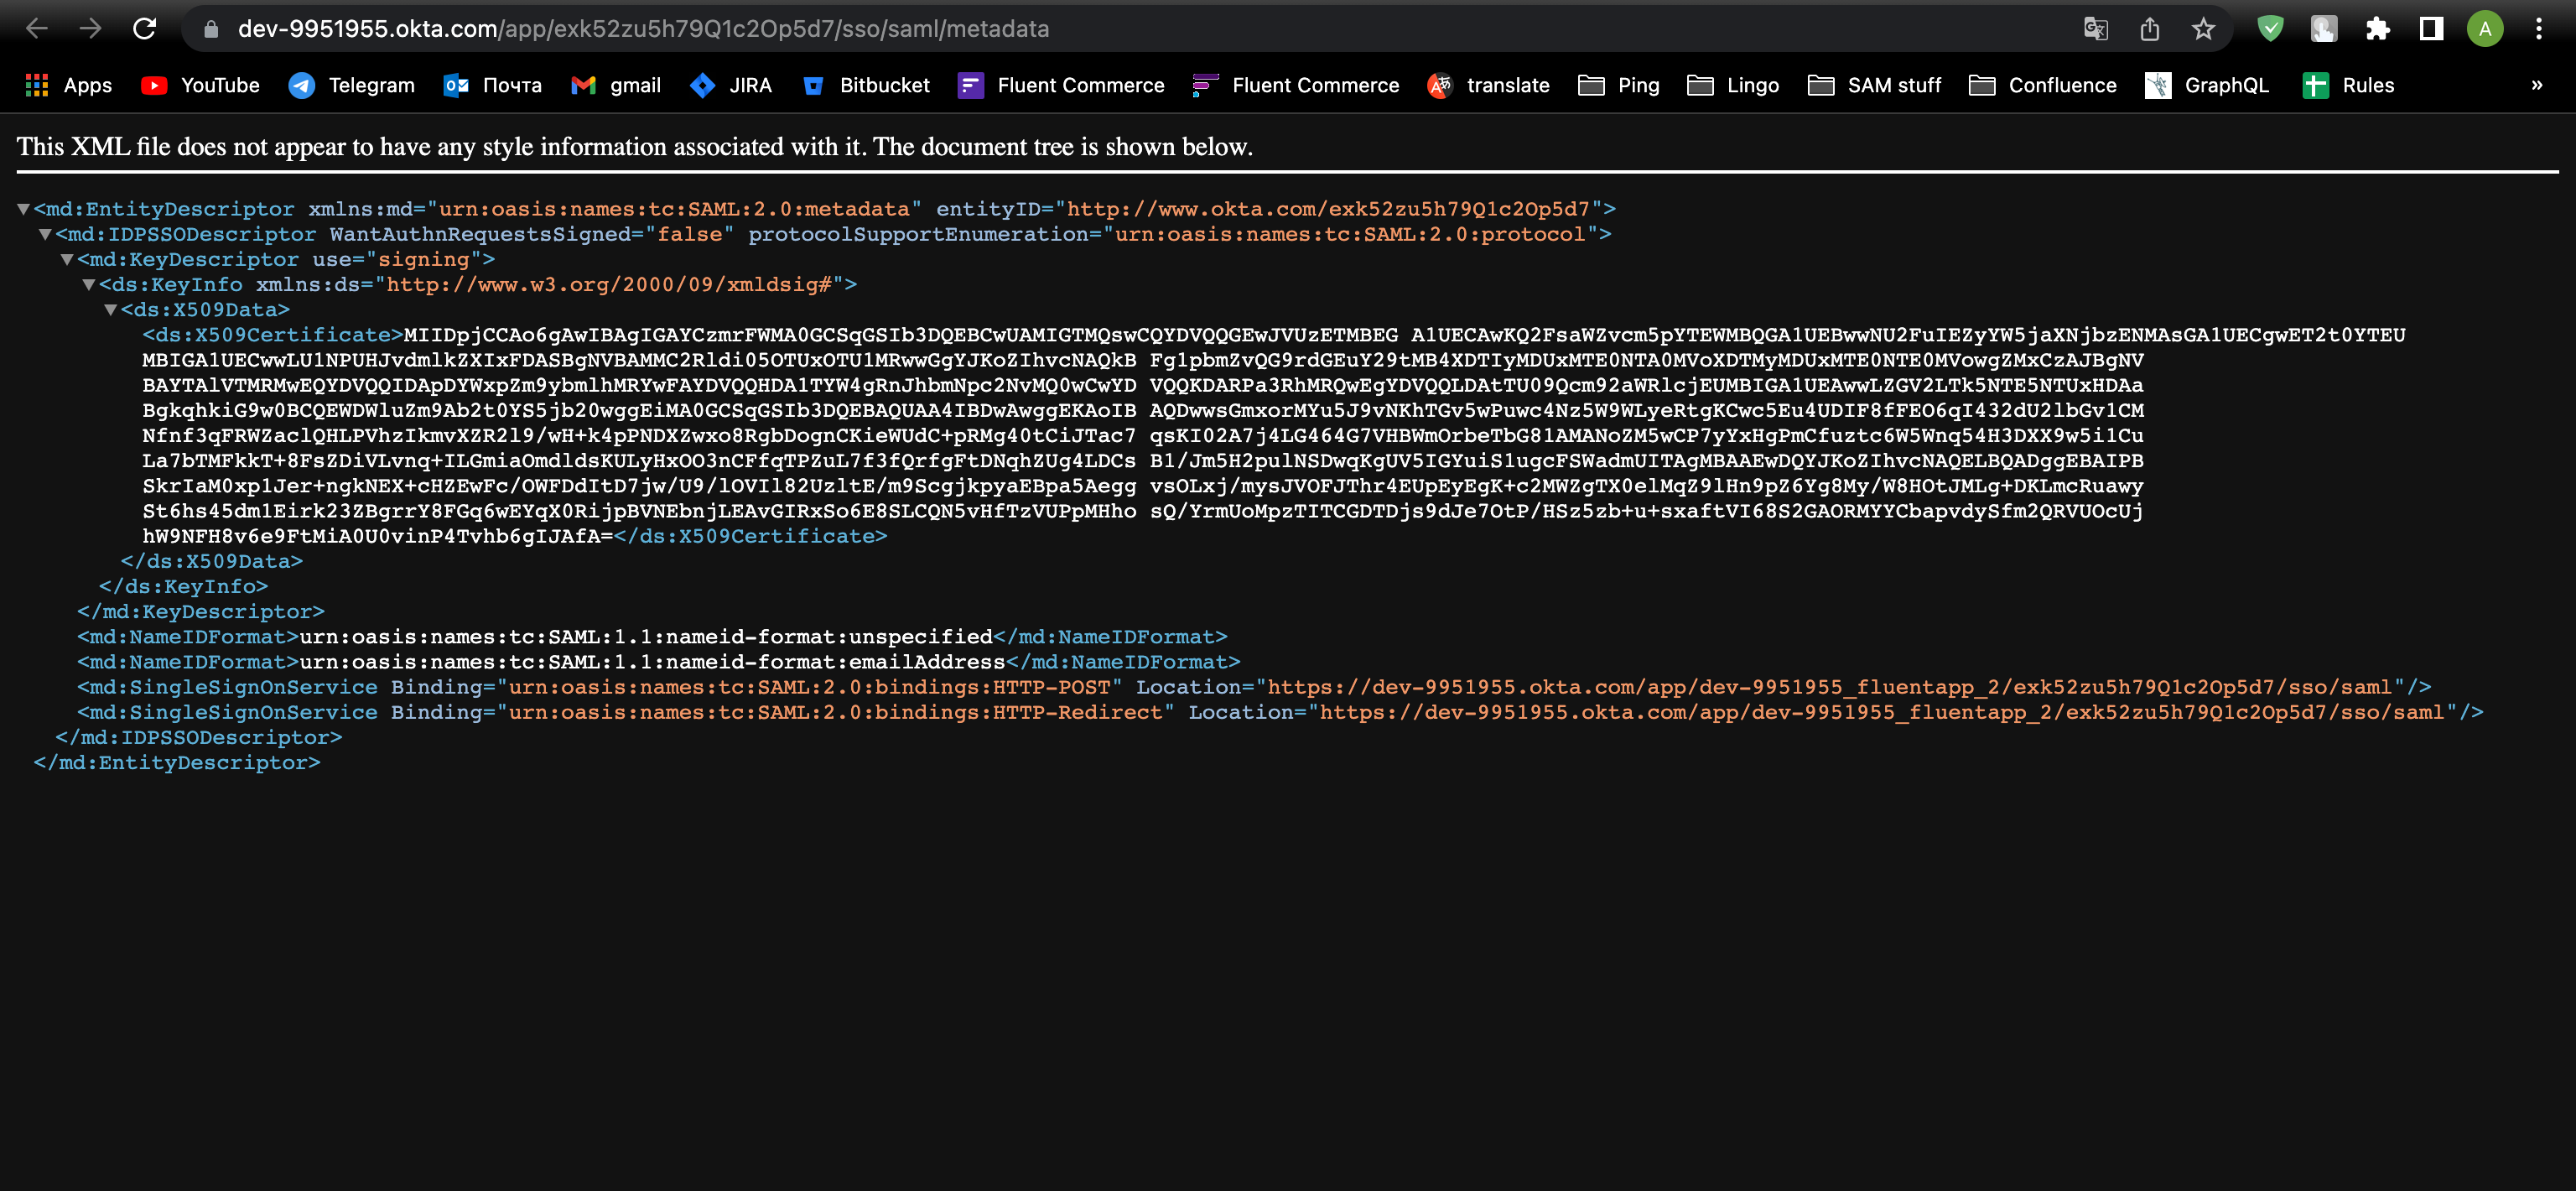
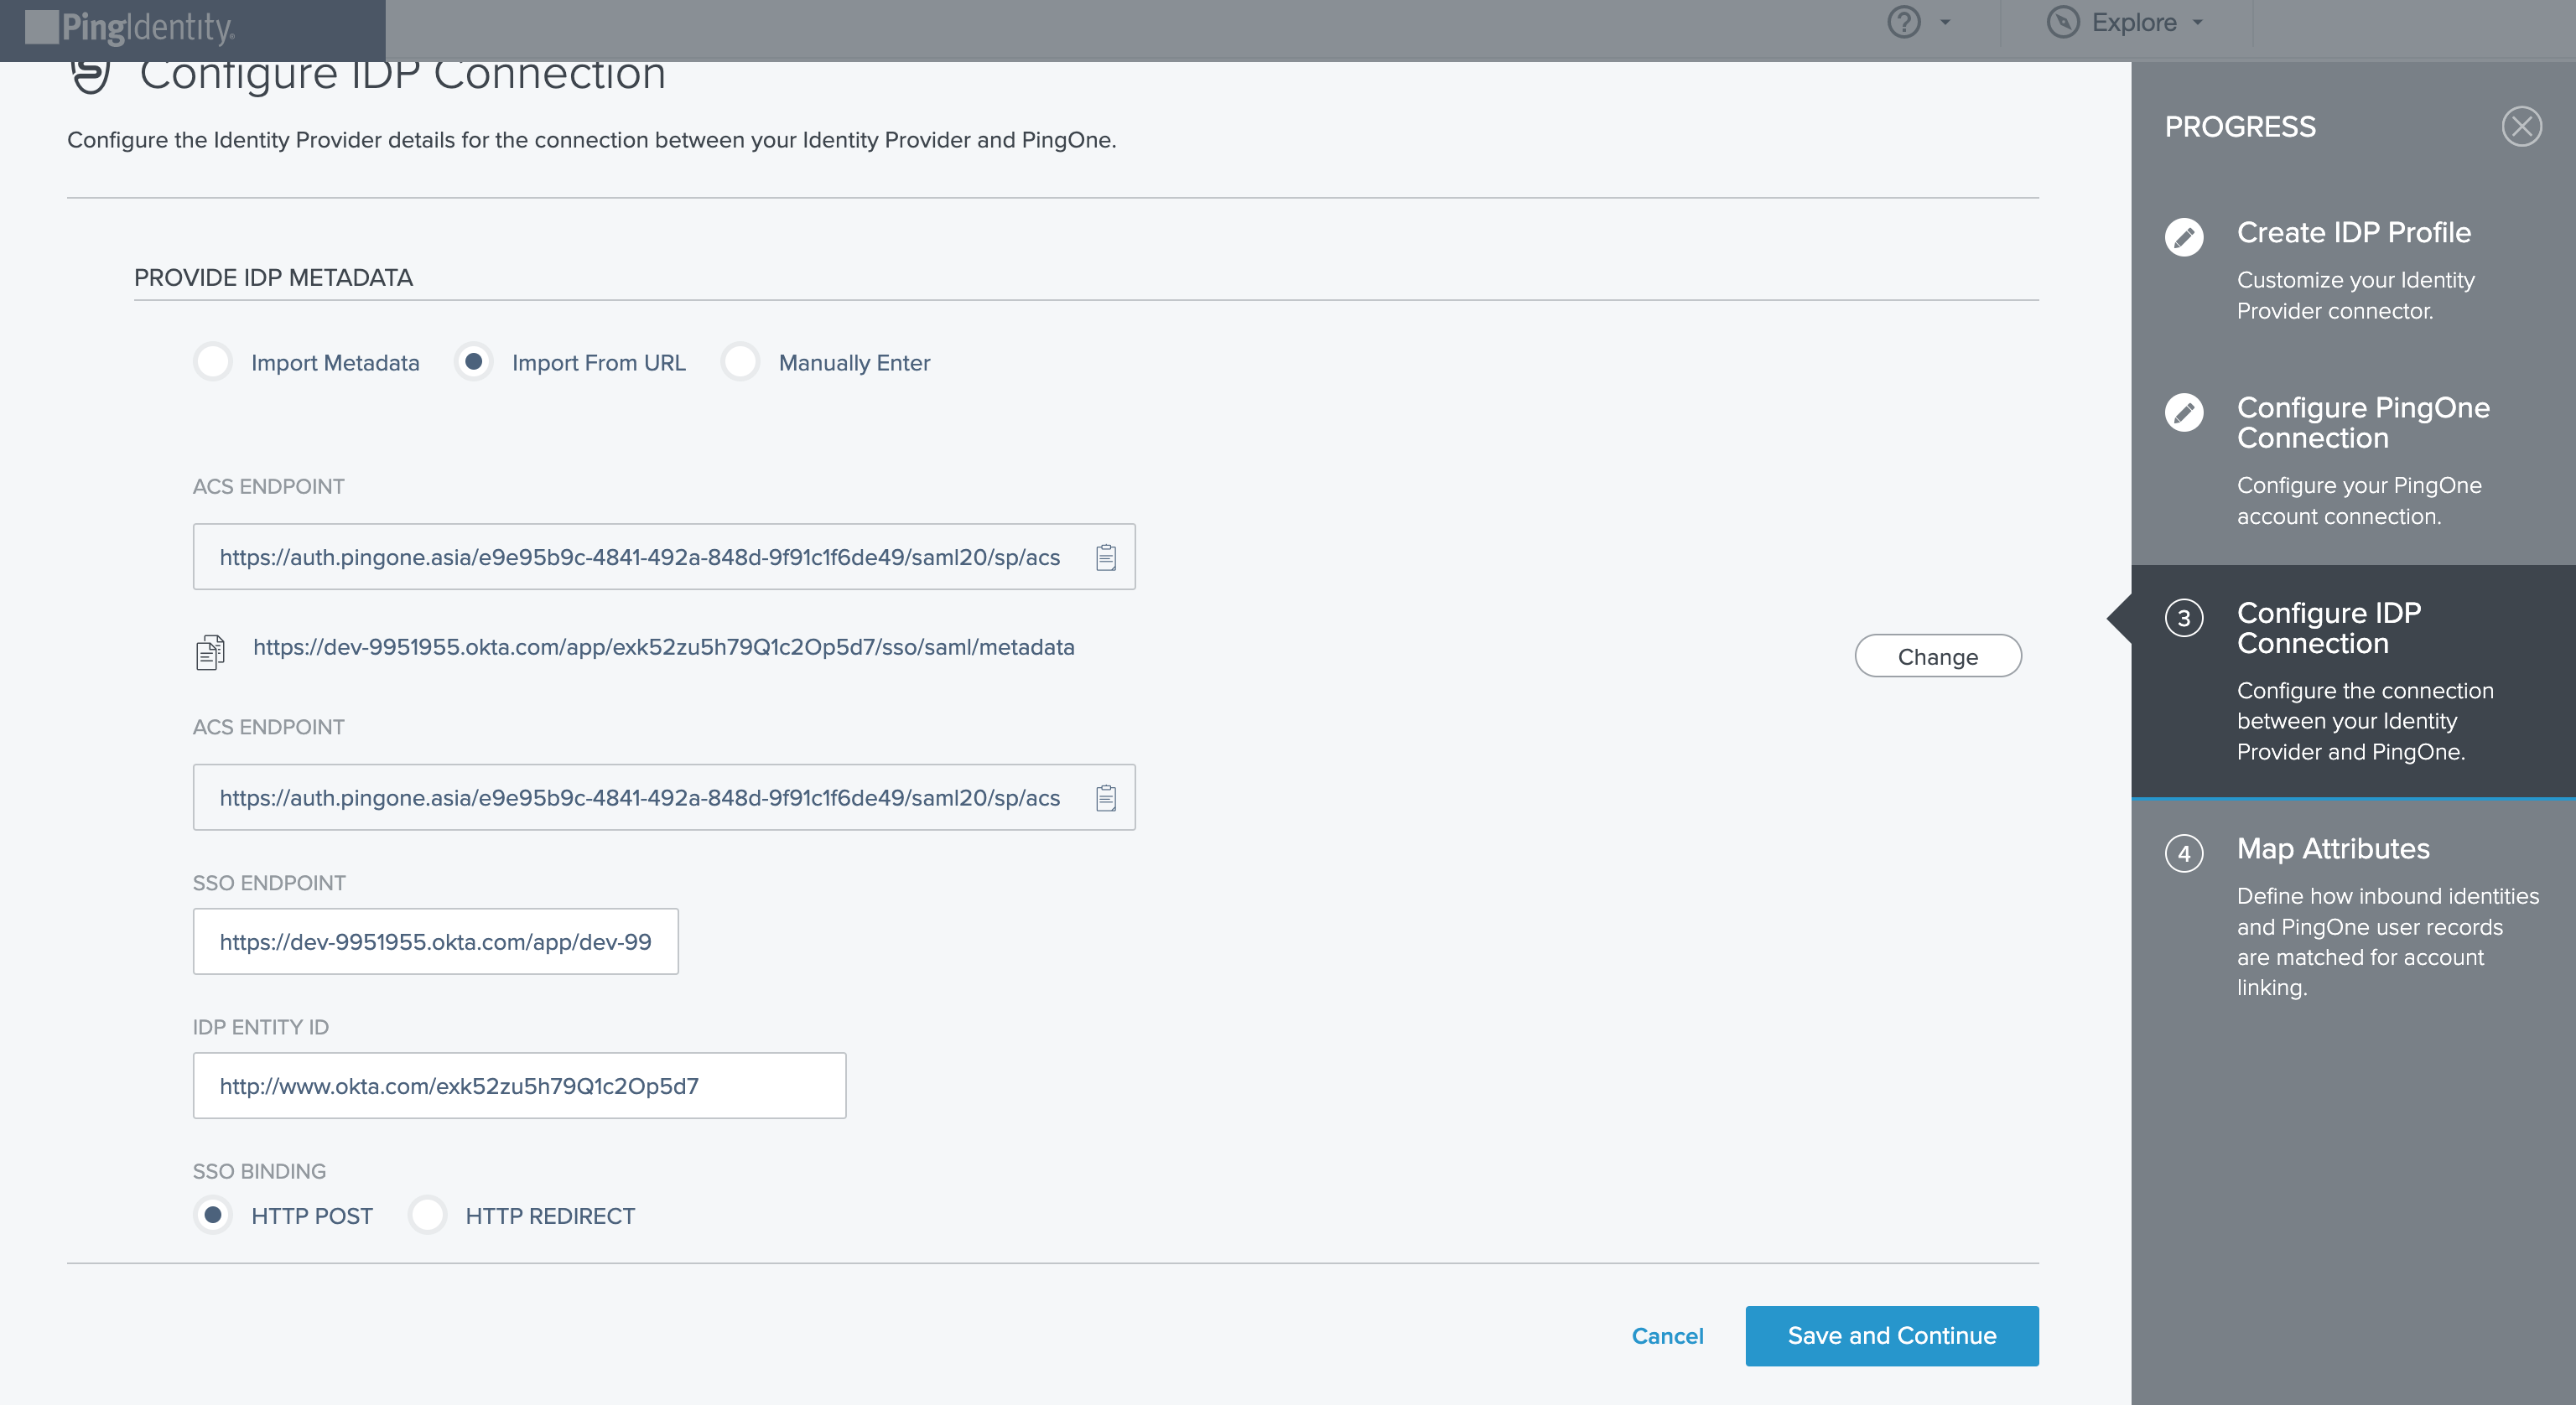
Manually enter. Select this option to enter the configuration details manually. Enter the following information:
- ACS endpoint. Shows the Assertion Consumer Service URL. The ACS endpoint is where the single sign-on (SSO) tokens are sent. Copy this value and enter it into the identify provider configuration.
- SSO endpoint. Specifies the SSO endpoint for the authentication request. Only authentication requests can be sent to the SSO endpoint.
- IDP entity ID. Specifies the identity provider’s entity ID.
- SSO binding. Specifies the binding to use for the authentication request. Select HTTP Post or HTTP Redirect.
IV. Continue IDP Configuration
follow these steps below:
Step 1.
Click Save and Continue.
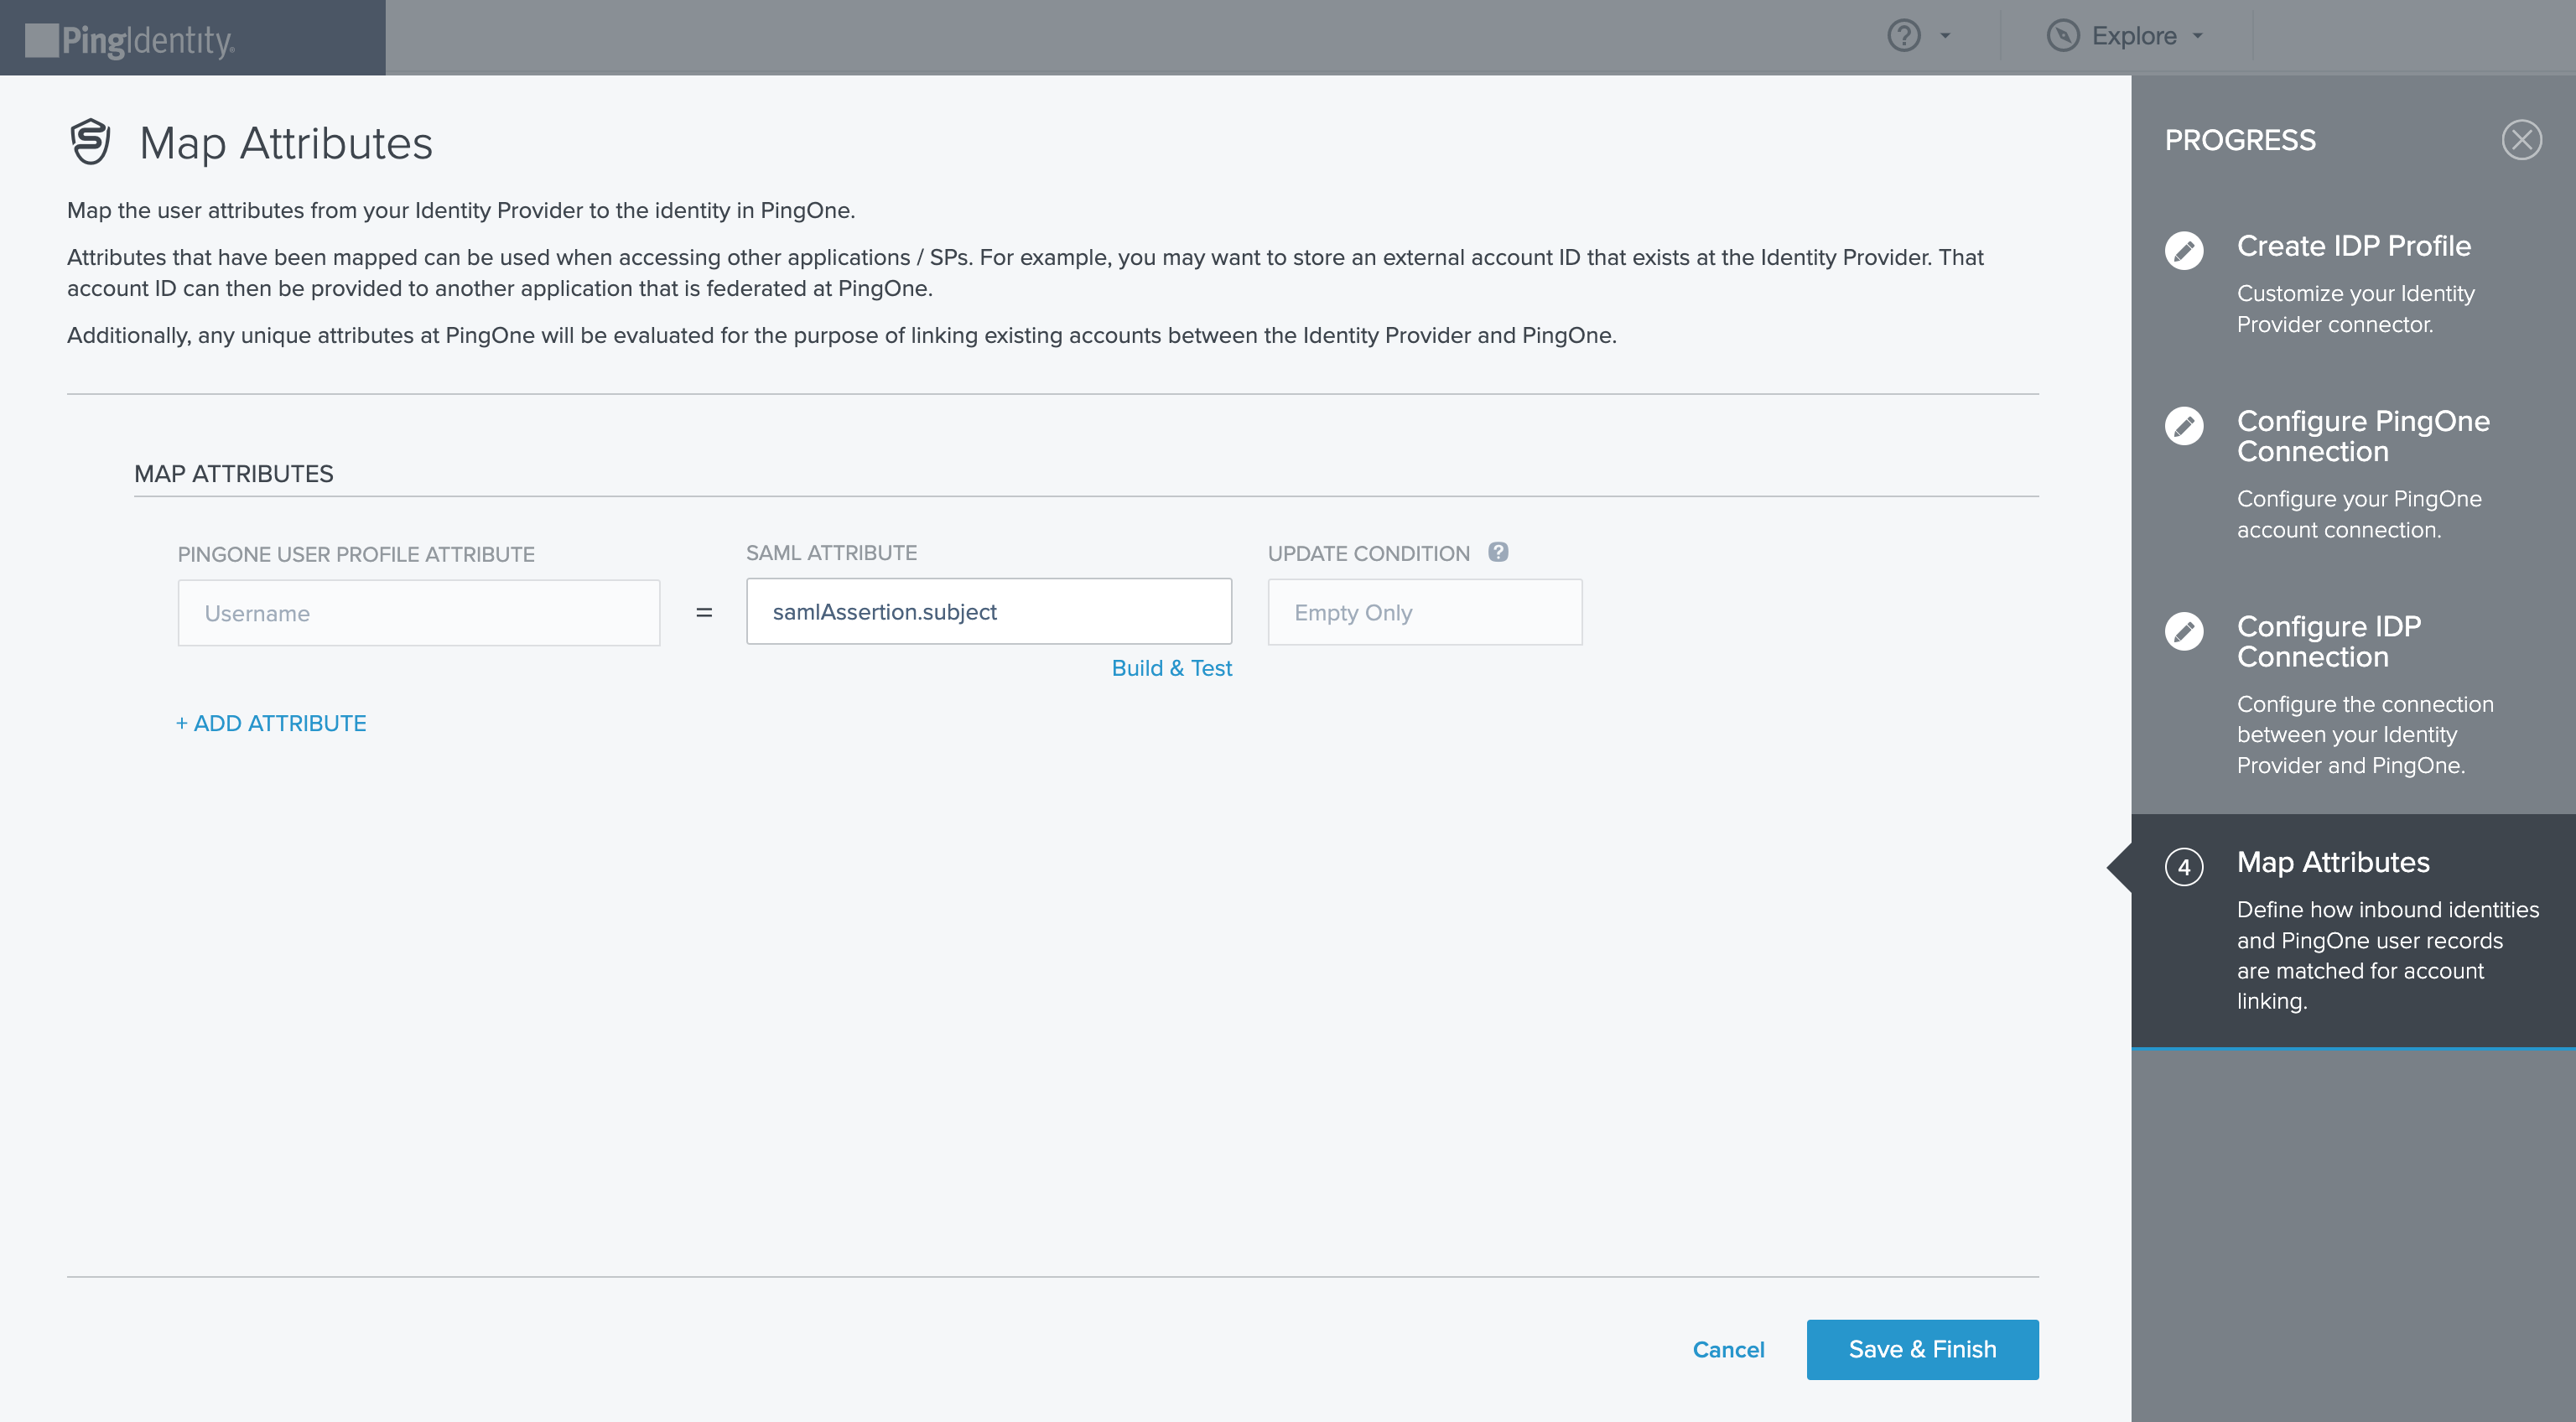
Step 3.
Click Save and Finish.
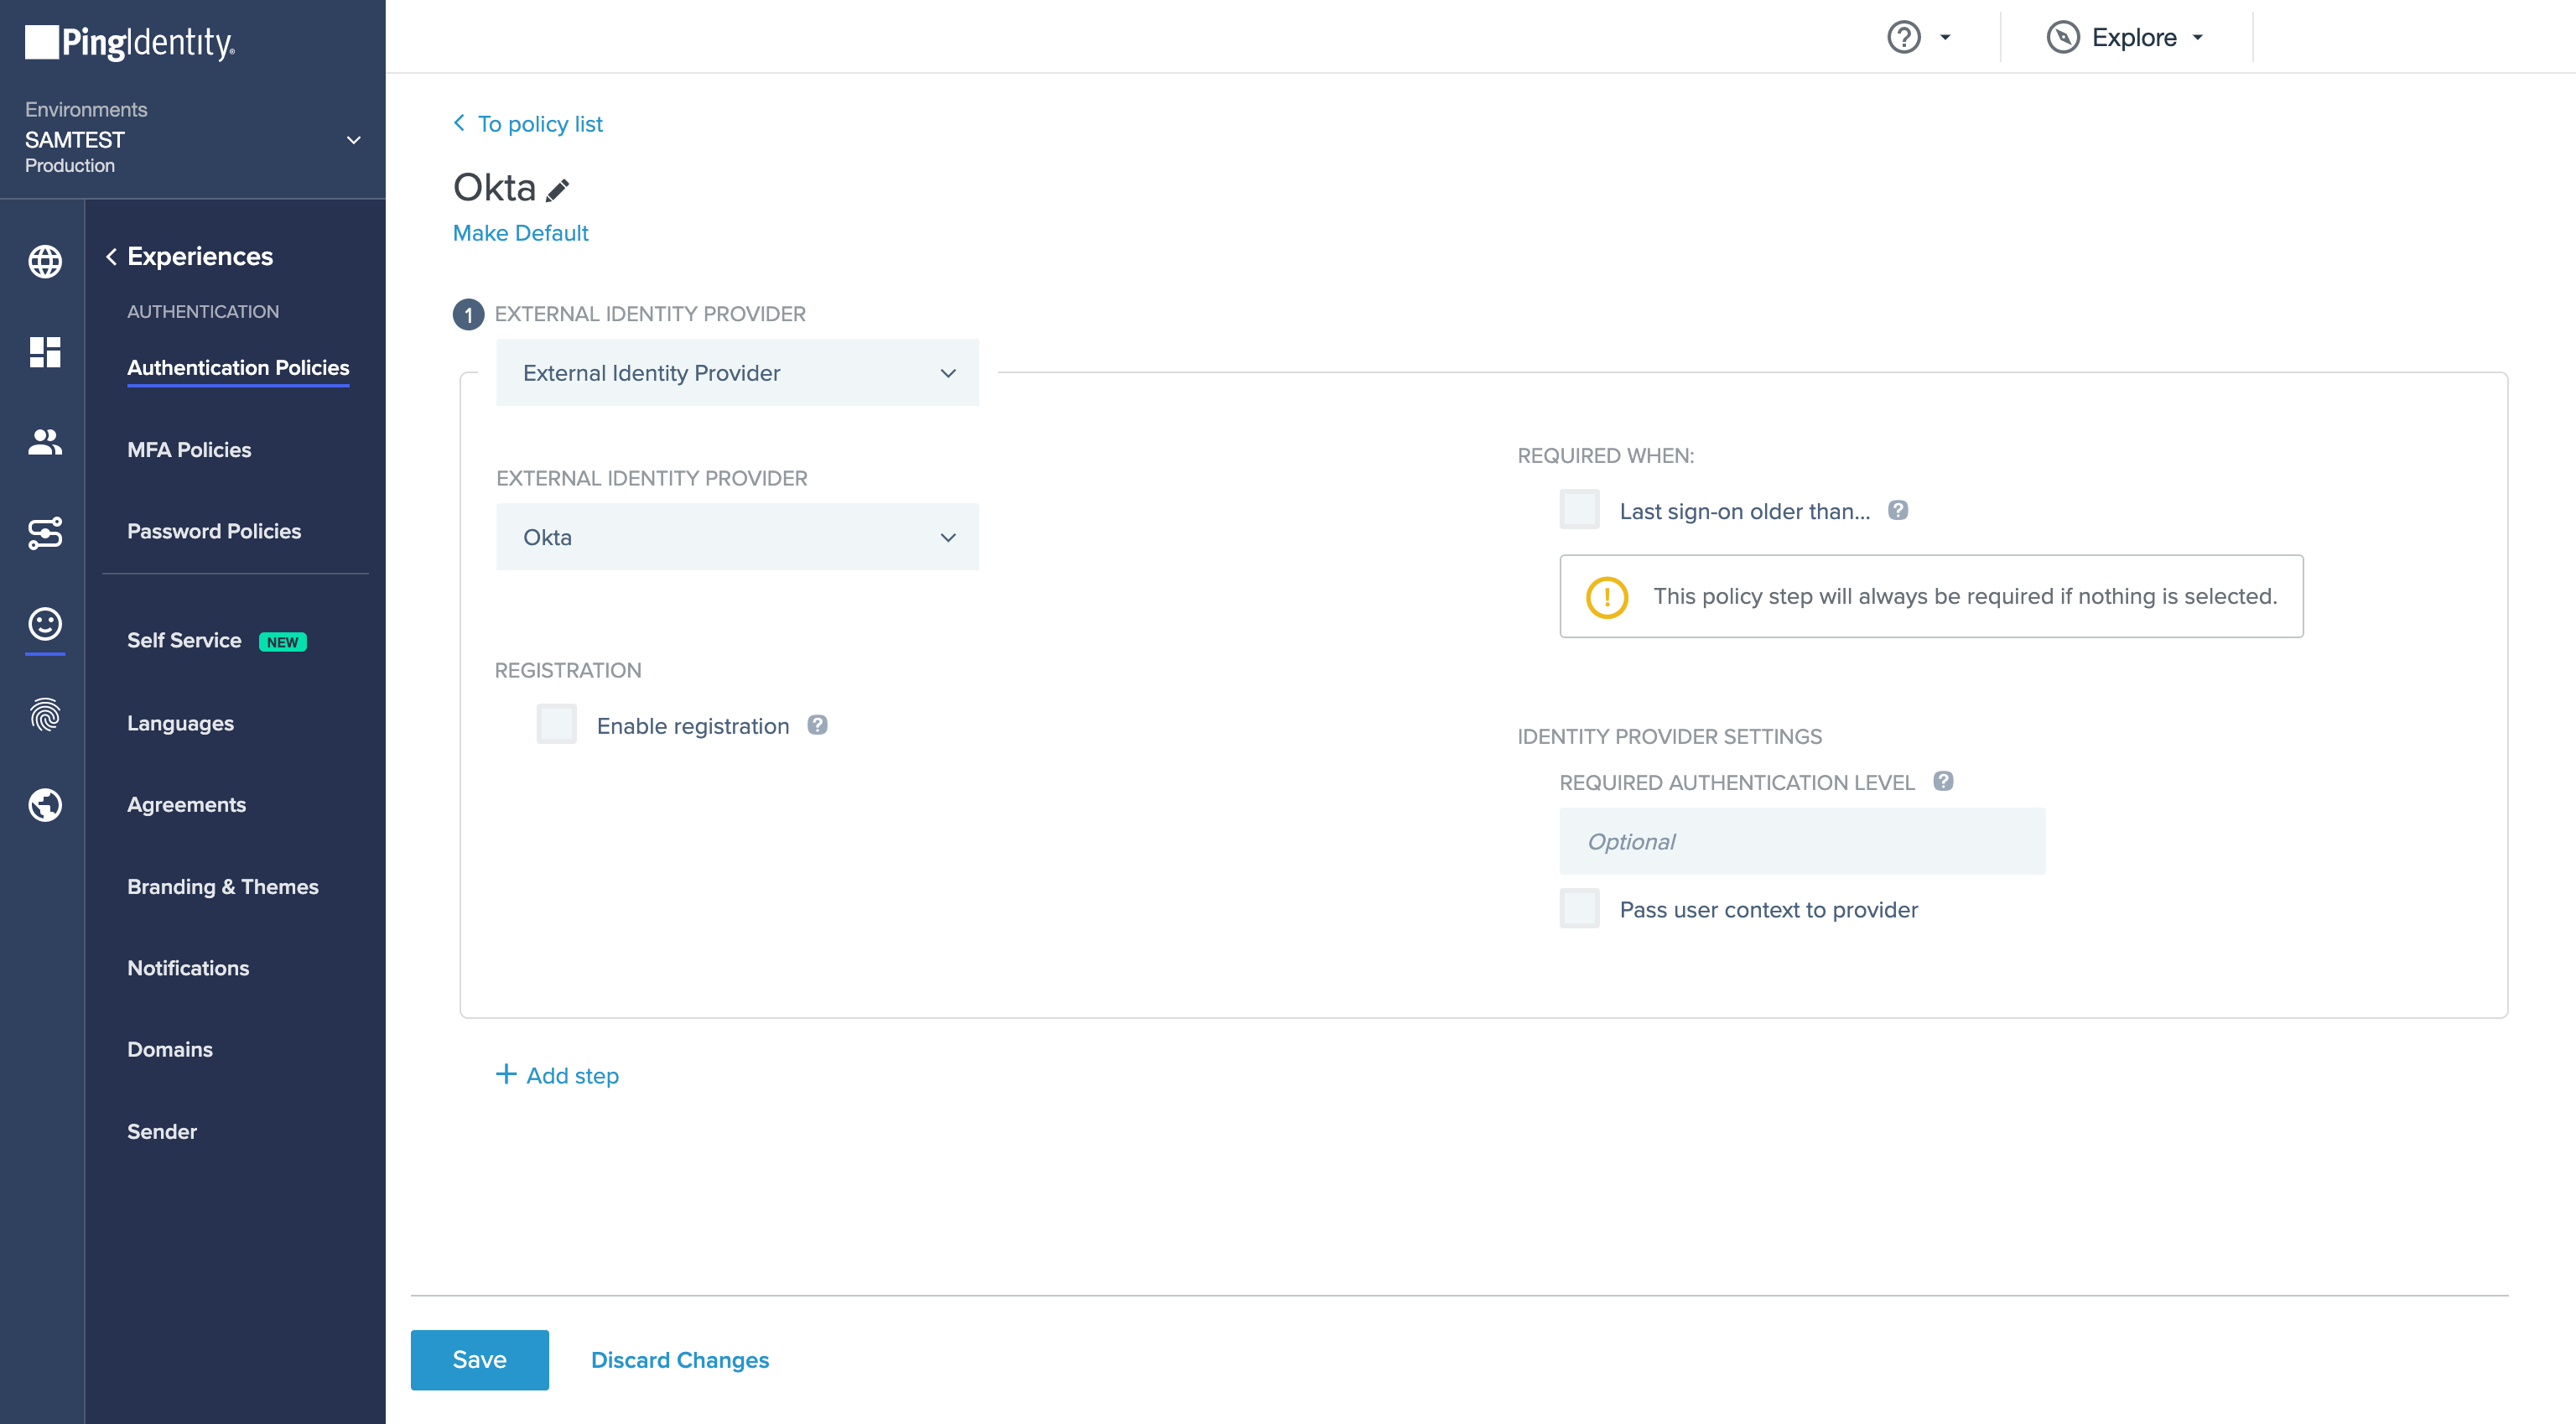
Do not forget
- Enable the External Identity Provider.
- Create a new Authentication Policy and add the newly created External Identity Provider to it.
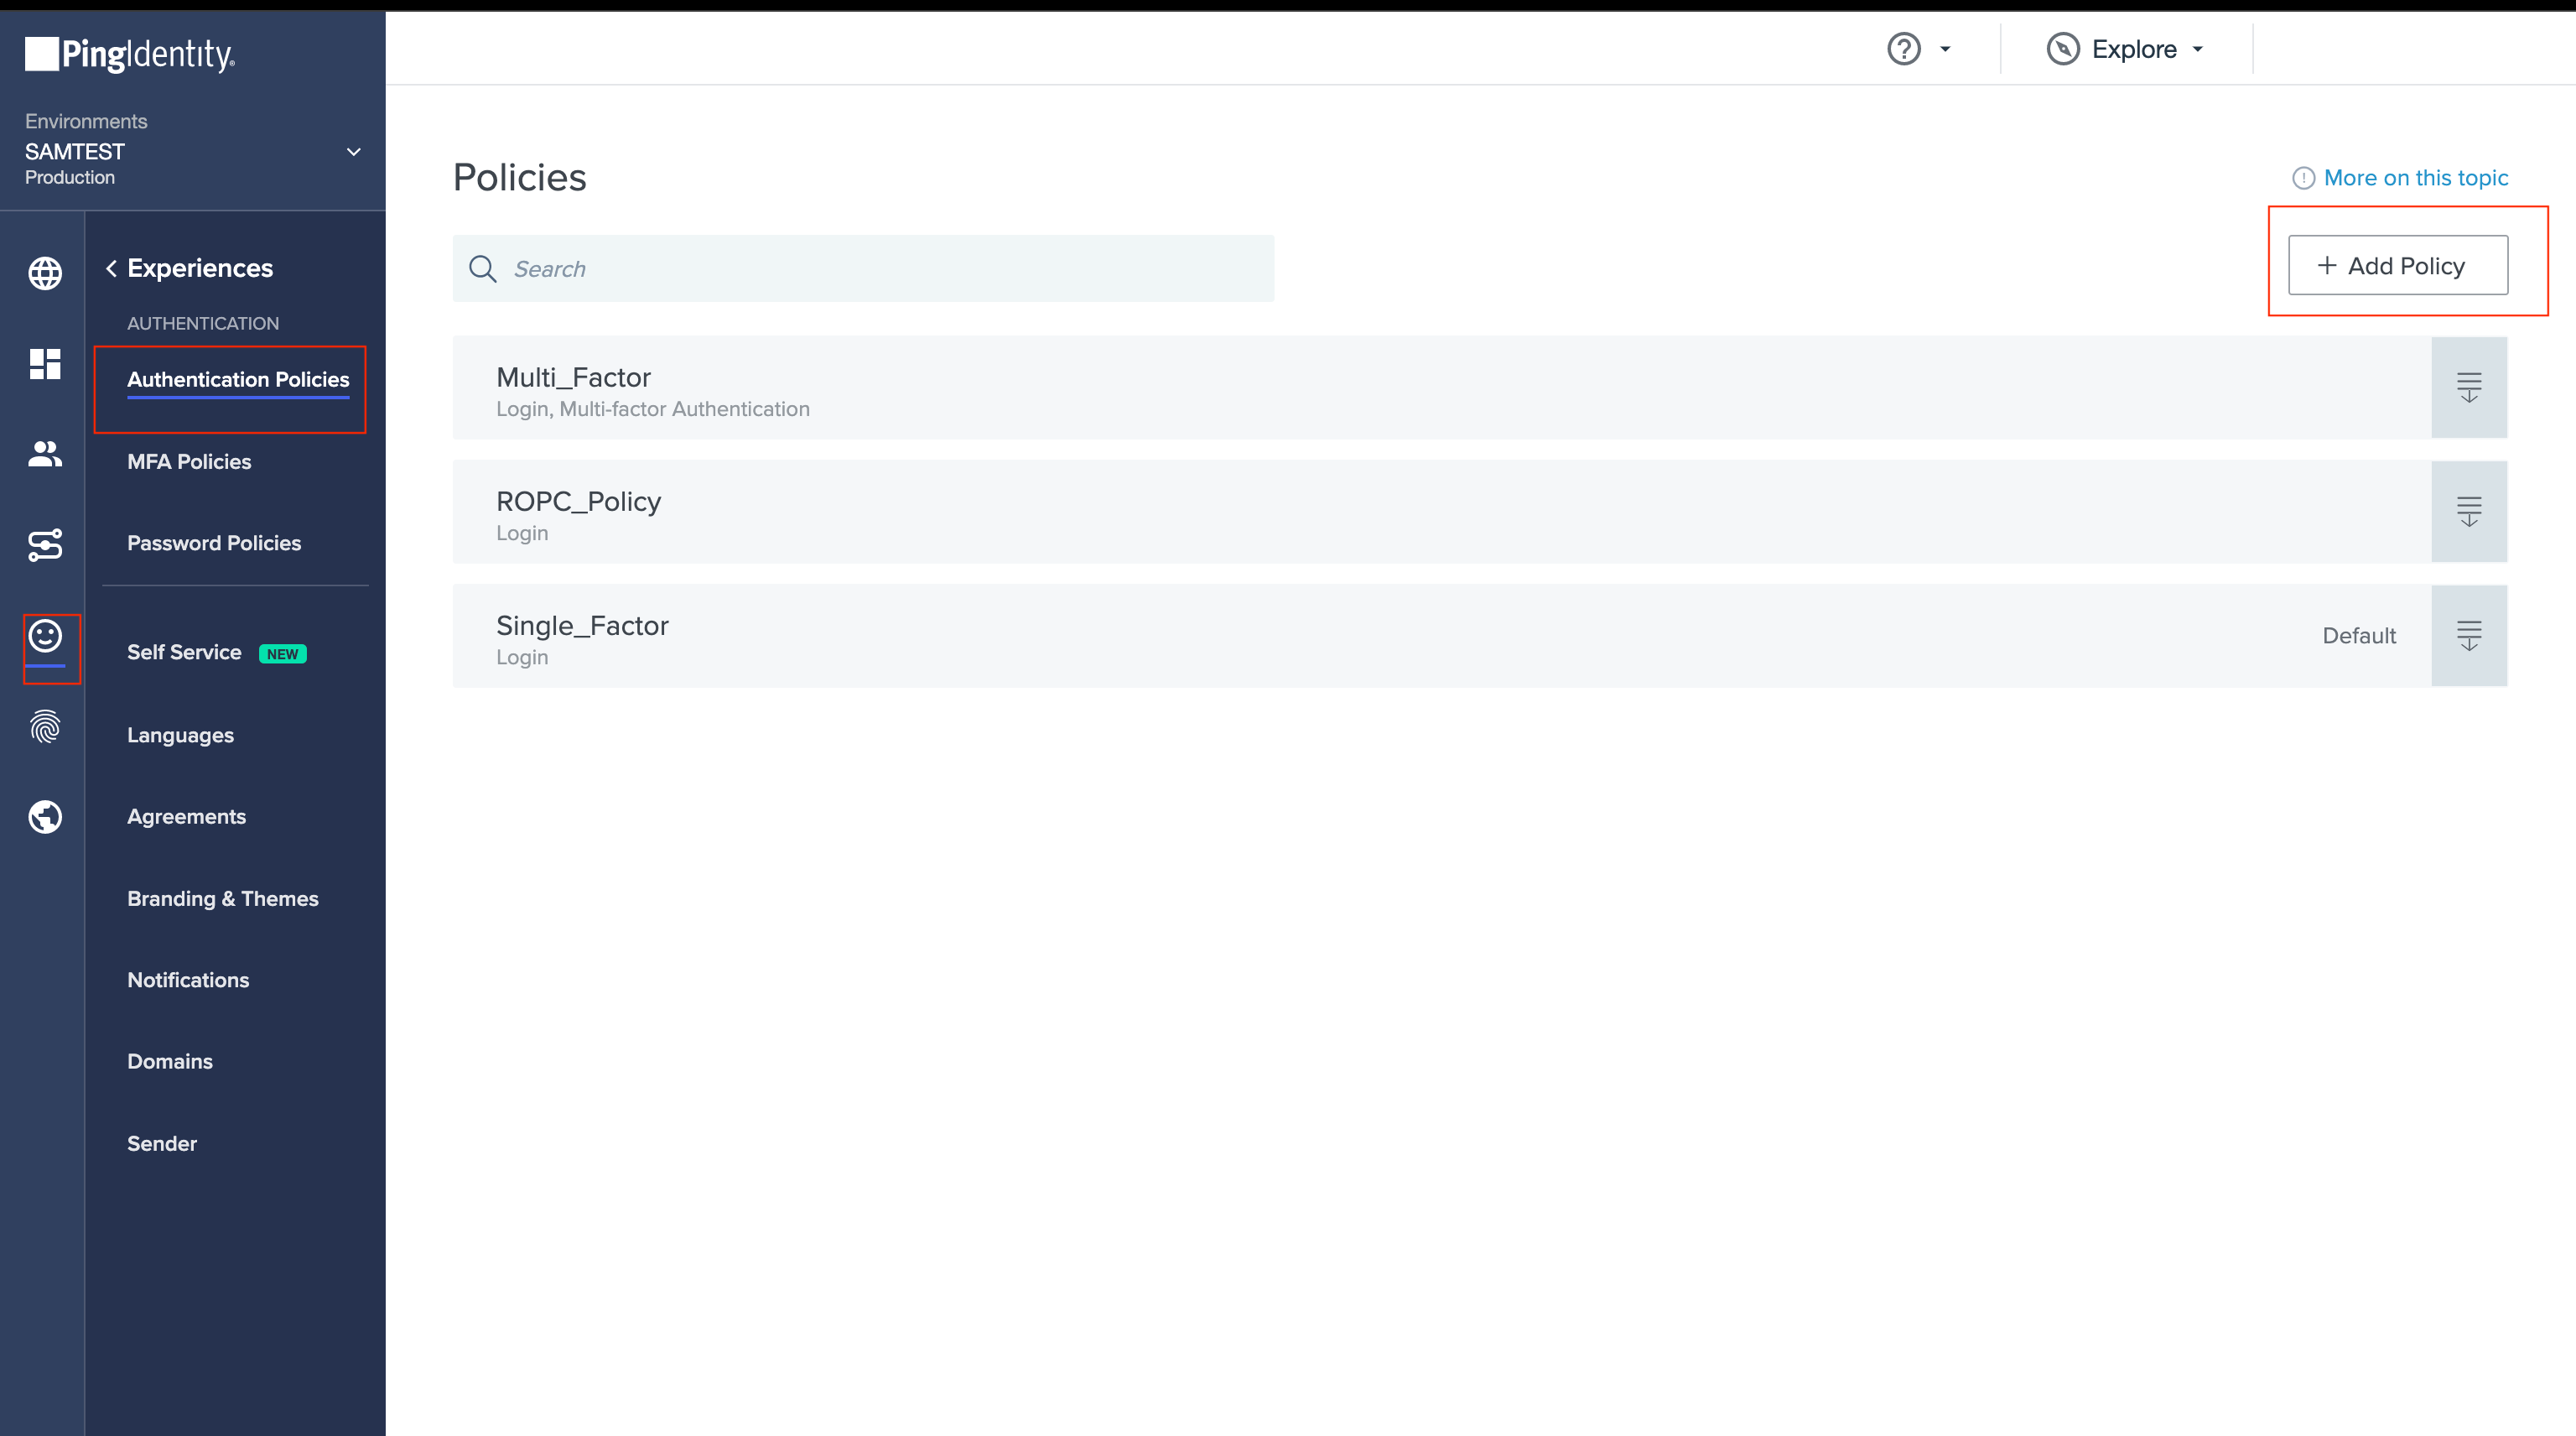

- Add the Authentication Policy to the application.
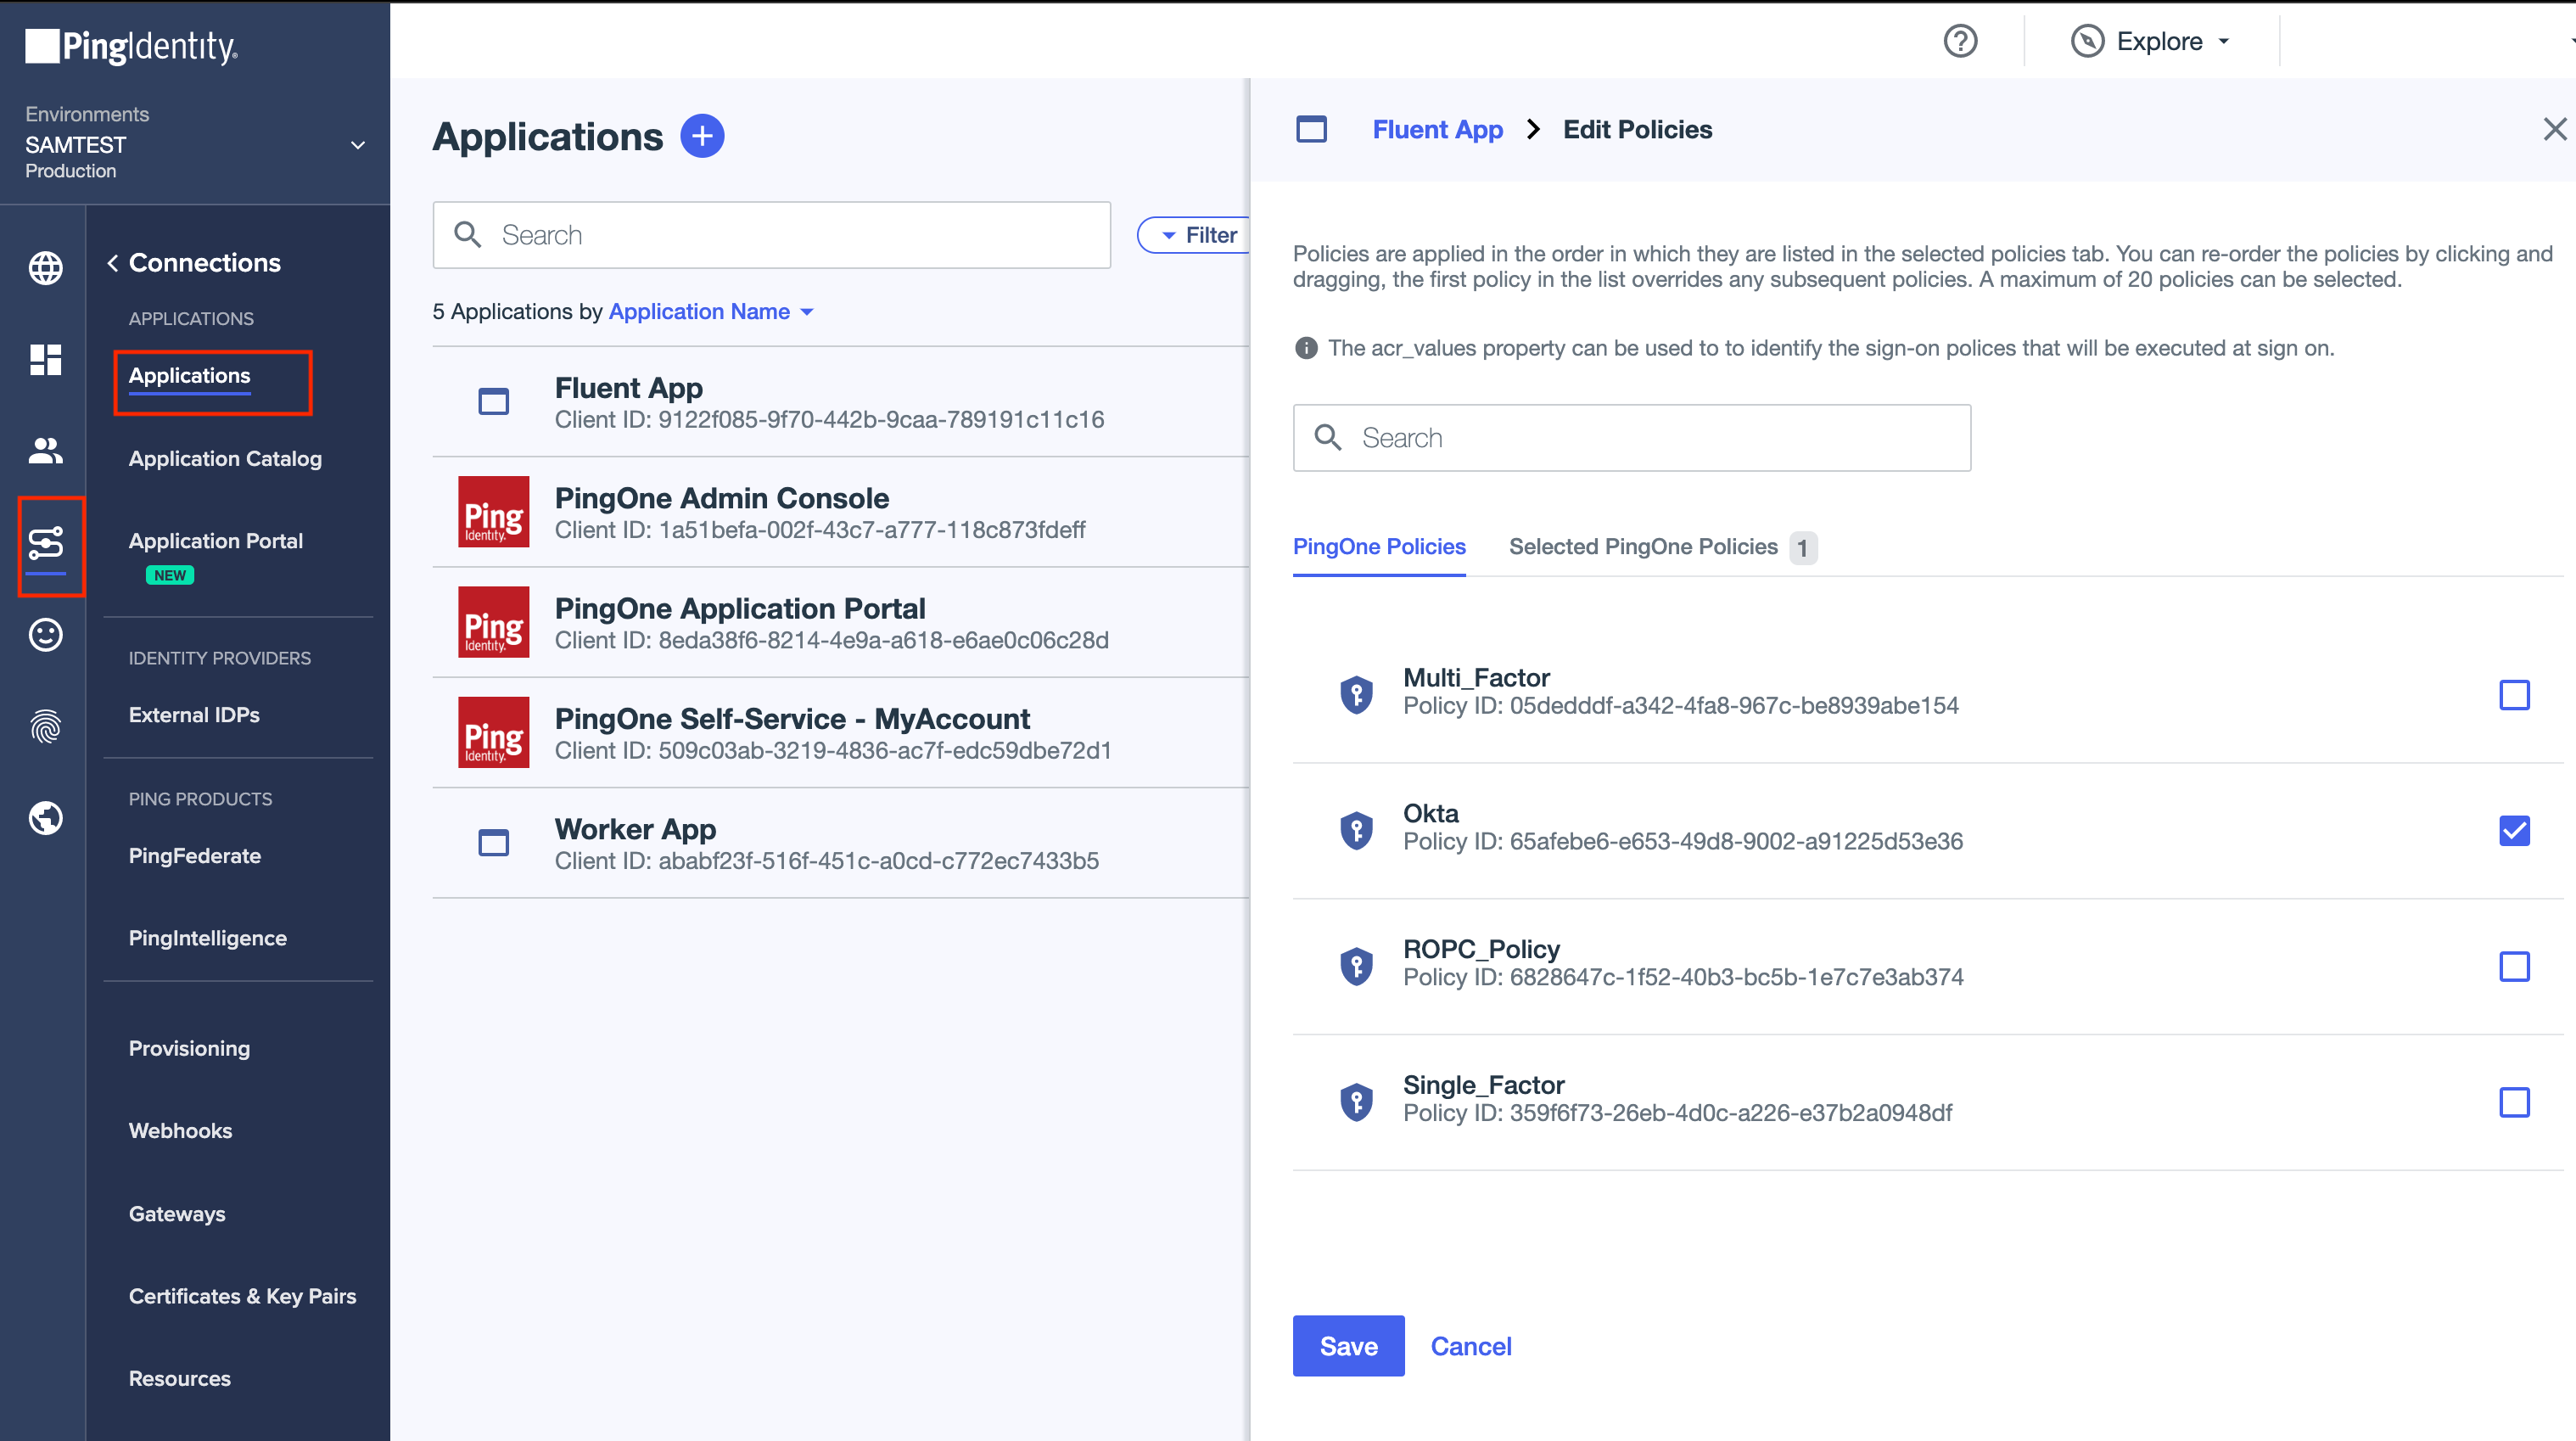
Once all configurations are done, you can log in to Fluent web app using the corporate user credentials. If the connection is configured correctly, the user will be redirected to the Okta login screen and after entering the correct credentials, the user will get access to Fluent Web App.